


Why does mold grow on toothbrushes? The answer usually begins with moisture, not poor hygiene. A brush rinsed after use can still hold water between its dense bristles. In a warm bathroom, those damp spaces may take hours to dry. Toothpaste residue, skin cells, and airborne dust can add more material to the surface. Even a careful routine cannot make a wet brush dry instantly. It happens.
The U.S. Environmental Protection Agency identifies moisture as a key condition for mold growth. Yet reliable data on how often mold grows directly on toothbrushes is limited, so a precise percentage would be misleading. One useful warning comes from storage research: NSF International’s 2011 Household Germ Study detected coliform bacteria on 27% of sampled toothbrush holders. That finding does not show that mold was present, or that toothbrushes caused illness. It does suggest that the holder and nearby surfaces deserve attention. The American Dental Association recommends storing toothbrushes upright and allowing them to air-dry. A closed travel cap or crowded cup may slow that process. Small choices matter.
A dark spot on bristles can be unsettling, but appearance alone cannot identify the substance. That uncertainty is worth admitting. This guide explores why toothbrush mold may appear, which bathroom conditions encourage it, and how practical storage habits can reduce lingering moisture. No routine is perfect; the goal is a brush that dries well between uses.
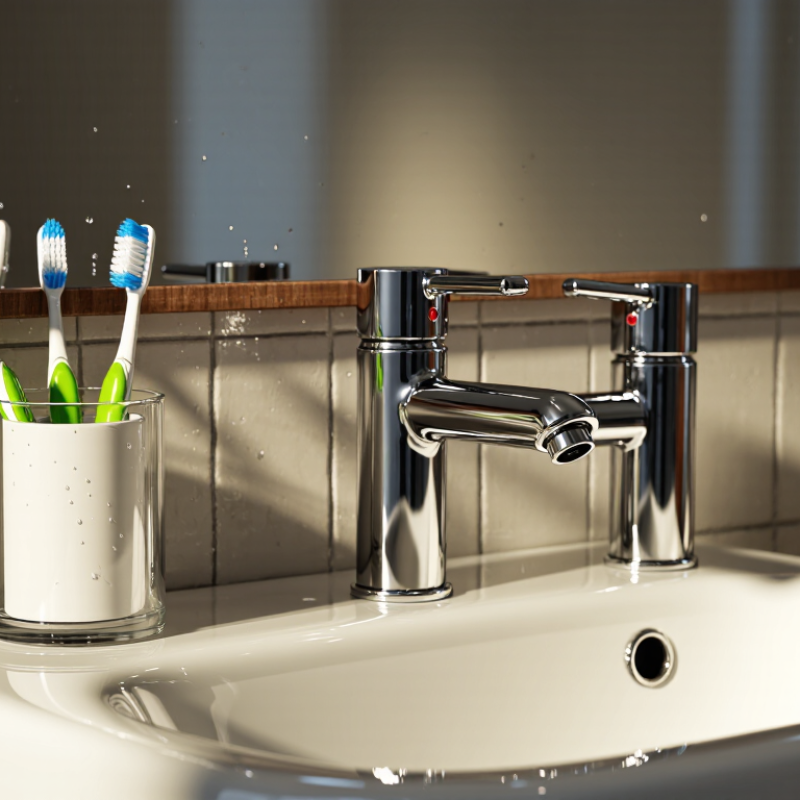
Mold grows on toothbrushes when moisture, organic residue, and time come together. After brushing, tiny traces of toothpaste, food particles, and saliva can remain between the bristles. A brush left damp in a warm, poorly ventilated bathroom may stay wet for hours. That creates favorable conditions for mold spores already present in the environment. It does not mean the brush is unusually dirty. Small details matter.
Time is part of the problem. A toothbrush kept upright with space around it can dry faster than one pressed against another brush or tucked into a closed case while wet. Rinsing helps remove residue, but it does not sterilize the bristles. Even careful routines are not perfect; a crowded holder can quietly trap moisture at the base. If you see mold, or notice a persistent musty smell, replace the toothbrush and clean the holder. Do not keep using a visibly moldy brush.
Tips: Rinse the brush thoroughly after use, shake off excess water, and store it upright in open air. Keep brushes from touching, and let travel cases dry between trips. Clean the holder regularly, especially around its damp bottom. If mold returns, improve airflow and check for standing water nearby.

Why Does Mold Grow on Toothbrushes?
Wet bristles and leftover toothpaste can create a favorable place for mold to grow. After brushing, tiny amounts of saliva, food debris, and paste may remain between the bristles. In a warm, humid bathroom, that moisture can linger for hours, especially when a brush is stored in a closed cabinet or crowded holder. Mold needs moisture and organic material; residue can supply both. Small dark or fuzzy spots may be easy to miss.
A brush that looks clean is not necessarily dry. It is easy to assume a quick rinse removes everything, but bristle bases and holder crevices can stay damp. That detail matters. Rinse the brush thoroughly, shake off excess water, and let it air-dry upright with space around it. If visible mold appears, replacing the brush is a sensible choice. Wash the holder regularly, too, since pooled water and old paste can collect at its bottom.
Tips: Keep brushes apart, avoid sealed covers between uses, and improve bathroom airflow when possible. Check the bristles and holder during routine cleaning. A little less clutter can help them dry.
| Factor | How It Can Support Mold Growth | What You May Notice | Practical Prevention |
|---|---|---|---|
| Wet bristles | Mold needs moisture to grow. Bristles that stay damp for long periods create a more favorable environment than bristles that dry between uses. | The brush remains wet well after brushing, especially in a humid or poorly ventilated bathroom. | Shake off excess water and store the brush upright in an open holder so air can circulate around the bristles. |
| Toothpaste and other residue | Residue can collect between bristles and hold moisture. It may also trap small amounts of debris; toothpaste residue alone does not mean mold will grow. | A visible film or clump remains near the bristle base or on the brush head. | Rinse the brush head thoroughly under running water after every use, then let it air-dry. |
| Enclosed or crowded storage | A closed container or tightly packed holder can slow drying and limit airflow around toothbrushes. | The brush is stored in a travel cap or cabinet while still damp, or its bristles touch other brushes. | Use a cover for transport, but allow the brush to dry before placing it in a closed case. Store brushes separately when possible. |
| Warm, humid surroundings | Warmth and high humidity can help mold persist and make damp bristles dry more slowly. Mold spores are commonly present in indoor air. | The bathroom often stays steamy, or the holder sits beside a consistently damp area. | Improve bathroom ventilation and keep the toothbrush away from persistently wet surfaces. |
| Dirty toothbrush holder | Water and residue can collect at the bottom of a holder, leaving the brush handle or lower bristles in a damp, dirty environment. | Standing water, residue, or visible buildup appears inside the holder. | Clean and dry the holder regularly, and choose one that does not allow water to pool around the brush. |
| Visible suspicious growth | Discoloration or fuzzy growth may indicate mold or another type of buildup; appearance alone cannot reliably identify what it is. | Spots, unusual discoloration, or fuzzy material appears on the bristles or handle. | Replace a toothbrush with visible growth or persistent buildup. Do not share toothbrushes, and follow routine replacement guidance—generally every 3–4 months, or sooner if bristles are frayed. |
Key point: Moisture is an important part of the problem, while residue and poor airflow can make drying harder. A damp toothbrush does not automatically have mold, and visible growth cannot be identified with certainty just by looking at it.
Why Does Mold Grow on Toothbrushes?
Why Humid Bathrooms and Closed Covers Slow Toothbrush Drying
A toothbrush can stay damp long after brushing, especially in a steamy bathroom with little airflow. Mold spores are common indoors; persistent moisture gives them a place to grow. A closed cover can hold humid air around wet bristles, slowing evaporation. The handle may look dry while the bristle base remains wet. Not every damp brush will develop visible mold, but repeated slow drying raises the risk.
The U.S. Environmental Protection Agency recommends keeping indoor relative humidity below 60%, ideally between 30% and 50%, to help limit mold growth. That guidance applies to indoor spaces, not specifically to toothbrushes, so it is not a precise brush-drying threshold. Still, it explains why a bathroom that stays humid after showers can be a poor drying spot. The American Dental Association advises storing toothbrushes upright and letting them air-dry; routinely covering a wet brush may work against that advice. Small detail, real difference.
Tips: Rinse away toothpaste, shake off excess water, and store the brush upright where air can circulate. Leave the cover off until the bristles are fully dry, if you use one for travel. Ventilate the bathroom after showers, and replace a brush with persistent visible mold. A humidity meter can help, though readings vary by location. I would not assume one quick wipe fixes a brush that stays damp every day.
Mold can grow when moisture lingers on toothbrush bristles or the handle, especially in a humid bathroom. A brush left flat beside a sink may stay damp longer, while bristles pressed against another brush can trap moisture. Visible fuzzy growth is a reason to discard the brush. A musty smell or damaged bristles also deserve attention. Still, not every dark mark is mold; appearance alone cannot identify every contaminant.
The American Dental Association (ADA) advises storing toothbrushes upright and allowing them to air-dry between uses. It also recommends replacing a toothbrush every 3–4 months, or sooner if its bristles become frayed. These practical intervals are guidance, not a guarantee that a brush stays clean until replacement day. I can see how easy it is to miss a damp brush tucked behind a cup. Give it space, and keep its head from touching other brushes.
Tips: Rinse off toothpaste, shake away excess water, and stand the brush upright in an open holder. Avoid routinely sealing a wet brush in a travel case. Replace it sooner after visible mold or substantial bristle wear.
Toothbrushes can stay damp between uses. Store yours upright and let it air-dry, and replace it every 3–4 months—or sooner if the bristles are frayed.
The highlighted range shows the recommended replacement interval. Air-drying helps the brush dry between uses.
Bathroom air often stays damp after a hot shower, and a wet brush can hold moisture between its bristles. A toothbrush stored in a closed cabinet may dry even more slowly. Mold needs moisture to grow, so persistent dampness can make the brush and its surroundings more welcoming. Still, humidity alone does not prove that a toothbrush has mold; visible spots, odor, and storage conditions matter too.
The U.S. EPA’s A Brief Guide to Mold, Moisture and Your Home sets a clear indoor relative-humidity benchmark: below 60%. The guide says 30%–50% is preferable. A small hygrometer can show whether bathroom humidity stays high, especially after showers. Vent the room and let the brush air-dry upright, away from wet surfaces. Small changes help. It is easy to focus only on the toothbrush, but the room’s moisture may be the harder problem. Check readings at different times; one quick measurement can miss the daily damp spell.


For those larger-sized parts, or smaller quantity runs, we have 2 independent powder coat booths and ovens. The quality, durability and affordability of today’s powder coating finishes make this the process of choice for world-class companies.
Powder coating advantages over other forms of coating are many. Materials used in the Powder coating process can be metals and non-metals that come in a multitude of thicknesses, textures, colors, etc. Another of Powder coating’s biggest advantages over conventional coatings is its ability to create finishes in many different textures. Powder Coating Booths allow us the ability to apply these advantages to large products.
Tri-State Fabricators runs a full-service conveyor line for painting. Wet painting can provide protection or decoration to many different part styles. From start to finish, every project is easier to undergo random and point-based inspection by our skilled painting team.
Advantages to our Wet Paint Line are these lines start with product prep and ends with a thorough inspection of a high quality finished product. Our ability to complete large and small projects with a superior finish and doing so in a timely and economical fashion. This passes along the savings in production to our customers. When powder coating ins not an option, our Wet Paint Line gets the job done right the first time.
When the parts get big and heavy we roll-out our custom paint racks and oversize booth. By utilizing our partnerships with all the major paint brands, we can match virtually any color with wet paint.
The advantages of having access to a Wet Paint Booth are many. Large projects of many different shapes can be loaded into the booth. The Wet Paint Booth offers an environment that is much more controlled than a typical parts painting operation.
Not only are they used because of their controlled environment, but they’re are also advantageous when it comes to applying paint to parts that are needed in industries that require specialty coatings such as medical, aerospace, etc.
Our military forces have some very high standards when it comes to the finish of their vehicles and equipment. From the first pre-treatment step to final coat, it takes a great deal of knowledge and experience to protect the men and women of our armed forces. They deserve only the best, and Tri-State Fabricators provides it.
All of our processes are closely monitored by our staff and management teams. Both of which are highly trained in the processes of metal fabrication and finishing. Tri-State Fabricators’ goal is to always fully satisfy each and every customer, including the military. We will always put a 110% into what we do.
Abrasive media blasting is an excellent way to remove old paint, rust, and increase the paint/powder adhesion. Glass beads produce a much smoother and brighter finish than angular abrasives; leaving the part clean yet without any dimensional change. Chemically inert and environmentally friendly, we can recycle our beads approximately 30 times; making them a more preferred method of metal cleaning or surface finishing.
Advantages to Glass Bead Blasting are many. Glass bead blast media is used when a project is needing rough surfaces need to become smooth for applications of coatings such as paint. It is typically used to clean paint and rust from a product surface without deforming the surface it is being used on. Overall, compared to many other blasting media, Glass Bead Blasting is a very economical choice and those savings are always passed on to our customers.
Tri-State Fabricators utilize a zinc phosphate wash to clean and etch the material to ensure the best paint adhesion possible. The unique design of our 3-stage wash system does the work like a 5-stage. From Cleaning and rinsing to conversion coating and post-treatment, Our Part Washing process is a complete service and works throughout the fabrication service and the finishing service.
Along with the previously mentioned benefits, Curing is a vital chemical reaction that leaves the product finish hard and relatively safe from mild abrasion and aggressive corrosion. This process can be done in more than one way; ambient air-dry or in curing ovens at temps that exceed 240°.
From fixing paint mistakes (someone else’s of course) to simply cleaning our paint line hooks, our burn-off oven is put to good use. After a quick burn-off, a little clean up, and a fresh coat of paint, your parts will look better than new.
Why does our Burn-Off Oven work so well? Because super heating the air around parts turns the materials into ashes. From paint and powder coatings to rubber and machining oils, high temps do the job without degrading the integrity of the part.
Masking is a vital part of producing high quality products. We have die-cut masking patterns to protect machined surfaces as well as a wide range of plugs and caps to protect threaded holes and bolts. We provide permanent and temporary masking.
Masking allows the selected sections of a product to be protected from a fabrication or finishing service. This can be with both chemicals when etching and tapes, paints when only finishing just a section of the product. Masking is great in aiding the customization process of a project.
Screen printing is a photographic process that transfers artwork onto a porous nylon screen which allows colored ink to flow through the screen and be deposited on an aluminum or plastic component. We can generally have just about any design created onto a screen for your parts.
Some of the advantages of Screen Printing are, brand recognition for your business displaying on your products, assembly instructions, product warnings/hazards, etc. Tri-State Fabricators produces Screen Printing of the highest quality so you know it’s durable.
Metal Finishing is the art of treating the exterior portion of product, often metal but can also be made of other materials, so that the surface is clean and free of any debris. Then the process of applying coats or either paint of powder coat takes place. This coating process improves the quality of the product in both appearance and resistance to wear and corrosion.
Tri-State Fabricators, Inc., understands that a project typically isn’t complete until a high-quality finish has been added to your product. This is why our painting and powder coating teams continuously inspect the products throughout the Metal Finishing process.

