


White 3D UV TPU DTF Film is gaining attention as decorators seek raised, tactile graphics without traditional screen-printing screens. Its appeal is practical: vivid white underbases, flexible TPU layers, and dimensional UV effects can create lettering that feels almost embossed under a fingertip. However, reliable guidance remains limited. Major market studies usually group UV printing, digital decoration, or transfer films into broader categories.
Smithers’ The Future of Digital Print for Packaging to 2028 identifies short runs, customization, and faster production as important drivers of digital printing growth. Grand View Research also reports continued expansion in UV-curable printing, supported by precise curing and improved substrate compatibility. These findings support the technology’s direction, but they do not prove that every White 3D UV TPU DTF Film performs equally. That distinction matters.
Mark Coudray, a recognized digital-print consultant, offers a useful production principle: “Consistency is a process, not a setting.” It applies directly here. Film tension, white-ink density, curing energy, adhesive temperature, and peeling angle can change the final texture. A small increase in curing may sharpen edges, yet excessive energy can reduce flexibility. That trade-off is easy to miss.
This guide explains how to prepare artwork, print the white layer, build the 3D effect, and transfer it safely. Expect some trial and error. Even experienced operators may need to adjust pressure, temperature, and dwell time for each garment or surface. Always test a sample first, record the settings, and inspect adhesion after washing.
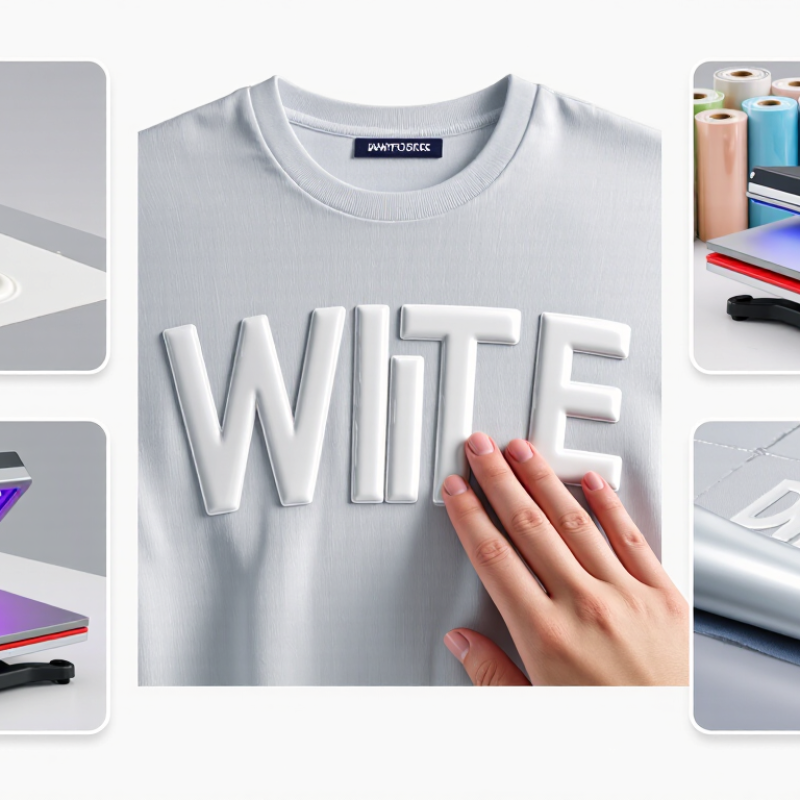
White 3D UV TPU DTF film is a layered transfer material for decorating smooth, compatible surfaces. Its white coating improves color visibility on dark or transparent objects. The 3D effect comes from a raised ink or adhesive layer. TPU provides flexibility and helps the design bond after application. The name is not fully standardized, so film construction can differ between suppliers.
The working process begins with printing the design onto a treated film. White ink is usually placed beneath the color layers. This creates a strong base and keeps fine details visible. UV light cures the printed layers, making them dry and slightly textured. A TPU adhesive layer then supports transfer to glass, coated metal, acrylic, or similar surfaces. The surface must be clean, dry, and free from silicone residue.
White ink creates a strong base and keeps fine details visible.
I normally test a small corner first. Poor cleaning can cause lifting within days. A firm, even squeegee pass removes air pockets without stretching the film. After transfer, press the design gently and peel according to the film’s specified method. Excessive heat may distort TPU, while weak pressure can leave edges unbonded. Do not assume every film uses identical curing times or peel temperatures. Record the printer settings, curing distance, and surface type during testing. This makes repeated production more reliable, although occasional texture differences still need inspection.

A reliable setup starts with compatible white 3D UV TPU DTF film, UV-curable inks, and a clean printing surface. The film should match the printer’s feed system and curing requirements. Choose a white ink with stable opacity, because weak white layers can make colors look dull. You also need color ink and clear varnish for raised details.
Keep it clean.
The essential equipment includes a UV printer, RIP software, a curing unit, and a laminator or transfer press. A white ink circulation system helps reduce sediment during longer jobs. Use a printhead cleaning kit, lint-free wipes, nitrile gloves, and a dust-free worktable. Store the film flat, away from heat and moisture. Small particles can become visible under glossy varnish.
In practice, load the TPU film without forcing its edges. Print the white base, colored artwork, and raised varnish according to the selected layer order. Cure each layer carefully, but avoid excessive heat that may deform TPU. Test a small piece before production. I have found that a visually perfect sample can still fail during transfer.
Poor adhesion often comes from surface contamination or insufficient curing. That mistake matters.
Record the film batch, ink settings, curing speed, and transfer pressure for repeatable results. Use ventilation and follow the safety instructions for UV materials.
How to Use White 3D UV TPU DTF Film
Preparing artwork carefully is the foundation of clean White 3D UV TPU DTF transfers. Build the design on a transparent canvas at 300 dpi. Keep important details away from the edges. Fine lines below 0.5 mm may disappear after printing and curing. They look sharp on screen, but not always on film.
Create separate layers for color, white ink, and the raised 3D effect. The white layer should support every light-colored area, especially when applying the transfer to dark fabric or surfaces. Extend it slightly beneath the color layer to reduce visible gaps. A small choke, often around 0.1 to 0.2 mm, may help, but exact values depend on the printer and software. Do not guess blindly.
For the 3D effect, use a clean spot layer or grayscale height map, depending on your workflow. Keep raised areas away from tiny text and crowded details. Large lettering, simple icons, and bold outlines usually produce more reliable results. Check transparency before exporting. Hidden backgrounds can create unwanted white boxes.
I learned this through failed samples. My first proof had a beautiful gradient, but the thin shadow vanished. Now I print a small test patch with the real film, ink settings, and target surface. Color profiles also need checking. A design that looks balanced on a monitor may print too dark or too flat. Record each adjustment, but leave room to question your settings.
Recommended prepress targets for creating clean, durable artwork: work at final size, use 300 dpi raster elements, keep the background transparent, define a solid white underbase, and convert text or critical line art to outlines.
These values represent practical production targets commonly used for print-ready artwork preparation and are not tied to any specific company or brand.
Begin with a clean, lint-free film surface. Check the printable side under bright light. It should feel slightly smoother. Prepare artwork with clear edges and moderate white coverage. Print the color layer according to your printer settings. Then add the white underbase evenly. A weak white layer can make the design look dull.
While the ink remains wet, spread hot-melt powder across the printed area. Tilt the film gently from side to side. Remove loose powder from the unprinted sections. Cure the powder using the recommended temperature and time for your film. Avoid overheating. Excess heat can cause TPU edges to shrink or curl. My first test used too much powder, and fine details looked heavy. I now test a small corner before full production.
Tips: Keep humidity stable. Store film flat and sealed. Wear suitable eye and hand protection. Check powder coverage by lifting the film slightly. Any glossy gaps may indicate poor adhesion. After curing, inspect the surface for bubbles or rough spots. Press the transfer onto a clean garment or approved surface with steady pressure. Let it cool before peeling. Results can vary, so record temperature, pressure, and curing time for each material batch.
White 3D UV TPU DTF Film creates raised, bright designs on suitable fabrics.
The result depends on careful transferring, controlled pressing, and patient finishing. Before production, inspect the printed film for dust, weak edges, or uneven white ink. A small test piece is essential because fabric blends react differently to heat and pressure.
Place the film on a clean, dry garment with the design facing upward. Align it carefully, then press using the temperature, pressure, and dwell time recommended for the film. Avoid sliding the press, which can distort fine details. Let the transfer cool if the film requires cold peeling. Remove it slowly from one corner. If an edge lifts, stop and repress it rather than pulling harder. That small mistake is easy to make.
Tips:
Use a lint roller before pressing. Keep the garment flat and wrinkle-free. A protective sheet can shield the press from residue. After peeling, apply a short finishing press through parchment when permitted by the film instructions. This can improve edge adhesion and surface consistency. Do not overpress raised details; excessive heat may flatten the texture. Wash the garment inside out after the recommended curing period, using mild detergent and avoiding aggressive drying. The finish may look slightly different after washing, so record your settings and review the result honestly.


For those larger-sized parts, or smaller quantity runs, we have 2 independent powder coat booths and ovens. The quality, durability and affordability of today’s powder coating finishes make this the process of choice for world-class companies.
Powder coating advantages over other forms of coating are many. Materials used in the Powder coating process can be metals and non-metals that come in a multitude of thicknesses, textures, colors, etc. Another of Powder coating’s biggest advantages over conventional coatings is its ability to create finishes in many different textures. Powder Coating Booths allow us the ability to apply these advantages to large products.
Tri-State Fabricators runs a full-service conveyor line for painting. Wet painting can provide protection or decoration to many different part styles. From start to finish, every project is easier to undergo random and point-based inspection by our skilled painting team.
Advantages to our Wet Paint Line are these lines start with product prep and ends with a thorough inspection of a high quality finished product. Our ability to complete large and small projects with a superior finish and doing so in a timely and economical fashion. This passes along the savings in production to our customers. When powder coating ins not an option, our Wet Paint Line gets the job done right the first time.
When the parts get big and heavy we roll-out our custom paint racks and oversize booth. By utilizing our partnerships with all the major paint brands, we can match virtually any color with wet paint.
The advantages of having access to a Wet Paint Booth are many. Large projects of many different shapes can be loaded into the booth. The Wet Paint Booth offers an environment that is much more controlled than a typical parts painting operation.
Not only are they used because of their controlled environment, but they’re are also advantageous when it comes to applying paint to parts that are needed in industries that require specialty coatings such as medical, aerospace, etc.
Our military forces have some very high standards when it comes to the finish of their vehicles and equipment. From the first pre-treatment step to final coat, it takes a great deal of knowledge and experience to protect the men and women of our armed forces. They deserve only the best, and Tri-State Fabricators provides it.
All of our processes are closely monitored by our staff and management teams. Both of which are highly trained in the processes of metal fabrication and finishing. Tri-State Fabricators’ goal is to always fully satisfy each and every customer, including the military. We will always put a 110% into what we do.
Abrasive media blasting is an excellent way to remove old paint, rust, and increase the paint/powder adhesion. Glass beads produce a much smoother and brighter finish than angular abrasives; leaving the part clean yet without any dimensional change. Chemically inert and environmentally friendly, we can recycle our beads approximately 30 times; making them a more preferred method of metal cleaning or surface finishing.
Advantages to Glass Bead Blasting are many. Glass bead blast media is used when a project is needing rough surfaces need to become smooth for applications of coatings such as paint. It is typically used to clean paint and rust from a product surface without deforming the surface it is being used on. Overall, compared to many other blasting media, Glass Bead Blasting is a very economical choice and those savings are always passed on to our customers.
Tri-State Fabricators utilize a zinc phosphate wash to clean and etch the material to ensure the best paint adhesion possible. The unique design of our 3-stage wash system does the work like a 5-stage. From Cleaning and rinsing to conversion coating and post-treatment, Our Part Washing process is a complete service and works throughout the fabrication service and the finishing service.
Along with the previously mentioned benefits, Curing is a vital chemical reaction that leaves the product finish hard and relatively safe from mild abrasion and aggressive corrosion. This process can be done in more than one way; ambient air-dry or in curing ovens at temps that exceed 240°.
From fixing paint mistakes (someone else’s of course) to simply cleaning our paint line hooks, our burn-off oven is put to good use. After a quick burn-off, a little clean up, and a fresh coat of paint, your parts will look better than new.
Why does our Burn-Off Oven work so well? Because super heating the air around parts turns the materials into ashes. From paint and powder coatings to rubber and machining oils, high temps do the job without degrading the integrity of the part.
Masking is a vital part of producing high quality products. We have die-cut masking patterns to protect machined surfaces as well as a wide range of plugs and caps to protect threaded holes and bolts. We provide permanent and temporary masking.
Masking allows the selected sections of a product to be protected from a fabrication or finishing service. This can be with both chemicals when etching and tapes, paints when only finishing just a section of the product. Masking is great in aiding the customization process of a project.
Screen printing is a photographic process that transfers artwork onto a porous nylon screen which allows colored ink to flow through the screen and be deposited on an aluminum or plastic component. We can generally have just about any design created onto a screen for your parts.
Some of the advantages of Screen Printing are, brand recognition for your business displaying on your products, assembly instructions, product warnings/hazards, etc. Tri-State Fabricators produces Screen Printing of the highest quality so you know it’s durable.
Metal Finishing is the art of treating the exterior portion of product, often metal but can also be made of other materials, so that the surface is clean and free of any debris. Then the process of applying coats or either paint of powder coat takes place. This coating process improves the quality of the product in both appearance and resistance to wear and corrosion.
Tri-State Fabricators, Inc., understands that a project typically isn’t complete until a high-quality finish has been added to your product. This is why our painting and powder coating teams continuously inspect the products throughout the Metal Finishing process.

