


A Toyota Tacoma Side Mirror is more than a painted housing beside the driver’s window. It is a visibility tool, a safety component, and a trim-specific replacement part. Depending on the Tacoma’s year and package, it may include manual adjustment, power adjustment, heating, turn signals, blind-spot monitoring, or a folding function. The differences are easy to miss. A mirror can look correct yet use the wrong connector, mounting plate, or camera system.
The Insurance Institute for Highway Safety reported that blind-spot monitoring reduces lane-change crashes by approximately 14 percent. That finding gives the mirror practical importance, especially on crowded highways and narrow urban streets. NHTSA also recorded 7,522 pedestrian deaths in 2022, showing why surrounding visibility deserves careful attention. David Zuby, IIHS executive vice president and chief research officer, has stated, “The best way to protect people in crashes is to prevent them in the first place.” A properly adjusted Toyota Tacoma Side Mirror supports that goal, although it cannot replace shoulder checks or attentive driving.
Real-world replacement work is less tidy. Paint may not match perfectly. A heated mirror may require the correct wiring. Blind-spot functions may need professional calibration after installation. Toyota’s owner documentation and parts catalogs should be checked before purchase, not after delivery. The safest choice depends on the Tacoma’s model year, trim, and existing equipment. Small details matter. Sometimes, the cheapest mirror becomes the most expensive mistake.
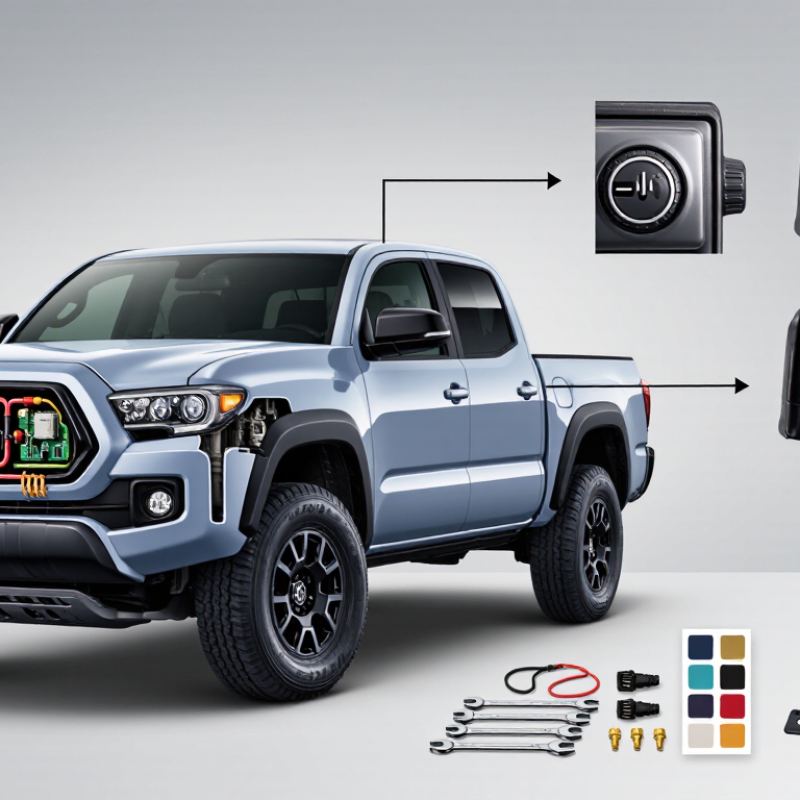
A side mirror is an adjustable exterior mirror mounted beside a pickup’s front doors. Its purpose is to show traffic behind and alongside the vehicle. The glass usually covers a wider area than the interior mirror, helping the driver judge lane position, trailers, bicycles, and approaching vehicles. Federal Motor Vehicle Safety Standard 111 requires defined rearward visibility, but the mirror still depends on correct adjustment and clean glass.
From practical inspection work, a useful setting places only a narrow edge of the vehicle in view. Most of the mirror should show the adjacent lane, not the door. Too much bodywork creates a blind area. Too little can make distance judgment harder. A 2020 Insurance Institute for Highway Safety analysis found that blind-spot monitoring reduced lane-change crashes by 14 percent. That figure supports the mirror’s role, but electronic assistance cannot replace a deliberate shoulder check.
A damaged housing may vibrate at highway speed. Small cracks can distort headlights at night. Heated glass helps clear frost and rain, while power adjustment improves precise positioning from the driver’s seat. Many replacement mirrors also include turn-signal lamps, temperature sensors, or blind-spot indicators. Those features are useful, though not every mirror assembly includes them. I have found that a mirror can look properly installed yet remain poorly aligned. Rechecking it from the normal driving position matters.

What Is a Toyota Tacoma Side Mirror?
A side mirror is a visibility tool mounted beside the cab. It helps the driver monitor adjacent lanes, parking spaces, and approaching traffic. Its main components include the mirror glass, housing, adjustment mechanism, wiring, and mounting base. Some versions also contain heating elements, turn indicators, or blind-spot sensors. The glass provides the view, while the housing protects it from rain, dust, and minor impacts. During inspections, I check the mounting base first. A loose base can cause constant vibration and distorted reflections.
Main Components and Mirror Types
Manual mirrors use a hand-operated adjustment lever. They are simple and usually easier to maintain. Power mirrors use an electric motor controlled from inside the cabin. Heated mirrors reduce fog and frost during cold mornings. Telescoping mirrors extend outward for better visibility when towing wide loads. Convex glass shows a broader area, but distant objects may look smaller. Flat glass offers a more natural image, although its viewing angle is narrower. No design is perfect. I once trusted a wide-angle mirror too much and missed how quickly another vehicle was closing.
Tips: Adjust the seat before setting the mirrors. Keep the vehicle side barely visible. Check the lower edge for curb or obstacle coverage. Test folding, heating, and power functions before driving. Small blind spots remain, even with careful adjustment.
A side mirror combines a reflective surface, housing, adjustment mechanism, mounting base, and optional visibility features. The chart compares common mirror types by their defining functions.
Scale: 1 indicates that the function defines or is inherent to the mirror type; 0 indicates that it is not inherent. Features may be combined in one mirror assembly.
A vehicle side mirror is more than a reflective panel beside the front doors. It gives the driver a wider view of nearby lanes, cyclists, parked vehicles, and road edges. The mirror housing also protects the glass and adjustment mechanism from weather and minor contact. A clear mirror helps the driver judge distance before changing direction.
Proper adjustment matters. Sit in your normal driving position before moving the mirror. Set the inside edge to show only a small section of the vehicle. The outer view should cover the adjacent lane, not the pavement beside the door. This reduces overlap between the side and interior mirrors. Still, no mirror removes every blind spot.
Check the mirror before each trip. Look for cracks, loose movement, water marks, or vibration at speed. A dirty surface can hide a motorcycle or a child near the vehicle. Wipe it with a soft cloth, especially after rain or dusty travel.
Bright headlights may reflect harshly at night, so a careful glance is safer than relying on one mirror. During a routine inspection, I once noticed a slight shake that seemed harmless. It made distant vehicles difficult to judge. That small fault needed attention.
Mirror settings can also change when another driver uses the vehicle. Recheck them. Take a second look.
A pickup truck’s side mirror is a safety component mounted beside the front doors. It helps the driver monitor adjacent lanes, parking lines, and approaching vehicles. Many versions use manual or electric adjustment, while higher trims may include heating, folding, or blind-spot indicators. Its housing protects the glass from weather, but small impacts can still cause damage.
Common side mirror problems include cracked glass, loose mounting, weak folding joints, and unresponsive adjustment motors. A mirror may shake at highway speed when its base bolts loosen. Moisture behind the glass can create cloudy patches or dark spots. Heated mirrors sometimes stop working because of a broken wire, failed connector, or damaged switch. Check the fuse before replacing the whole assembly. That simple step is often missed.
During inspection, move the glass slowly and listen for grinding sounds. Compare the mirror’s position with the opposite side. A door impact may bend the support even when the cover looks normal. I have found that replacement is not always the best answer; a loose connector can imitate motor failure. Still, diagnosing by sound alone is unreliable. Weather, vibration, and repeated manual folding can reveal problems gradually. Small cracks deserve attention, especially when they distort vehicles in the blind-zone area.
A pickup side mirror is a visibility device, not merely exterior trim. It shows adjacent lanes, rear corners, and approaching traffic outside the driver’s direct view. Federal Motor Vehicle Safety Standard No. 111 sets minimum rear-visibility requirements for passenger vehicles and light trucks. The National Highway Traffic Safety Administration recorded 7,522 pedestrian deaths in 2022, according to its Fatality Analysis Reporting System. That figure does not prove mirror-related causation, but it reinforces the value of careful observation.
For adjustment, sit in the normal driving position first. Set the inside edge of the mirror just beyond the vehicle’s side, leaving only a narrow body-line view. Tilt the upper edge slightly toward the horizon. A second person can confirm the blind-zone transition while another vehicle passes slowly. Replacement requires more care than removing three fasteners. Match the mounting plate, connector, heating function, and power-folding features before installation. A loose connector may cause intermittent movement, which is easy to misdiagnose as a failed motor.
Clean the glass with diluted soap and a soft microfiber cloth. Avoid aggressive solvents around plastic coatings. Check for cracks, loose housing, vibration, and water inside the lamp or connector. I have seen a mirror appear correctly aligned while the mounting bracket remained slightly bent. That mistake wastes time. Recheck the view after driving over uneven pavement, because vibration can reveal a problem that a driveway inspection misses.
| Data Dimension | Practical Information | Recommended Action | Safety or Maintenance Note |
|---|---|---|---|
| Basic Definition | A side mirror is an exterior visibility device mounted on the driver-side or passenger-side door. It helps the driver observe adjacent traffic, parking areas, and objects behind the vehicle. | Keep both mirrors positioned to provide a broad rearward and side view. | Side mirrors reduce blind spots but do not eliminate them completely. |
| Common Mirror Components | Typical components include the mirror glass, housing, mounting base, adjustment mechanism, electrical connector, and optional heating or turn-signal elements. | Identify the damaged component before ordering a replacement. | A cracked glass panel may require less work than a damaged housing or mounting base. |
| Manual Adjustment | Manual mirrors are positioned by hand or with an interior adjustment lever, depending on the vehicle configuration. | Adjust the mirror while seated in the normal driving position and before moving the vehicle. | Do not force a stiff adjustment mechanism, as the internal pivot may break. |
| Powered Adjustment | Power-adjustable mirrors use a small electric motor controlled by an interior switch. | Turn the ignition or accessory power on, select the correct side, and move the control in short steps. | If the switch works but the glass does not move, the motor, wiring, or internal linkage may require inspection. |
| Recommended Driver-Side Position | Set the mirror so only a small portion of the vehicle side is visible along the inner edge, while most of the mirror shows the adjacent lane. | Use a level road or driveway and confirm the view from the normal seating position. | Avoid aiming the mirror too far inward, which increases the blind area beside the vehicle. |
| Recommended Passenger-Side Position | Angle the mirror outward enough to show the adjacent lane and rear approach area while retaining a small reference view of the vehicle side. | Ask another person to help verify the view if the mirror is difficult to judge from the driver’s seat. | The passenger-side mirror may require extra attention because distance can be harder to estimate. |
| When Replacement Is Needed | Replacement may be appropriate when the glass is shattered, the housing is severely cracked, the mirror will not stay in position, or the mounting structure is damaged. | Compare the replacement part with the original unit, including mounting points and electrical connections. | A mirror that is loose at the door should be repaired promptly because vibration can reduce visibility. |
| Glass-Only Replacement | If the housing and adjustment mechanism remain intact, replacing only the mirror glass can be a practical option. | Use protective gloves and follow the replacement part’s fitting instructions. | Broken glass edges can cause cuts. Disconnect electrical heating terminals carefully when present. |
| Complete Assembly Replacement | A complete assembly generally includes the housing, glass, adjustment mechanism, and mounting structure. Some configurations may also include wiring. | Remove the interior door trim or access cover only when necessary, and protect painted surfaces during removal. | Do not allow the mirror assembly to hang by its wiring during installation. |
| Basic Replacement Tools | Common tools may include a trim-removal tool, socket set, screwdriver, plastic pry tool, work gloves, and a clean cloth. | Use the correct tool size and keep removed fasteners organized. | Plastic trim tools help reduce scratches and damage to interior panels. |
| Installation Check | After installation, verify that the mirror is firmly attached, moves through its adjustment range, and remains stable during normal door operation. | Test manual or powered adjustment before reinstalling all trim panels. | A loose mounting fastener can create vibration, wind noise, or sudden loss of mirror position. |
| Electrical Function Check | For equipped mirrors, check power adjustment, heating, turn-signal illumination, and any other connected functions. | Test each function with the vehicle safely parked and the ignition or accessory power enabled as required. | If a fuse repeatedly fails, stop testing and have the circuit inspected for a short or damaged wire. |
| Cleaning Method | Use clean water, mild automotive soap, and a soft microfiber cloth to remove dust, road film, and insects. | Rinse loose grit before wiping and dry the surface with a separate clean cloth. | Avoid abrasive pads, harsh solvents, and excessive pressure on the mirror glass. |
| Cold-Weather Care | Ice can restrict mirror movement and may place stress on the adjustment mechanism or housing. | Remove ice with a suitable de-icer or allow it to melt naturally before adjusting the mirror. | Do not use sharp tools or force the mirror against frozen components. |
| Vibration or Wind Noise | Excessive vibration or new wind noise can indicate a loose fastener, damaged housing, worn pivot, or improper installation. | Inspect the mounting area and check whether the mirror moves independently of the door. | Repair loose or unstable mirrors before driving in heavy traffic or at highway speeds. |
| Visibility Verification | A properly adjusted mirror should provide a continuous visual transition from the interior rearview mirror to the side-mirror view with minimal overlap. | Check the view after carrying passengers, changing the seat position, or installing a different mirror assembly. | Always perform a shoulder check before changing lanes, even when the mirrors are correctly adjusted. |
| Inspection Frequency | Inspect the mirror condition during routine vehicle cleaning and before trips involving towing, rough roads, or long-distance driving. | Look for cracks, looseness, clouding, water intrusion, and damaged wiring. | Early inspection can prevent a minor defect from becoming a complete visibility failure. |


For those larger-sized parts, or smaller quantity runs, we have 2 independent powder coat booths and ovens. The quality, durability and affordability of today’s powder coating finishes make this the process of choice for world-class companies.
Powder coating advantages over other forms of coating are many. Materials used in the Powder coating process can be metals and non-metals that come in a multitude of thicknesses, textures, colors, etc. Another of Powder coating’s biggest advantages over conventional coatings is its ability to create finishes in many different textures. Powder Coating Booths allow us the ability to apply these advantages to large products.
Tri-State Fabricators runs a full-service conveyor line for painting. Wet painting can provide protection or decoration to many different part styles. From start to finish, every project is easier to undergo random and point-based inspection by our skilled painting team.
Advantages to our Wet Paint Line are these lines start with product prep and ends with a thorough inspection of a high quality finished product. Our ability to complete large and small projects with a superior finish and doing so in a timely and economical fashion. This passes along the savings in production to our customers. When powder coating ins not an option, our Wet Paint Line gets the job done right the first time.
When the parts get big and heavy we roll-out our custom paint racks and oversize booth. By utilizing our partnerships with all the major paint brands, we can match virtually any color with wet paint.
The advantages of having access to a Wet Paint Booth are many. Large projects of many different shapes can be loaded into the booth. The Wet Paint Booth offers an environment that is much more controlled than a typical parts painting operation.
Not only are they used because of their controlled environment, but they’re are also advantageous when it comes to applying paint to parts that are needed in industries that require specialty coatings such as medical, aerospace, etc.
Our military forces have some very high standards when it comes to the finish of their vehicles and equipment. From the first pre-treatment step to final coat, it takes a great deal of knowledge and experience to protect the men and women of our armed forces. They deserve only the best, and Tri-State Fabricators provides it.
All of our processes are closely monitored by our staff and management teams. Both of which are highly trained in the processes of metal fabrication and finishing. Tri-State Fabricators’ goal is to always fully satisfy each and every customer, including the military. We will always put a 110% into what we do.
Abrasive media blasting is an excellent way to remove old paint, rust, and increase the paint/powder adhesion. Glass beads produce a much smoother and brighter finish than angular abrasives; leaving the part clean yet without any dimensional change. Chemically inert and environmentally friendly, we can recycle our beads approximately 30 times; making them a more preferred method of metal cleaning or surface finishing.
Advantages to Glass Bead Blasting are many. Glass bead blast media is used when a project is needing rough surfaces need to become smooth for applications of coatings such as paint. It is typically used to clean paint and rust from a product surface without deforming the surface it is being used on. Overall, compared to many other blasting media, Glass Bead Blasting is a very economical choice and those savings are always passed on to our customers.
Tri-State Fabricators utilize a zinc phosphate wash to clean and etch the material to ensure the best paint adhesion possible. The unique design of our 3-stage wash system does the work like a 5-stage. From Cleaning and rinsing to conversion coating and post-treatment, Our Part Washing process is a complete service and works throughout the fabrication service and the finishing service.
Along with the previously mentioned benefits, Curing is a vital chemical reaction that leaves the product finish hard and relatively safe from mild abrasion and aggressive corrosion. This process can be done in more than one way; ambient air-dry or in curing ovens at temps that exceed 240°.
From fixing paint mistakes (someone else’s of course) to simply cleaning our paint line hooks, our burn-off oven is put to good use. After a quick burn-off, a little clean up, and a fresh coat of paint, your parts will look better than new.
Why does our Burn-Off Oven work so well? Because super heating the air around parts turns the materials into ashes. From paint and powder coatings to rubber and machining oils, high temps do the job without degrading the integrity of the part.
Masking is a vital part of producing high quality products. We have die-cut masking patterns to protect machined surfaces as well as a wide range of plugs and caps to protect threaded holes and bolts. We provide permanent and temporary masking.
Masking allows the selected sections of a product to be protected from a fabrication or finishing service. This can be with both chemicals when etching and tapes, paints when only finishing just a section of the product. Masking is great in aiding the customization process of a project.
Screen printing is a photographic process that transfers artwork onto a porous nylon screen which allows colored ink to flow through the screen and be deposited on an aluminum or plastic component. We can generally have just about any design created onto a screen for your parts.
Some of the advantages of Screen Printing are, brand recognition for your business displaying on your products, assembly instructions, product warnings/hazards, etc. Tri-State Fabricators produces Screen Printing of the highest quality so you know it’s durable.
Metal Finishing is the art of treating the exterior portion of product, often metal but can also be made of other materials, so that the surface is clean and free of any debris. Then the process of applying coats or either paint of powder coat takes place. This coating process improves the quality of the product in both appearance and resistance to wear and corrosion.
Tri-State Fabricators, Inc., understands that a project typically isn’t complete until a high-quality finish has been added to your product. This is why our painting and powder coating teams continuously inspect the products throughout the Metal Finishing process.

