


Choosing a top intramedullary nail in 2026 depends less on a universal ranking than on the fracture, patient, and surgical approach. The Global Burden of Disease study estimated 178 million new fractures worldwide in 2019, underscoring the scale of fracture care, but not the number suitable for nailing (GBD 2019 Fracture Collaborators, 2021). That distinction matters. A fracture count is not a device forecast.
This overview focuses on commonly used nail families: cephalomedullary nails for many proximal femur fractures, antegrade and retrograde femoral nails, tibial nails, humeral nails, and flexible nails used in selected pediatric cases. Each solves a different fixation problem. A nail’s length, diameter, locking options, and entry point can affect fit and stability; the best choice still depends on fracture pattern, bone quality, and clinical judgment. AO Surgery Reference provides procedure-specific guidance, while orthopedic trauma literature evaluates outcomes in defined patient groups. These sources are more useful than treating a market-share list as clinical proof.
There is no single public, standardized dataset that reliably ranks nail types by global use in 2026. Commercial market reports may estimate revenue, but their categories and methods can differ. That is easy to overlook. This guide therefore compares practical indications and design features rather than claiming a definitive winner. Some cases remain borderline, and evidence does not settle every choice. A careful comparison should make those limits visible.
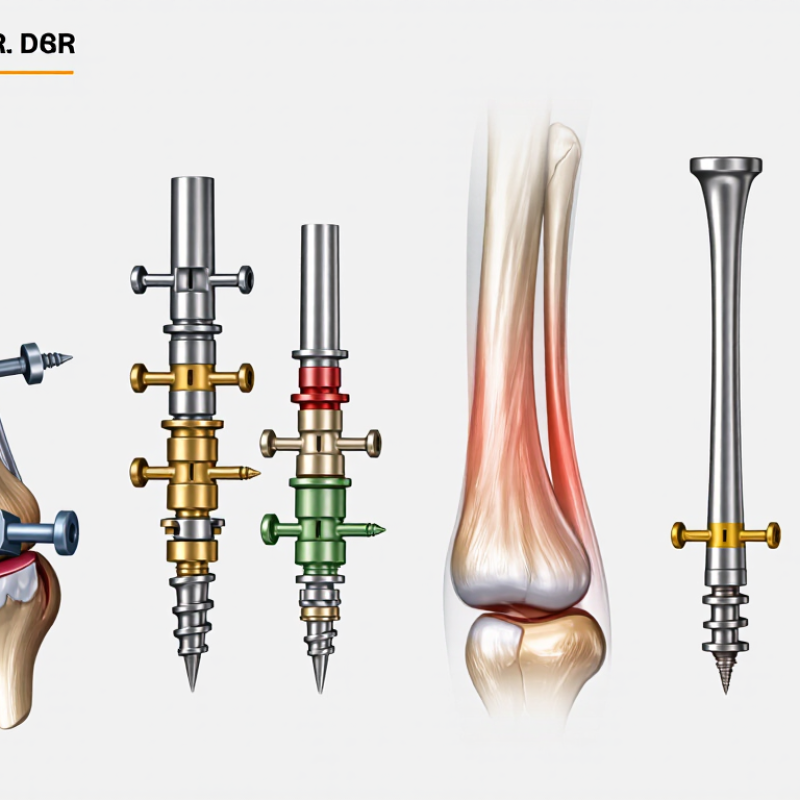
What Are the Top Intramedullary Nail Types in 2026?
What Intramedullary Nails Are and How They Stabilize Fractures
An intramedullary nail is a metal rod placed inside the hollow center of a long bone to help stabilize a fracture. Surgeons commonly use nails designed for the femur, tibia, or humerus. The right design depends on the bone and the fracture’s location and shape. There is no single best type for every patient.
After aligning the broken bone, the surgeon inserts the nail into its central canal. Locking screws pass through the bone and nail, limiting unwanted rotation or shortening. Think of a rod inside a cracked tube, secured near both ends. The nail shares some load with the bone, but it does not replace the healing process. That matters. Recovery and weight-bearing plans vary with fracture stability, bone quality, and overall health.
Tips: Ask your orthopedic team what the nail is intended to stabilize and how follow-up imaging will track healing. Report worsening pain, new numbness, or wound concerns promptly. Small details matter, and recovery can be uneven. A simple timeline may help, but your care team’s instructions should guide activity and follow-up.

Intramedullary nails sit inside the bone’s medullary canal. Locking screws help control rotation and length. This chart maps common nail designs to typical treatment sites; it is a general guide, not a ranking or a treatment recommendation. The appropriate implant depends on the fracture and the patient.
Intramedullary nail designs are commonly classified by the bone they stabilize, such as the femur, tibia, or humerus. Their lengths, curves, and locking-hole positions reflect differences in anatomy and fracture location. A femoral nail, for example, must follow the bone’s natural bow. Small design details matter.
Nails can also be grouped by insertion direction. Antegrade nails enter from the bone’s upper end, while retrograde nails are inserted from the lower end. The choice depends on fracture position, patient anatomy, and the surgical plan. These terms describe the route, not a guarantee of better results.
Another useful distinction is locking design. Locked nails use screws through holes in the nail to help control rotation and shortening; some designs allow limited movement at the fracture site. Nails may also be solid or cannulated, with a hollow channel that can guide placement over a wire. Reamed and unreamed describe preparation of the bone canal, rather than a simple product category. The labels can overlap, which makes classification less tidy than it first appears. A nail’s suitability depends on the fracture and clinical assessment, not its category alone.
| Classification Group | Intramedullary Nail Type | Typical Bone or Region | Key Design Features | Common Clinical Use | Typical Fixation Approach |
|---|---|---|---|---|---|
| By anatomy and proximal fixation | Cephalomedullary nail | Proximal femur | A femoral nail with one or more large proximal screws or a blade directed into the femoral head and neck. | Selected intertrochanteric and subtrochanteric fractures, according to fracture pattern and clinical assessment. | Proximal head-and-neck fixation is combined with distal locking screws when indicated. |
| By anatomy and insertion route | Antegrade femoral nail | Femoral shaft; inserted from the proximal femur | A long, curved nail introduced through a proximal entry point and advanced down the femoral medullary canal. | Many femoral shaft fractures. | Interlocking screws can be placed proximally and distally to control length and rotation. |
| By anatomy and insertion route | Retrograde femoral nail | Femoral shaft or selected distal femur; inserted through the knee end of the femur | A nail inserted through a distal femoral entry point, with the available locking options depending on the device and fracture location. | Selected femoral shaft and distal femoral fractures; the approach may be considered when a proximal entry route is unsuitable. | Interlocking screws secure the nail; distal fixation options vary by design. |
| By anatomy | Tibial nail | Tibial shaft | A nail shaped for the tibial canal, with proximal and distal locking options. | Many tibial shaft fractures. | Interlocking screws help maintain alignment, length, and rotation; screw configuration depends on the fracture and nail design. |
| By anatomy and entry route | Humeral nail | Humeral shaft and, for some designs, selected fractures near either end of the humerus | A nail designed for the humeral canal; insertion may be antegrade or retrograde depending on the design and fracture. | Selected humeral shaft fractures. | Proximal and distal locking screws may be used. Entry-point and locking choices depend on the fracture and anatomy. |
| By nail flexibility and patient group | Flexible or elastic intramedullary nail | Most commonly selected long-bone fractures in children | One or more slender, flexible nails are placed in the medullary canal; the technique relies on balanced elastic support rather than a large rigid nail. | Selected pediatric long-bone fractures, with suitability influenced by age, bone size, and fracture pattern. | Usually does not use the same transverse interlocking-screw configuration as a rigid adult nail. |
| By proximal screw orientation | Femoral reconstruction nail | Femur, including shaft fractures with associated proximal femoral involvement | A femoral nail with proximal screw options oriented to provide fixation in the femoral head and neck, in addition to shaft fixation. | Selected combined proximal femoral and shaft fracture patterns. | Proximal head-and-neck screws and distal interlocking screws are used as appropriate to the fracture. |
| By locking configuration | Statically or dynamically locked nail | Design feature used in nails for several long bones | “Static” and “dynamic” describe locking configurations. Depending on the nail, a slot or selected screw position may permit controlled axial movement. | Locking configuration is selected to suit fracture stability, location, and the treatment plan. | Options differ by nail model; not every nail offers the same locking modes. |
These are common design categories, not a ranking. The appropriate nail and fixation method depend on the bone, fracture pattern, patient factors, and the treating surgeon’s assessment.
Femoral nails are selected by fracture location and the direction of insertion. Antegrade nails enter near the hip; retrograde nails pass upward from the knee. Proximal femoral and cephalomedullary nails add screws into the femoral head for fractures near the hip. The 2021 American Academy of Orthopaedic Surgeons guideline recommends cephalomedullary devices for subtrochanteric and reverse-obliquity fractures. For stable intertrochanteric fractures, it accepts either a cephalomedullary device or a sliding hip screw. The fracture pattern matters more than the nail’s name.
Tibial shaft fractures commonly use locked nails, with screws securing the implant above and below the break. Reamed and unreamed designs are both used. The SPRINT trial compared these approaches in 1,319 patients. Its results did not establish one reaming strategy as best for every fracture; open and closed injuries can behave differently. Small details matter: nail position, alignment, and screw placement can affect healing and knee comfort.
Humeral nails may be inserted antegrade through the shoulder or retrograde through the elbow. Locking screws help control rotation, but entry location deserves care. Antegrade insertion can irritate shoulder tissues, while retrograde insertion requires attention to the elbow and surrounding anatomy. Not a perfect trade-off. Evidence comparing humeral nails with plates varies across fracture patterns and study methods, so surgeons weigh bone quality, fracture level, and patient needs rather than choosing by habit.
Intramedullary nails are not interchangeable; their geometry and locking options should match the fracture. The Global Burden of Disease 2019 analysis estimated 178 million new fractures worldwide that year, a reminder of the scale of fracture care—not a measure of nail use. Pattern matters most. For intertrochanteric and subtrochanteric fractures, cephalomedullary nails use a proximal screw or blade to support the femoral head and neck. A long nail may also span a subtrochanteric extension, where bending forces can challenge a shorter construct.
Femoral shaft fractures often suit antegrade nails, inserted near the hip, while retrograde nails enter above the knee and may be considered when the proximal route is unsuitable. Tibial nails use proximal and distal locking screws to control rotation and length; short distal fragments demand careful reduction and screw placement. Humeral nails address selected shaft fractures, but shoulder symptoms and nearby anatomy matter. These choices are not automatic. A 2023 AAOS guideline on older adults with hip fractures supports cephalomedullary devices for selected unstable patterns, while patient condition and surgeon assessment still shape treatment. The evidence is not a perfect fit for every fracture. On the operating table, a small gap at the fracture or a screw placed too close to the joint can change the result.
Choosing an intramedullary nail in 2026 starts with the fracture, not the catalogue. Its location, shape, and stability help determine whether a standard, cephalomedullary, or other specialized design is appropriate. A fracture extending near a joint may need different fixation options from a straightforward shaft fracture. Small details matter.
The patient’s anatomy matters too. Nail diameter and length should suit the medullary canal, while locking screw positions must support the planned fracture alignment. Bone quality, existing implants, and any deformity can change the options. Preoperative imaging helps, but measurements are not a substitute for checking the fit during surgery. Not always.
Surgeons should also consider the instruments available, their familiarity with the system, and how reliably the nail can be inserted and locked. A technically advanced design is not automatically the best choice if its features do not match the fracture or the surgical plan. Evidence, training, and careful clinical judgment should guide selection. No implant removes the risks of infection, malalignment, or delayed healing. Patient-specific factors may shift the decision, and reasonable clinicians may choose differently.


For those larger-sized parts, or smaller quantity runs, we have 2 independent powder coat booths and ovens. The quality, durability and affordability of today’s powder coating finishes make this the process of choice for world-class companies.
Powder coating advantages over other forms of coating are many. Materials used in the Powder coating process can be metals and non-metals that come in a multitude of thicknesses, textures, colors, etc. Another of Powder coating’s biggest advantages over conventional coatings is its ability to create finishes in many different textures. Powder Coating Booths allow us the ability to apply these advantages to large products.
Tri-State Fabricators runs a full-service conveyor line for painting. Wet painting can provide protection or decoration to many different part styles. From start to finish, every project is easier to undergo random and point-based inspection by our skilled painting team.
Advantages to our Wet Paint Line are these lines start with product prep and ends with a thorough inspection of a high quality finished product. Our ability to complete large and small projects with a superior finish and doing so in a timely and economical fashion. This passes along the savings in production to our customers. When powder coating ins not an option, our Wet Paint Line gets the job done right the first time.
When the parts get big and heavy we roll-out our custom paint racks and oversize booth. By utilizing our partnerships with all the major paint brands, we can match virtually any color with wet paint.
The advantages of having access to a Wet Paint Booth are many. Large projects of many different shapes can be loaded into the booth. The Wet Paint Booth offers an environment that is much more controlled than a typical parts painting operation.
Not only are they used because of their controlled environment, but they’re are also advantageous when it comes to applying paint to parts that are needed in industries that require specialty coatings such as medical, aerospace, etc.
Our military forces have some very high standards when it comes to the finish of their vehicles and equipment. From the first pre-treatment step to final coat, it takes a great deal of knowledge and experience to protect the men and women of our armed forces. They deserve only the best, and Tri-State Fabricators provides it.
All of our processes are closely monitored by our staff and management teams. Both of which are highly trained in the processes of metal fabrication and finishing. Tri-State Fabricators’ goal is to always fully satisfy each and every customer, including the military. We will always put a 110% into what we do.
Abrasive media blasting is an excellent way to remove old paint, rust, and increase the paint/powder adhesion. Glass beads produce a much smoother and brighter finish than angular abrasives; leaving the part clean yet without any dimensional change. Chemically inert and environmentally friendly, we can recycle our beads approximately 30 times; making them a more preferred method of metal cleaning or surface finishing.
Advantages to Glass Bead Blasting are many. Glass bead blast media is used when a project is needing rough surfaces need to become smooth for applications of coatings such as paint. It is typically used to clean paint and rust from a product surface without deforming the surface it is being used on. Overall, compared to many other blasting media, Glass Bead Blasting is a very economical choice and those savings are always passed on to our customers.
Tri-State Fabricators utilize a zinc phosphate wash to clean and etch the material to ensure the best paint adhesion possible. The unique design of our 3-stage wash system does the work like a 5-stage. From Cleaning and rinsing to conversion coating and post-treatment, Our Part Washing process is a complete service and works throughout the fabrication service and the finishing service.
Along with the previously mentioned benefits, Curing is a vital chemical reaction that leaves the product finish hard and relatively safe from mild abrasion and aggressive corrosion. This process can be done in more than one way; ambient air-dry or in curing ovens at temps that exceed 240°.
From fixing paint mistakes (someone else’s of course) to simply cleaning our paint line hooks, our burn-off oven is put to good use. After a quick burn-off, a little clean up, and a fresh coat of paint, your parts will look better than new.
Why does our Burn-Off Oven work so well? Because super heating the air around parts turns the materials into ashes. From paint and powder coatings to rubber and machining oils, high temps do the job without degrading the integrity of the part.
Masking is a vital part of producing high quality products. We have die-cut masking patterns to protect machined surfaces as well as a wide range of plugs and caps to protect threaded holes and bolts. We provide permanent and temporary masking.
Masking allows the selected sections of a product to be protected from a fabrication or finishing service. This can be with both chemicals when etching and tapes, paints when only finishing just a section of the product. Masking is great in aiding the customization process of a project.
Screen printing is a photographic process that transfers artwork onto a porous nylon screen which allows colored ink to flow through the screen and be deposited on an aluminum or plastic component. We can generally have just about any design created onto a screen for your parts.
Some of the advantages of Screen Printing are, brand recognition for your business displaying on your products, assembly instructions, product warnings/hazards, etc. Tri-State Fabricators produces Screen Printing of the highest quality so you know it’s durable.
Metal Finishing is the art of treating the exterior portion of product, often metal but can also be made of other materials, so that the surface is clean and free of any debris. Then the process of applying coats or either paint of powder coat takes place. This coating process improves the quality of the product in both appearance and resistance to wear and corrosion.
Tri-State Fabricators, Inc., understands that a project typically isn’t complete until a high-quality finish has been added to your product. This is why our painting and powder coating teams continuously inspect the products throughout the Metal Finishing process.