


Choosing the right Solar Power System For Rv is less about chasing the highest wattage. It is about matching energy production with real travel habits.
A weekend camper may need a compact 200-watt setup. A full-time traveler running a refrigerator, laptop, fan, and induction cooker may need far more. Roof space, battery chemistry, inverter capacity, charging speed, and installation quality all matter. Even a powerful system can disappoint under tree shade or winter clouds. That detail is easy to overlook.
Solar educator Will Prowse has expressed the practical distinction this way: “Solar panels are a battery charger, not a battery.” His point remains important. Panels collect energy, but batteries store it for nighttime use. A weak battery bank can limit an otherwise excellent system.
This guide compares ten leading RV solar options through practical criteria. We examine output, expandability, portability, controller performance, monitoring tools, durability, warranty support, and overall value. We also consider setup complexity, because a system that looks impressive online may feel frustrating beside a crowded campsite.
Not every ranking will fit every traveler. That is unavoidable. A lightweight portable kit may suit a small trailer better than a large roof array. Meanwhile, a premium system may offer dependable performance but exceed a modest budget. Real-world results can also vary with weather, wiring, battery age, and user habits.
The goal is not to promise unlimited electricity. It is to identify balanced systems that make off-grid travel quieter, cleaner, and more predictable. Expect useful comparisons, practical cautions, and a few conclusions worth reconsidering.
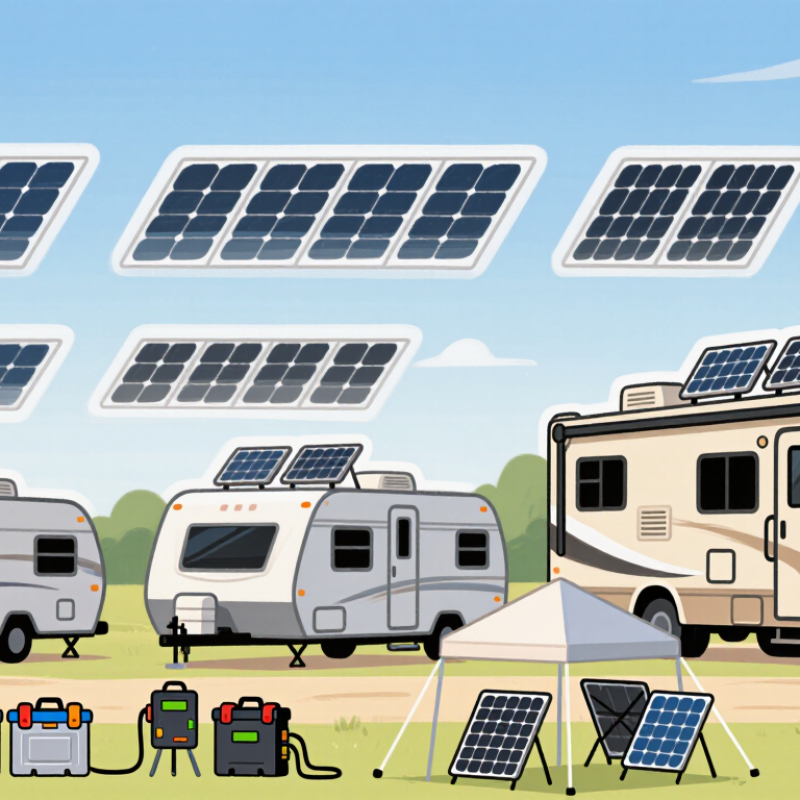
Choosing among the top 10 solar power systems for RVs starts with understanding how each system works. A typical setup includes solar panels, a charge controller, batteries, wiring, and an inverter. Panels collect sunlight, while the controller protects the batteries from unsafe charging. The battery stores energy for lights, fans, water pumps, and small appliances. An inverter changes stored power into household-style electricity. More equipment does not always mean better performance.
Your travel habits matter. A weekend camper may need a compact system with limited battery storage. Full-time travelers often require larger panels, deeper battery capacity, and careful energy monitoring. Roof space, shade, weather, and battery chemistry also affect results. In my experience, beginners often estimate energy use too loosely. A coffee maker or heater can drain a battery surprisingly fast. Real measurements are more reliable than optimistic calculations.
Tips: List every device and its wattage. Multiply watts by daily operating hours. Leave extra capacity for cloudy weather. Keep panels clean and inspect cable connections regularly. Choose professional installation when roof work or electrical protection seems uncertain. A system that looks powerful on paper may perform poorly under tree cover. Small mistakes happen, so review your usage after several trips and adjust the system gradually.

Comparing the top 10 RV solar systems requires more than checking panel wattage. Start with usable energy, not advertised capacity. The U.S. Energy Information Administration reports that residential electricity use varies widely by season and location. RV demand changes even faster. A compressor refrigerator, roof fan, and inverter can drain a small battery overnight. Compare daily watt-hours, battery chemistry, inverter output, and recharge time. LiFePO4 batteries usually offer better usable capacity and cycle life than older lead-acid designs. However, they often cost more upfront. That trade-off matters.
The Solar Energy Industries Association and Wood Mackenzie reported 32.4 gigawatts of U.S. solar capacity added in 2023. This growth supports better controllers and more efficient panels. Still, portable systems face shade, heat, vibration, and limited roof space. Check real-world panel efficiency, temperature performance, controller type, cable length, and installation weight. A higher wattage rating may disappoint under tree cover. I have seen small shading losses become large afternoon shortages.
Tips: Measure your actual loads for three days. Record refrigerator cycles, laptop use, and inverter losses. Choose at least 20% extra capacity for cloudy weather. Confirm that the battery management system includes overcharge and temperature protection. Also inspect warranty terms, repair access, and water resistance. These details are less exciting, but they often decide reliability. The International Renewable Energy Agency reports continuing declines in solar costs, yet replacement parts and installation labor can still raise ownership expenses. That point is easy to miss.
Choosing among the top 10 solar power systems for RVs depends on travel habits, battery capacity, and available roof space. A compact portable panel kit suits weekend campers who park under trees. A fixed roof system works better for frequent travelers. Hybrid systems combine both options when shade is unpredictable. Flexible panels reduce roof weight, but their heat tolerance and lifespan deserve careful checking.
For small trailers, a 100–200-watt system can support lights, phones, and a small refrigerator. Larger motorhomes may need 400–800 watts, an MPPT charge controller, and a correctly sized lithium battery. A budget PWM system can serve simple loads. It may waste more energy in cold or low-light conditions. For boondocking, prioritize a larger battery bank and a pure sine wave inverter. For cloudy regions, choose panels with strong low-light performance. Ten useful system types include portable, roof-mounted, hybrid, flexible, lightweight, high-capacity, budget, boondocking, trailer-specific, and motorhome systems.
Installation details matter more than impressive wattage. Measure roof shadows at different times, then calculate daily energy use in watt-hours. Keep cable runs short and protect exposed wiring from abrasion. A fuse near the battery is essential. Do not assume every system can run an air conditioner. That usually requires substantial battery storage and careful load management. A system can look perfect on paper yet disappoint after two shaded days. Rechecking winter production and real appliance usage prevents costly overconfidence.
| Rank | RV Need | Solar Array | Battery Storage | Charge Controller | Inverter | Estimated Daily Energy* | Approx. Roof Area | Best For |
|---|---|---|---|---|---|---|---|---|
| 1 | Compact Starter System | 100 W | 100 Ah, 12 V LiFePO₄ ≈ 1.28 kWh nominal | 10–15 A MPPT | 300 W pure sine wave | 0.30–0.40 kWh | 6–8 sq. ft. | Small trailers, van weekends, lights, phones, and small electronics |
| 2 | Essential Boondocking System | 200 W | 100 Ah, 12 V LiFePO₄ ≈ 1.28 kWh nominal | 20 A MPPT | 600 W pure sine wave | 0.60–0.80 kWh | 12–16 sq. ft. | Light daily loads such as refrigeration, lighting, fans, and device charging |
| 3 | Weekend Travel System | 300 W | 200 Ah, 12 V LiFePO₄ ≈ 2.56 kWh nominal | 30 A MPPT | 1,000 W pure sine wave | 0.90–1.20 kWh | 18–24 sq. ft. | Couples using a refrigerator, water pump, television, and kitchen appliances occasionally |
| 4 | Remote Work System | 400 W | 200 Ah, 12 V LiFePO₄ ≈ 2.56 kWh nominal | 40 A MPPT | 1,500 W pure sine wave | 1.20–1.60 kWh | 24–32 sq. ft. | Laptop, monitor, router, lighting, refrigerator, and moderate daily office use |
| 5 | Family Travel System | 600 W | 300 Ah, 12 V LiFePO₄ ≈ 3.84 kWh nominal | 50–60 A MPPT | 2,000 W pure sine wave | 1.80–2.40 kWh | 36–48 sq. ft. | Larger travel trailers with multiple occupants and higher entertainment loads |
| 6 | High-Usage Van System | 800 W | 400 Ah, 12 V LiFePO₄ ≈ 5.12 kWh nominal | 60–80 A MPPT | 2,000 W pure sine wave | 2.40–3.20 kWh | 48–64 sq. ft. | Full-time van living with cooking, refrigeration, computers, and daily DC loads |
| 7 | Four-Season System | 800 W | 400 Ah, 12 V LiFePO₄ ≈ 5.12 kWh nominal | 60–80 A MPPT | 2,000 W pure sine wave | 2.40–3.20 kWh | 48–64 sq. ft. | RVs needing dependable reserves for heating controls, fans, pumps, and low-sun conditions |
| 8 | Large Motorhome System | 1,000 W | 400 Ah, 12 V LiFePO₄ ≈ 5.12 kWh nominal | 80–100 A MPPT | 3,000 W pure sine wave | 3.00–4.00 kWh | 60–80 sq. ft. | Class A or large Class C motorhomes with substantial roof space and AC-ready wiring |
| 9 | Off-Grid Lifestyle System | 1,200 W | 600 Ah, 12 V LiFePO₄ ≈ 7.68 kWh nominal | 100–120 A MPPT | 3,000 W pure sine wave | 3.60–4.80 kWh | 72–96 sq. ft. | Extended boondocking with induction cooking, office equipment, refrigeration, and water systems |
| 10 | Solar-plus-Alternator System | 600 W roof array + vehicle charging | 300 Ah, 12 V LiFePO₄ ≈ 3.84 kWh nominal | 50–60 A MPPT + DC-to-DC charger | 2,000 W pure sine wave | 1.80–2.40 kWh solar plus driving input | 36–48 sq. ft. | RVs that frequently travel between shaded campsites or experience limited sunlight |
*Estimated daily energy assumes approximately four peak-sun hours, typical system losses, clean panels, and favorable orientation. Actual output varies with season, weather, shading, temperature, roof layout, and installation quality.
An RV solar power system should match your daily energy use, roof space, and travel habits. Fixed rooftop panels suit frequent travelers, while portable panels help when the vehicle stays under trees. List every load, including lights, refrigeration, fans, and device charging. Measure twice. A small energy audit prevents an expensive oversize system. For many RVs, a charge controller, lithium or lead-acid battery bank, inverter, and correctly sized wiring form the core setup.
Mount panels where vents and air conditioners cast minimal shade. Leave room for airflow and future maintenance. Route cables through a weatherproof roof entry, then seal the opening carefully with compatible sealant. I once underestimated cable distance; voltage loss became noticeable during cloudy afternoons. Cable size should reflect both current and run length. Install a fuse near the battery’s positive terminal, and keep connections tight, covered, and accessible. A multimeter can reveal reversed polarity before damage occurs.
Configure the controller for the battery’s exact chemistry and voltage. Set charging stages, temperature compensation, and low-voltage protection according to the battery manufacturer’s specifications. Shade matters. Test panel voltage, charging current, and inverter output separately under full sunlight. Do not connect an inverter directly to campground power wiring without approved transfer equipment. That shortcut can create serious hazards. Check the system after its first trip, because vibration may loosen terminals and reveal weaknesses that looked acceptable in the driveway.
Choosing among the top 10 solar power systems for RVs requires more than comparing wattage. Maintenance keeps performance predictable. Inspect roof-mounted panels every month for dust, leaves, cracked seals, and loose hardware. A soft brush and clean water usually work well. Avoid abrasive cleaners, which can scratch the glass and reduce output.
Check cable insulation near roof openings and storage compartments. Look for fading, heat damage, or sharp bends. Keep connectors dry and firmly joined. A properly rated fuse should protect each major circuit, while a reachable disconnect improves emergency safety. Batteries need ventilation when their design requires it, and terminals should remain clean and tight. Never cover a battery compartment with stored luggage. It can restrict airflow and hide warning signs.
Performance depends on small details. Park away from tall trees when possible, because partial shade can reduce production sharply. Track daily voltage and energy readings instead of trusting one afternoon’s result. Clean panels early in the morning, when their surfaces are cool. High temperatures can lower output, even under clear skies. I once blamed weak sunlight on a controller fault, but a loose terminal caused the problem. That mistake was avoidable. Leave space around the controller for airflow, and keep an inspection log with dates, readings, and repairs. A professional should test unfamiliar wiring or repeated battery faults. DIY confidence has limits.


For those larger-sized parts, or smaller quantity runs, we have 2 independent powder coat booths and ovens. The quality, durability and affordability of today’s powder coating finishes make this the process of choice for world-class companies.
Powder coating advantages over other forms of coating are many. Materials used in the Powder coating process can be metals and non-metals that come in a multitude of thicknesses, textures, colors, etc. Another of Powder coating’s biggest advantages over conventional coatings is its ability to create finishes in many different textures. Powder Coating Booths allow us the ability to apply these advantages to large products.
Tri-State Fabricators runs a full-service conveyor line for painting. Wet painting can provide protection or decoration to many different part styles. From start to finish, every project is easier to undergo random and point-based inspection by our skilled painting team.
Advantages to our Wet Paint Line are these lines start with product prep and ends with a thorough inspection of a high quality finished product. Our ability to complete large and small projects with a superior finish and doing so in a timely and economical fashion. This passes along the savings in production to our customers. When powder coating ins not an option, our Wet Paint Line gets the job done right the first time.
When the parts get big and heavy we roll-out our custom paint racks and oversize booth. By utilizing our partnerships with all the major paint brands, we can match virtually any color with wet paint.
The advantages of having access to a Wet Paint Booth are many. Large projects of many different shapes can be loaded into the booth. The Wet Paint Booth offers an environment that is much more controlled than a typical parts painting operation.
Not only are they used because of their controlled environment, but they’re are also advantageous when it comes to applying paint to parts that are needed in industries that require specialty coatings such as medical, aerospace, etc.
Our military forces have some very high standards when it comes to the finish of their vehicles and equipment. From the first pre-treatment step to final coat, it takes a great deal of knowledge and experience to protect the men and women of our armed forces. They deserve only the best, and Tri-State Fabricators provides it.
All of our processes are closely monitored by our staff and management teams. Both of which are highly trained in the processes of metal fabrication and finishing. Tri-State Fabricators’ goal is to always fully satisfy each and every customer, including the military. We will always put a 110% into what we do.
Abrasive media blasting is an excellent way to remove old paint, rust, and increase the paint/powder adhesion. Glass beads produce a much smoother and brighter finish than angular abrasives; leaving the part clean yet without any dimensional change. Chemically inert and environmentally friendly, we can recycle our beads approximately 30 times; making them a more preferred method of metal cleaning or surface finishing.
Advantages to Glass Bead Blasting are many. Glass bead blast media is used when a project is needing rough surfaces need to become smooth for applications of coatings such as paint. It is typically used to clean paint and rust from a product surface without deforming the surface it is being used on. Overall, compared to many other blasting media, Glass Bead Blasting is a very economical choice and those savings are always passed on to our customers.
Tri-State Fabricators utilize a zinc phosphate wash to clean and etch the material to ensure the best paint adhesion possible. The unique design of our 3-stage wash system does the work like a 5-stage. From Cleaning and rinsing to conversion coating and post-treatment, Our Part Washing process is a complete service and works throughout the fabrication service and the finishing service.
Along with the previously mentioned benefits, Curing is a vital chemical reaction that leaves the product finish hard and relatively safe from mild abrasion and aggressive corrosion. This process can be done in more than one way; ambient air-dry or in curing ovens at temps that exceed 240°.
From fixing paint mistakes (someone else’s of course) to simply cleaning our paint line hooks, our burn-off oven is put to good use. After a quick burn-off, a little clean up, and a fresh coat of paint, your parts will look better than new.
Why does our Burn-Off Oven work so well? Because super heating the air around parts turns the materials into ashes. From paint and powder coatings to rubber and machining oils, high temps do the job without degrading the integrity of the part.
Masking is a vital part of producing high quality products. We have die-cut masking patterns to protect machined surfaces as well as a wide range of plugs and caps to protect threaded holes and bolts. We provide permanent and temporary masking.
Masking allows the selected sections of a product to be protected from a fabrication or finishing service. This can be with both chemicals when etching and tapes, paints when only finishing just a section of the product. Masking is great in aiding the customization process of a project.
Screen printing is a photographic process that transfers artwork onto a porous nylon screen which allows colored ink to flow through the screen and be deposited on an aluminum or plastic component. We can generally have just about any design created onto a screen for your parts.
Some of the advantages of Screen Printing are, brand recognition for your business displaying on your products, assembly instructions, product warnings/hazards, etc. Tri-State Fabricators produces Screen Printing of the highest quality so you know it’s durable.
Metal Finishing is the art of treating the exterior portion of product, often metal but can also be made of other materials, so that the surface is clean and free of any debris. Then the process of applying coats or either paint of powder coat takes place. This coating process improves the quality of the product in both appearance and resistance to wear and corrosion.
Tri-State Fabricators, Inc., understands that a project typically isn’t complete until a high-quality finish has been added to your product. This is why our painting and powder coating teams continuously inspect the products throughout the Metal Finishing process.

