10 Tips for Choosing the Right Road Excavator
Choosing the right Road Excavator is a field decision, not merely a brochure comparison. Roads demand controlled digging, stable travel, accurate grading, and reliable performance beside traffic, utilities, and uneven shoulders. Oxford Economics’ Global Construction 2030 report projected strong long-term infrastructure growth, while Deloitte’s 2024 Engineering and Construction Industry Outlook highlighted labor shortages, cost pressure, and accelerating digital adoption. These pressures make machine selection more consequential. A poorly matched excavator can waste fuel, extend trenching time, and increase transport costs.
Industry analyst Mike Woof offers a useful principle: “Match the machine to the application.” His advice sounds simple. It is often ignored. This guide examines ten practical checks, including operating weight, tail swing, hydraulic flow, bucket capacity, ground pressure, visibility, fuel consumption, attachment compatibility, telematics, and dealer support. A 20-ton excavator may appear powerful, yet a compact model could work better near narrow lanes and buried services. Conversely, a small machine may struggle with hard shoulders, deep drainage channels, or heavy breakers.
Look closely at the worksite.
Measure the trench width. Confirm transport limits. Ask how many hours the machine will actually operate each day. Review service access, not just purchase price. Manufacturer productivity figures can help, but they rarely reflect muddy ground, inexperienced operators, or frequent repositioning. That is where judgment matters. No checklist is perfect. Real road projects are messier than spreadsheets, and the right Road Excavator must balance production, safety, comfort, ownership cost, and local service capability.
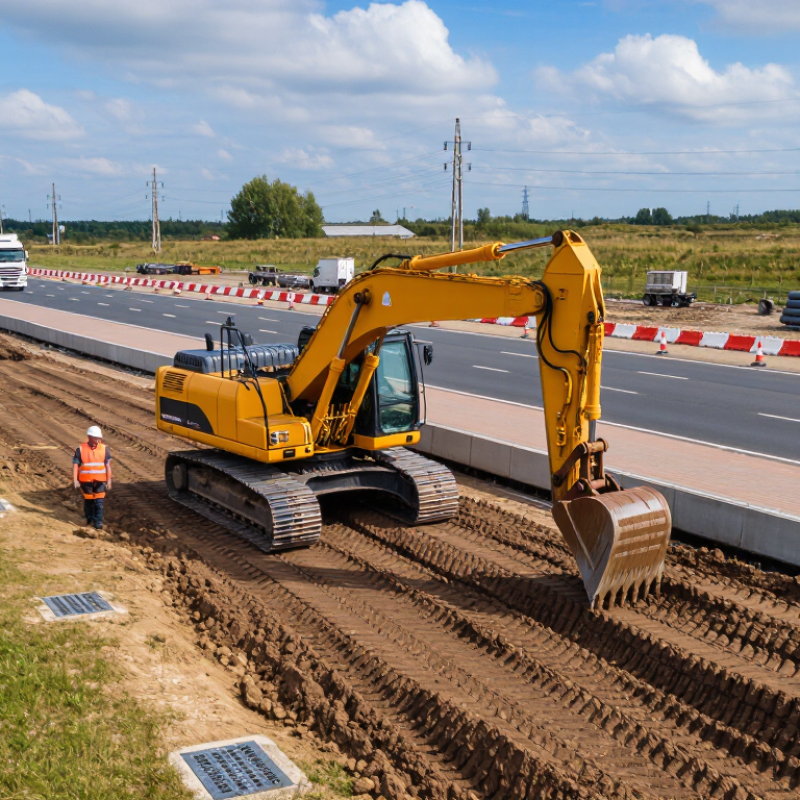
Define Road Excavator Classes by 10–25 Tonne Operating Weight
10 Tips for Choosing the Right Road Excavator
Define Road Excavator Classes by 10–25 Tonne Operating Weight
Tip one: define the operating weight before comparing machines. A 10–15 tonne excavator suits narrow road repairs and lighter drainage work. A 16–20 tonne class offers stronger lifting capacity and wider working range. Machines from 21–25 tonnes handle deeper cuts, heavy shoulders, and demanding ground conditions.
Tip two: check the complete operating weight, including the bucket, fluids, and selected equipment. Specifications can change with each configuration. Tip three: measure road width, turning space, and transport restrictions. A powerful excavator is useless if it blocks live traffic or cannot reach the work zone. Tip four: compare lifting charts at realistic working radii. Do not rely only on maximum lift figures.
Tip five: inspect boom reach and digging depth beside the actual trench design. Tip six: review hydraulic flow for breakers, compactors, or tilt buckets. Tip seven: assess stability on slopes and soft shoulders. I once saw a smaller machine work more safely than a heavier one because its setup matched the site. That detail is easy to miss. Tip eight: examine tire condition, steering response, and braking performance on paved routes. Tip nine: prioritize clear sight lines, mirrors, cameras, and practical access to controls. Tip ten: verify service records, inspection evidence, and parts support before purchase. Ask for measured performance, not impressive claims. A careful operator may still choose the 10–15 tonne class when access matters more than raw power. There is no perfect class.
10 Tips for Choosing the Right Road Excavator
Road Excavator Classes by 10–25 Tonne Operating Weight
Operating weight is a practical first filter when selecting an excavator for road construction. The chart groups machines into three commonly used classes: 10–15 tonnes, 15–20 tonnes, and 20–25 tonnes. Actual performance depends on configuration, attachment, undercarriage, ground conditions, and local transport regulations.
- Confirm the required operating-weight class before comparing machine specifications.
- Choose a 10–15 tonne excavator for utility trenches, urban maintenance, and restricted access areas.
- Choose a 15–20 tonne excavator for general road drainage, shoulder work, and medium-scale earthmoving.
- Choose a 20–25 tonne excavator for bulk excavation, deep cuts, slope work, and heavy road construction.
- Check transport weight with the selected bucket, coupler, hydraulic attachments, and counterweight installed.
- Match bucket capacity and breakout force to the soil type and expected production rate.
- Verify maximum digging depth and reach against trench, embankment, and drainage requirements.
- Compare hydraulic flow and pressure when using breakers, augers, cutters, or compactors.
- Review tail-swing dimensions, undercarriage width, and ground pressure for the work zone.
- Confirm fuel efficiency, service access, operator visibility, safety systems, and local road-transport limits.
Compare Hydraulic Flow, 20–40 MPa Pressure, and Attachment Demand
10 Tips for Choosing the Right Road Excavator
Hydraulic flow should match the attachment, not just the excavator’s advertised power. A breaker may need high flow for rapid impact, while a compactor often needs steadier delivery. The 2024 Off-Highway Research market review identifies hydraulic excavators as a major driver of global construction-equipment demand. That demand reflects versatility, but it also exposes poor attachment matching. Measure the attachment’s required litres per minute, then compare it with the machine’s usable auxiliary flow. Do not rely on maximum flow alone. It may only be available at a specific engine speed.
Pressure adds another layer. Many road excavators operate between 20 and 40 MPa, depending on size and circuit design. Higher pressure can produce stronger breakout force from smaller components. It can also increase heat, seal wear, and maintenance sensitivity. ISO 6015:2023 provides test methods for excavator lifting performance, but field performance still depends on oil temperature, hose condition, and operator control. A pressure gauge helps.
Check the attachment manual carefully. Then inspect the hydraulic diagram.
For example, a 30 MPa attachment connected to a 20 MPa circuit may work slowly or fail under load. A 40 MPa system can be excessive for light trenching, especially when the road surface limits stability. The 2024 EquipmentWatch market report links equipment value closely with condition and utilization, a reminder that hydraulic abuse can reduce resale value. My own caution is simple: calculations can look perfect, yet a neglected return filter can ruin the result. Depth, cycle time, temperature, and service access deserve equal attention.
10 Tips for Choosing the Right Road Excavator - Compare Hydraulic Flow, 20–40 MPa Pressure, and Attachment Demand
Planning reference: Hydraulic pressure and flow ranges are typical industry values for road-excavation equipment, not universal specifications. Always compare the attachment manufacturer’s required flow, pressure, return-line restrictions, hydraulic oil temperature limits, and duty cycle with the excavator’s actual technical data.
Verify Reach, Digging Depth, and Lift Capacity Under ISO 6015 Tests
Choosing the right road excavator starts with the working envelope, not the brochure headline. I measure required reach, digging depth, dumping height, and tail swing at the actual site. A long arm may reach farther, but it can reduce breakout force and stability. Check the boom, stick, bucket, and counterweight combination together.
ISO 6015 mainly defines methods for measuring hydraulic excavator lift capacity. It does not replace field verification of reach or digging depth. Ask for test data showing the machine configuration, load radius, boom position, and supporting surface. Compare rated capacity at both the front and side. Small radius changes can produce large lifting differences. Confirm whether the figures include the bucket, quick coupler, and lifting accessories. They often do not.
I once trusted a maximum-depth figure and overlooked the trench slope. The machine could reach the number, but not safely. My earlier checklist also missed hydraulic temperature and tire or track condition. Do not repeat that mistake. Check hydraulic pressure, counterweight options, ground bearing conditions, and the operator’s visibility. Then compare the measured working range with the planned trench profile. Leave a practical margin below the ISO-tested lift limit, especially when the load moves over uneven ground. Request dated test records and clear measurement units. Vague capacity claims deserve a second look.
Assess Tires, Axles, and 360° Mobility for Roadside Worksites
Choosing a road excavator begins with the ground beneath it, not the brochure. On roadside projects, tires must suit asphalt, gravel, mud, and broken shoulders. Inspect tread depth, sidewall cuts, and pressure before each shift. Incorrect pressure can reduce stability and increase tire wear.
Axles deserve equal attention. Strong axles support repeated travel, uneven loads, and frequent braking. Check for oil leaks, unusual heat, and loose components after operating on rough surfaces. A damaged axle may not show clear symptoms immediately. That is easy to miss.
360° mobility matters when traffic, barriers, and narrow lanes limit working space. Test steering response, articulation, turning radius, and travel speed in a controlled area. The excavator should reposition without repeated shuttling or crossing fresh pavement. Four-wheel steering can improve maneuverability, but it may feel less predictable to inexperienced operators. Practice helps.
Measure clearance around cones, guardrails, drainage channels, and parked service vehicles. Confirm that the upper structure can rotate without striking people or equipment. Use mirrors, cameras, and a spotter where visibility remains poor. Technology supports judgment; it does not replace it.
I once underestimated a soft shoulder. The machine moved, but the tires sank several centimeters. That mistake changed my inspection routine. Road conditions can shift hourly, so record tire pressure, axle observations, and steering behavior during the workday. Small notes often reveal larger maintenance problems.





