


7 Tips for Choosing Galvanized Self Drilling Screws

Choosing Galvanized Self Drilling Screws is not just a matter of picking a length from a shelf. The right fastener must match the metal thickness, coating, joint design, and conditions on site. A screw that looks suitable can still struggle to drill cleanly or leave a loose connection. Small details matter.

For transparency, the named specialist and quotation below are illustrative, not a verified real-world attribution: “A dependable screw is chosen for the whole joint, not just the hole it makes,” says fictional fastening adviser Evan Cole. Use that principle as a practical reminder, not as a substitute for manufacturer data. Check the screw’s stated drilling capacity against the combined thickness of the materials. Confirm that its head style fits the application and that the coating suits the exposure conditions. For dissimilar metals or corrosive environments, seek product-specific compatibility guidance.

Installation deserves equal attention. Keep the driver aligned, use a suitable bit, and follow the manufacturer’s recommended speed and torque. Stop if the screw spins, binds, or fails to seat; forcing it may damage the coating or weaken the connection. It happens.

This guide’s seven tips will help compare point styles, lengths, coatings, head types, and installation requirements. They also highlight a common oversight: the best choice depends on the complete assembly, not one product feature. When specifications are unclear, verify them with the screw manufacturer or a qualified fastener professional before installation.
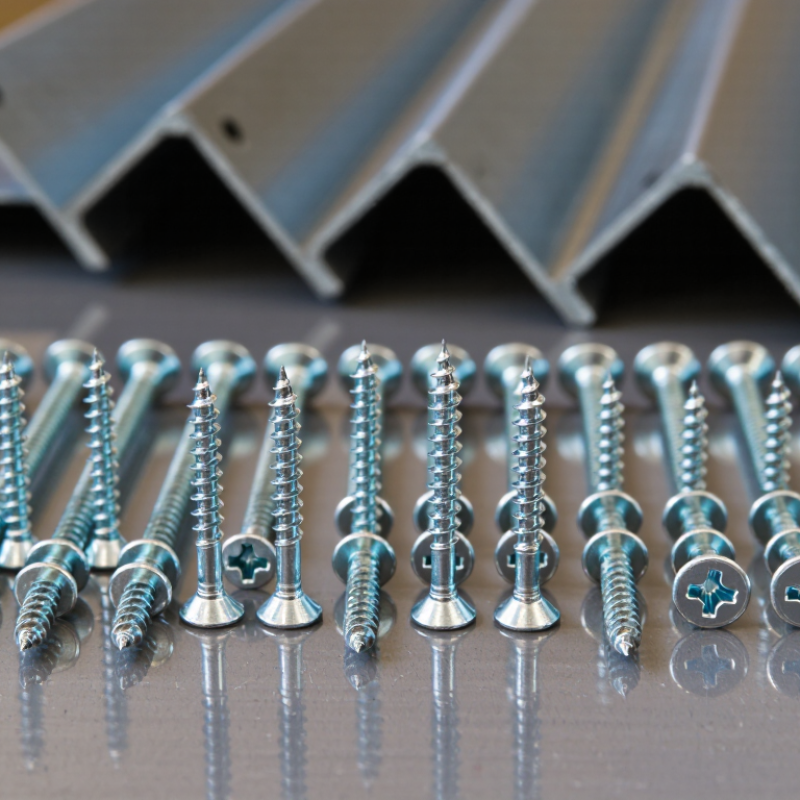
7 Tips for Choosing Galvanized Self Drilling Screws

Understand Galvanized Coatings and Corrosion Protection

“Galvanized” describes a zinc coating, not a guaranteed service life. Zinc protects steel by forming a barrier and, when the coating is damaged, can corrode preferentially to the underlying steel. The protection still has limits. Salt spray, standing water, industrial pollutants, and frequent wet-dry cycles can consume zinc faster than sheltered, dry conditions.

Check the coating type and its stated thickness, rather than relying on the word galvanized alone. Some self-drilling screws use electroplated zinc; others have thicker coatings intended for harsher exposure. Match the coating specification to the project environment, and confirm that it is suitable for the materials being joined. Dissimilar metals can increase corrosion risk when moisture creates a conductive path between them. Small details matter.

Installation can affect protection, too. Use the correct driver and speed so the head and coating are not damaged, and avoid forcing the screw at an angle. Inspect cut or scratched areas, especially around exposed edges, where corrosion may begin sooner. I’m tempted to treat a thicker coating as the simple answer, but that can miss the effects of poor drainage or incompatible materials. Ask for coating documentation when the exposure is demanding, and follow the screw maker’s installation guidance.


Match Screw Size and Drill Point to the Materials

A galvanized self-drilling screw must suit both the material thickness and the drill point’s capacity. Check the combined thickness of every layer being fastened, not just the outer sheet. The screw should pass through the stack and leave enough thread engaged in the supporting material. Too long, and its tip may protrude where it can snag; too short, and the joint may not hold securely.

Match the drill point to the material’s thickness and strength. Thin sheet metal needs a point designed for lighter-gauge stock; an oversized point can leave a loose or ragged hole. Thicker steel calls for a point with enough drilling capacity, as well as a screw diameter suited to the load. Don’t force it. If the screw stalls, check the point rating and your setup instead of leaning harder on the driver.

For layered assemblies, test a sample on scrap of the same thickness. Watch whether the screw starts cleanly, pulls the sheets together, and seats without stripping.

Charts are useful, but real material can vary a little. I’d rather pause and check than trust a guess.

Select a Head and Drive Style for the Installation

When choosing galvanized self-drilling screws, match the head to the surface and the tool access. A hex washer head offers a broad bearing face and works well where a visible, raised head is acceptable. Its shape also pairs with a nut driver, which can feel steadier than a hand screwdriver. For a flush finish, consider a flat head, but only when the material and installation are suited to countersinking. A pan head sits above the surface and can be useful when a flat head is unnecessary.

Tip: Check the drive before ordering. Phillips, square, and hex drives need matching bits or sockets; a poor fit can cause slipping and damage the screw’s coating. Try one screw in a sample piece first. It is a small step, but it can reveal access or fit problems early.

Keep the tool aligned with the screw axis, and use controlled pressure as the drill point cuts. Stop when the head seats firmly; overdriving may deform the surface or strip the drive. In a tight corner, a hex head may be awkward, even if it suits the job elsewhere. I would recheck the actual installation space rather than assume the drawing tells the whole story.

Check Load Requirements and Environmental Exposure

Start with the load path, not the screw-box label. A self-drilling screw holding thin sheet metal faces different forces from one anchoring a bracket into timber. Check the required withdrawal, pull-over, and shear capacities for the actual sheet thickness and supporting material. AISI S100 provides design provisions for cold-formed steel connections, but a screw’s capacity depends on the tested assembly, edge distance, and installation. Use test data that matches your materials; a generic “heavy duty” rating may not.

Then assess where the fastener will live. A roof near a salt spray, a damp greenhouse, and a dry indoor wall are not equivalent environments. ISO 9223:2012 classifies first-year atmospheric zinc corrosion rates from 0.1 micrometres or less in category C1 to 4.2–8.4 micrometres in C5. These figures describe atmospheric exposure, not a screw’s guaranteed service life. That distinction matters. Check the coating type and thickness, and confirm compatibility with nearby metals and treated materials. A small scratch at the washer can become a corrosion starting point. I would still treat exposure estimates cautiously: sheltered joints can stay wet longer than expected, and installation damage is easy to miss.

7 Tips for Choosing Galvanized Self Drilling Screws - Check Load Requirements and Environmental Exposure

Tip What to Check Practical Guidance Why It Matters
1 Load requirements Determine the expected tension, shear, or combined loads for each connection. Use published, application-specific load data for the exact screw, material, and installation conditions; do not assume a generic capacity. Fastener capacity depends on factors such as screw diameter, embedment, connected materials, edge distance, and load direction.
2 Base material and thickness Identify the material and thickness of every layer being fastened. Confirm that the screw’s drilling-capacity range covers the combined steel thickness and that its thread engagement suits the supporting material. A screw that cannot drill through the stack or engage the base material correctly may produce a weak or incomplete connection.
3 Drill point and screw length Match the drill-point capacity to the total thickness of the metal being drilled. Choose a length that allows the required thread engagement after passing through the attached materials, following the screw maker’s specifications. Drill points and lengths are designed for particular material thicknesses; using the wrong combination can lead to poor drilling or insufficient engagement.
4 Exposure and corrosion protection Assess whether the installation is dry and sheltered, regularly damp, exposed to weather, or near salt or chemicals. Select a coating system specifically rated for the actual exposure; ordinary zinc coatings may not provide adequate protection in severe or marine conditions. Corrosion resistance varies with coating type, coating thickness, moisture, pollutants, and maintenance. “Galvanized” alone does not define service life.
5 Contact with other metals Check for contact with dissimilar metals, including aluminum and stainless steel, especially where rainwater or condensation can create an electrical path. Use compatible materials or an appropriate isolation detail where needed. In wet conditions, dissimilar-metal contact can accelerate corrosion of the less noble metal or its coating.
6 Head style, washer, and sealing Choose a head and, where required, a bonded sealing washer suited to the joint surface and exposure. Follow the specified installation method so the washer seals without being crushed, distorted, or left loose. Head geometry affects bearing and tool access; an incorrectly installed washer may not seal reliably and can damage the coating or panel.
7 Installation and inspection Use the correct driver and installation settings. Keep the screw aligned, avoid overdriving, and inspect sample connections for complete seating, damaged coatings, and proper engagement. Follow project requirements for spacing and edge distances. Overdriving, underdriving, misalignment, or damaged coatings can reduce connection performance and shorten corrosion-protection life.

Verify Compatibility, Quality, and Installation Guidelines

Compatibility begins with the materials. Tip: Match screw metal and coating to the base material; dissimilar metals can accelerate corrosion when moisture bridges them. Tip: Check the panel thickness, drill-point capacity, and thread design against the fastener maker’s specifications. Tip: Confirm the coating suits the exposure, especially near salt spray or persistent condensation. NACE International’s 2016 IMPACT study estimated corrosion costs at US$2.5 trillion in 2013, or about 3.4% of global GDP. It also reported that applying corrosion-control practices could reduce costs by 15–35%. That broad estimate is not a screw-life guarantee, but it shows why coating choice matters.

Tip: Review the applicable product data and test documentation; “galvanized” alone does not identify coating thickness or process. Tip: Inspect samples for damaged heads, uneven coating, or exposed steel. Small flaws count. Tip: Use the specified driver speed and pressure, and stop when the washer seats. Overdriving can strip threads or damage the protective layer. A slightly tilted screw can also leave a leak path.

Tip: Follow the installation guide for pilot holes, spacing, and edge distance; requirements vary by material and fastener design. Keep screws dry and separated from incompatible metal debris during storage. After installation, check a few fasteners for firm seating and coating damage. Even careful crews can miss one loose screw, so a quick visual check is worthwhile.

Powder Coat Booths

For those larger-sized parts, or smaller quantity runs, we have 2 independent powder coat booths and ovens. The quality, durability and affordability of today’s powder coating finishes make this the process of choice for world-class companies.

Powder coating advantages over other forms of coating are many. Materials used in the Powder coating process can be metals and non-metals that come in a multitude of thicknesses, textures, colors, etc. Another of Powder coating’s biggest advantages over conventional coatings is its ability to create finishes in many different textures. Powder Coating Booths allow us the ability to apply these advantages to large products.

Wet Paint Line

Tri-State Fabricators runs a full-service conveyor line for painting. Wet painting can provide protection or decoration to many different part styles. From start to finish, every project is easier to undergo random and point-based inspection by our skilled painting team.

Advantages to our Wet Paint Line are these lines start with product prep and ends with a thorough inspection of a high quality finished product. Our ability to complete large and small projects with a superior finish and doing so in a timely and economical fashion. This passes along the savings in production to our customers. When powder coating ins not an option, our Wet Paint Line gets the job done right the first time.

Wet Paint Booths

When the parts get big and heavy we roll-out our custom paint racks and oversize booth. By utilizing our partnerships with all the major paint brands, we can match virtually any color with wet paint.

The advantages of having access to a Wet Paint Booth are many. Large projects of many different shapes can be loaded into the booth. The Wet Paint Booth offers an environment that is much more controlled than a typical parts painting operation.

Not only are they used because of their controlled environment, but they’re are also advantageous when it comes to applying paint to parts that are needed in industries that require specialty coatings such as medical, aerospace, etc.

Military CARC

Our military forces have some very high standards when it comes to the finish of their vehicles and equipment. From the first pre-treatment step to final coat, it takes a great deal of knowledge and experience to protect the men and women of our armed forces. They deserve only the best, and Tri-State Fabricators provides it.

All of our processes are closely monitored by our staff and management teams. Both of which are highly trained in the processes of metal fabrication and finishing. Tri-State Fabricators’ goal is to always fully satisfy each and every customer, including the military. We will always put a 110% into what we do.

Glass-Bead Blasting

Abrasive media blasting is an excellent way to remove old paint, rust, and increase the paint/powder adhesion. Glass beads produce a much smoother and brighter finish than angular abrasives; leaving the part clean yet without any dimensional change. Chemically inert and environmentally friendly, we can recycle our beads approximately 30 times; making them a more preferred method of metal cleaning or surface finishing.

Advantages to Glass Bead Blasting are many. Glass bead blast media is used when a project is needing rough surfaces need to become smooth for applications of coatings such as paint. It is typically used to clean paint and rust from a product surface without deforming the surface it is being used on. Overall, compared to many other blasting media, Glass Bead Blasting is a very economical choice and those savings are always passed on to our customers.

Part Washing

Tri-State Fabricators utilize a zinc phosphate wash to clean and etch the material to ensure the best paint adhesion possible. The unique design of our 3-stage wash system does the work like a 5-stage. From Cleaning and rinsing to conversion coating and post-treatment, Our Part Washing process is a complete service and works throughout the fabrication service and the finishing service.

Along with the previously mentioned benefits, Curing is a vital chemical reaction that leaves the product finish hard and relatively safe from mild abrasion and aggressive corrosion. This process can be done in more than one way; ambient air-dry or in curing ovens at temps that exceed 240°.

Burn-Off Oven

From fixing paint mistakes (someone else’s of course) to simply cleaning our paint line hooks, our burn-off oven is put to good use. After a quick burn-off, a little clean up, and a fresh coat of paint, your parts will look better than new.

Why does our Burn-Off Oven work so well? Because super heating the air around parts turns the materials into ashes. From paint and powder coatings to rubber and machining oils, high temps do the job without degrading the integrity of the part.

Masking

Masking is a vital part of producing high quality products. We have die-cut masking patterns to protect machined surfaces as well as a wide range of plugs and caps to protect threaded holes and bolts. We provide permanent and temporary masking.

Masking allows the selected sections of a product to be protected from a fabrication or finishing service. This can be with both chemicals when etching and tapes, paints when only finishing just a section of the product. Masking is great in aiding the customization process of a project.

Screen Printing

Screen printing is a photographic process that transfers artwork onto a porous nylon screen which allows colored ink to flow through the screen and be deposited on an aluminum or plastic component. We can generally have just about any design created onto a screen for your parts.

Some of the advantages of Screen Printing are, brand recognition for your business displaying on your products, assembly instructions, product warnings/hazards, etc. Tri-State Fabricators produces Screen Printing of the highest quality so you know it’s durable.

Metal Finishing

Metal Finishing is the art of treating the exterior portion of product, often metal but can also be made of other materials, so that the surface is clean and free of any debris. Then the process of applying coats or either paint of powder coat takes place. This coating process improves the quality of the product in both appearance and resistance to wear and corrosion.

Tri-State Fabricators, Inc., understands that a project typically isn’t complete until a high-quality finish has been added to your product. This is why our painting and powder coating teams continuously inspect the products throughout the Metal Finishing process.
