


How to Install a Metal Sandwich Panel Roof?

A Metal Sandwich Panel Roof can be installed efficiently, but the finished roof depends on careful planning as much as fast fastening. Each panel combines metal skins with an insulating core, so handling, joint alignment, and screw placement all affect performance. A crooked first panel can leave gaps at the eaves or make later seams harder to close. Small details matter.

This guide explains how to prepare the roof structure, position panels, secure fasteners, and finish edges and ridge details. It also covers practical checks, such as confirming the support spacing, checking panel direction, and inspecting washers for even compression. Follow the panel manufacturer’s installation instructions and use fasteners specified for the roof system; details can vary by panel design and climate. Work at height requires suitable fall protection and trained handling, especially when wind catches a long panel. Do not rush the first row. That is easy to regret.

Before installation, verify that the framing is sound and the roof dimensions match the panel layout. Keep panels dry and protected from damage, and avoid cutting methods that can harm protective coatings. If the structure, loads, or connections are uncertain, ask a qualified building professional to review them. A neat-looking roof is not necessarily a reliable one. The sections ahead provide a clear sequence while pointing out common mistakes and the checks that help prevent leaks, loose fixings, and unnecessary rework.
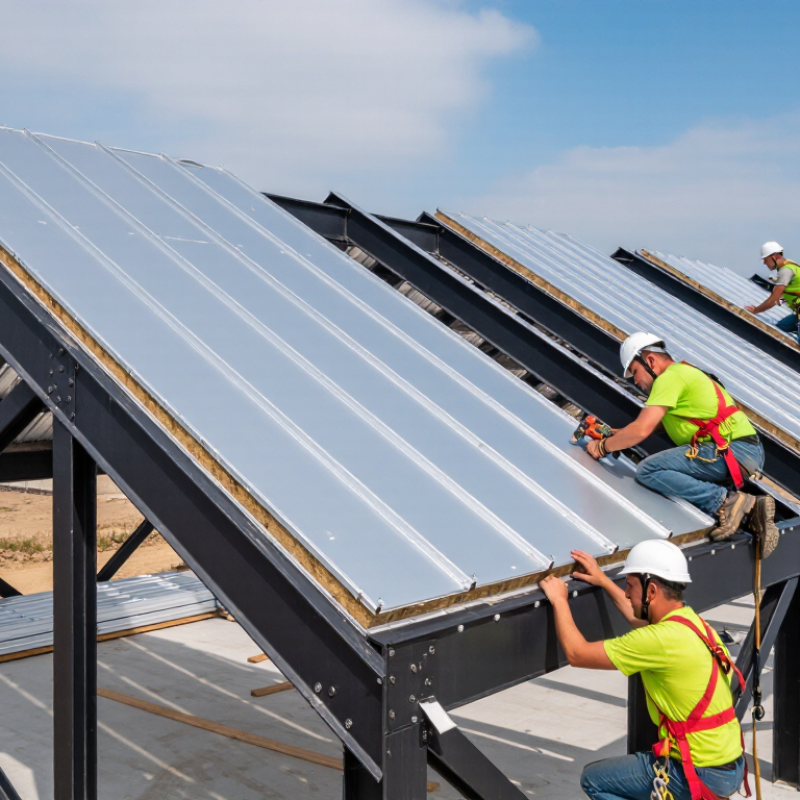
How to Install a Metal Sandwich Panel Roof?

Assess Roof Structure, Panel Specifications, and Installation Requirements

Before ordering metal sandwich panels, inspect the roof framing, not just the visible deck. Measure purlin spacing and check for corrosion, loose connections, sagging, and uneven bearing surfaces. Confirm that the structure can carry panel dead load plus local snow, wind, and maintenance loads. ASCE/SEI 7-22 provides methods for determining design wind and snow loads; project-specific values still depend on location and building geometry. Small gaps matter. A weak purlin connection can undermine an otherwise suitable panel system.

Compare panel span tables with the measured support spacing, then confirm panel thickness, core type, joint design, fastener pattern, and tested uplift performance. Review fire and condensation requirements too; a panel’s insulation value alone does not establish suitability. The U.S. Department of Energy’s Energy Saver guidance notes that reflective cool roofs can remain up to 50°F cooler than conventional roofs under comparable sunny conditions. That is a surface-temperature difference, not a promised indoor temperature reduction. During installation, keep panel ends square, protect cut edges, and seat washers without crushing them. Measure twice. I would still verify every detail against the project drawings and panel installation instructions, since field conditions rarely match a neat span-table example exactly.


Prepare the Roof Deck, Tools, Safety Gear, and Panel Layout

Before lifting panels, inspect the roof deck for rot, loose fasteners, uneven joints, and standing water. The surface must be sound, clean, and dry. Confirm that framing spacing, roof slope, and support capacity match the panel supplier’s installation details. Repair weak areas before covering them; panels can hide problems, not fix them.

Gather a tape measure, chalk line, drill with suitable bits, snips, and the specified fasteners. Wear cut-resistant gloves, eye protection, sturdy footwear, and fall-protection equipment suited to the site. Secure ladders and keep tools from sliding off the roof. Wind changes everything. Avoid handling large panels in gusts, and never step on unsupported edges or skylights. Set panels down on stable supports.

Plan the layout from the eave toward the ridge, using the approved panel direction and side-lap detail. Measure the roof width and mark reference lines so the first panel starts square; a small error can grow across the roof. Check overhangs, valleys, penetrations, and ridge details before fastening. I still remeasure awkward roof sections, because a quick estimate has fooled more than one careful installer. Verify fastener locations and sealing requirements against the project documents; details vary by panel system.

Position and Fasten the Metal Sandwich Roof Panels

How to Install a Metal Sandwich Panel Roof?

Position and Fasten the Metal Sandwich Roof Panels

Set the first panel square to the eave and check its alignment against the roof edge. A small error here can widen across the roof. Confirm that panel ends land on the specified supports, then engage the side joint without forcing the foam core. Follow the project drawings for fastener type, location, and spacing; wind-uplift demands vary by building and roof zone. Drive screws perpendicular to the panel, compressing the sealing washer evenly without crushing it.

Thermal movement matters. The Metal Construction Association’s technical guidance gives carbon steel a thermal expansion coefficient of about 6.5 × 10⁻⁶ inches per inch per °F. A 30-foot panel exposed to a 100°F temperature change can move roughly 0.23 inches. Allow for movement as the panel system requires, especially at fixed points and end laps. Check the fastener pattern before covering it. It is easy to miss one.

Tips: Keep panels supported while positioning them, and remove metal shavings promptly to prevent staining. Use the specified fasteners and tools. If a panel sits unevenly, pause and correct the alignment rather than pulling it into place with screws.

Seal Panel Joints and Install Ridge, Eave, and Edge Flashings

How to Install a Metal Sandwich Panel Roof?

Start with clean, dry panel edges. Lay continuous butyl tape in the side-lap channel, following the panel system’s installation details. Keep the tape unbroken at end laps and around approved fastener locations. Press adjoining panels together evenly, then install screws perpendicular to the roof surface. Compress each washer enough to seal, but do not crush it. Check twice. A neat bead can look convincing, yet it cannot correct a poorly aligned joint.

At the ridge, fit profile-matched closure strips beneath the ridge flashing. They help block wind-driven rain and pests; preserve ventilation only where the roof design calls for it. Secure the cap with the specified fasteners and seal its laps without blocking drainage paths. At the eaves, align the flashing so water sheds clear of the panel core and into the intended drainage area. Water finds gaps.

Cover exposed edges with suitable edge trim, and protect any cut panel core using the system’s recommended closure or coating. Use sealants compatible with the panel facing and insulation. Too much sealant can trap water, while too little leaves a path for leaks. Inspect joints and flashing ends from close range, especially after tightening fasteners. Follow the panel maker’s details and use fall protection while working on the roof.

How to Install a Metal Sandwich Panel Roof? - Seal Panel Joints and Install Ridge, Eave, and Edge Flashings

Installation stage Work to complete Key installation guidance What to check
1. Prepare the roof Review the approved roof layout, structural supports, panel direction, and project-specific installation instructions. Confirm that the supporting structure is sound, aligned, and suitable for the panel system. Use fall protection and follow site safety requirements. Support locations, roof dimensions, slope, openings, and required safety measures are verified before work begins.
2. Position the eave flashing Install the eave trim at the lower roof edge before placing the panels, where the roof detail calls for it. Align the flashing to the roof edge and provide the specified overlap and water-shedding direction. Use compatible fasteners and sealant where required by the detail. The trim is straight, securely attached, and arranged so water drains outward rather than behind the flashing.
3. Set the first panel Place the first panel square to the eave and align it with the roof layout. Check the panel orientation and bearing before fastening. Install fasteners at the locations and spacing specified for the panel system and supporting structure. The panel is square, fully supported, and fastened without overdriving or distorting the facing sheets.
4. Install adjoining panels Place each panel alongside the previous one and engage the side joint according to the system design. Keep the joint fully engaged and panels aligned. Apply joint sealant or install a sealing strip only where specified; do not block drainage paths or leave gaps in the joint. Side joints are continuous and closed, panel edges are aligned, and no core material is exposed.
5. Fasten and seal panel joints Complete the specified fastening pattern and seal joint locations that are identified in the approved details. Use compatible fasteners, washers, and sealants. Follow the required fastener type, placement, and spacing; sealant requirements vary by panel design and exposure. Fasteners are secure and correctly seated. Sealant is continuous where required, with no missed gaps or obstructed drainage channels.
6. Fit ridge closure and flashing Install the specified ridge closures, ventilation components, and ridge flashing at the roof peak. Use the correct closure profile for the panel ribs. Position closures and sealant as detailed, then overlap and fasten ridge flashing to shed water away from the ridge joint. Closures match the panel profile, the ridge is weather-protected, and any designed ventilation route remains open.
7. Install rake and edge flashing Fit rake or verge flashing along sloping roof edges and complete other perimeter trims shown in the project details. Lap adjoining pieces in the direction of water flow and use the specified closures, fasteners, and sealant. Detail corners and transitions to prevent water entry. Edges are covered, overlaps are secure, and flashing does not interfere with panel movement or drainage.
8. Inspect and clean the roof Inspect completed joints, flashings, fasteners, and roof penetrations; remove metal swarf and installation debris. Repair damaged coatings using an approved method. Avoid abrasive cleaning or incompatible chemicals, and do not leave metal cuttings on the roof surface. No loose fasteners, open joints, exposed cores, debris, or visible gaps remain; all details match the approved project documentation.

Note: Panel profiles, fastening patterns, sealant locations, flashing overlaps, and ventilation details differ by system and project. Follow the applicable approved drawings, installation instructions, and local building requirements.

Inspect Fasteners, Seals, Alignment, and Weatherproofing

How to Install a Metal Sandwich Panel Roof?

Inspect Fasteners, Seals, Alignment, and Weatherproofing

A sound roof starts with the details at every joint. Check that panel edges sit square, side laps close evenly, and end laps follow the project drawings. Look along each fastener row: screws should be straight, seated firmly, and fitted with intact washers. Overdriving can crush the washer; a loose screw can leave a path for water. There is no universal screw pattern. ASCE 7 wind design uses three-second gust speeds, while site exposure affects the pressures the roof must resist. Match fastener spacing to the engineered assembly, not guesswork.

Inspect sealant before panels hide the joint. It should form a continuous bead, without gaps, dirt, or stretched sections. Check closures at eaves, ridges, and penetrations, where wind-driven rain can find small openings. The U.S. Department of Energy notes that cool roof surfaces can be up to 50°F cooler than conventional roofs under sunny conditions. That figure is not a panel movement allowance, but it highlights why thermal conditions matter. Leave movement details to the panel specification. After installation, inspect in daylight and again after rain. Even careful checks can miss a crooked lap or a pinhole. That part deserves a second look.

Powder Coat Booths

For those larger-sized parts, or smaller quantity runs, we have 2 independent powder coat booths and ovens. The quality, durability and affordability of today’s powder coating finishes make this the process of choice for world-class companies.

Powder coating advantages over other forms of coating are many. Materials used in the Powder coating process can be metals and non-metals that come in a multitude of thicknesses, textures, colors, etc. Another of Powder coating’s biggest advantages over conventional coatings is its ability to create finishes in many different textures. Powder Coating Booths allow us the ability to apply these advantages to large products.

Wet Paint Line

Tri-State Fabricators runs a full-service conveyor line for painting. Wet painting can provide protection or decoration to many different part styles. From start to finish, every project is easier to undergo random and point-based inspection by our skilled painting team.

Advantages to our Wet Paint Line are these lines start with product prep and ends with a thorough inspection of a high quality finished product. Our ability to complete large and small projects with a superior finish and doing so in a timely and economical fashion. This passes along the savings in production to our customers. When powder coating ins not an option, our Wet Paint Line gets the job done right the first time.

Wet Paint Booths

When the parts get big and heavy we roll-out our custom paint racks and oversize booth. By utilizing our partnerships with all the major paint brands, we can match virtually any color with wet paint.

The advantages of having access to a Wet Paint Booth are many. Large projects of many different shapes can be loaded into the booth. The Wet Paint Booth offers an environment that is much more controlled than a typical parts painting operation.

Not only are they used because of their controlled environment, but they’re are also advantageous when it comes to applying paint to parts that are needed in industries that require specialty coatings such as medical, aerospace, etc.

Military CARC

Our military forces have some very high standards when it comes to the finish of their vehicles and equipment. From the first pre-treatment step to final coat, it takes a great deal of knowledge and experience to protect the men and women of our armed forces. They deserve only the best, and Tri-State Fabricators provides it.

All of our processes are closely monitored by our staff and management teams. Both of which are highly trained in the processes of metal fabrication and finishing. Tri-State Fabricators’ goal is to always fully satisfy each and every customer, including the military. We will always put a 110% into what we do.

Glass-Bead Blasting

Abrasive media blasting is an excellent way to remove old paint, rust, and increase the paint/powder adhesion. Glass beads produce a much smoother and brighter finish than angular abrasives; leaving the part clean yet without any dimensional change. Chemically inert and environmentally friendly, we can recycle our beads approximately 30 times; making them a more preferred method of metal cleaning or surface finishing.

Advantages to Glass Bead Blasting are many. Glass bead blast media is used when a project is needing rough surfaces need to become smooth for applications of coatings such as paint. It is typically used to clean paint and rust from a product surface without deforming the surface it is being used on. Overall, compared to many other blasting media, Glass Bead Blasting is a very economical choice and those savings are always passed on to our customers.

Part Washing

Tri-State Fabricators utilize a zinc phosphate wash to clean and etch the material to ensure the best paint adhesion possible. The unique design of our 3-stage wash system does the work like a 5-stage. From Cleaning and rinsing to conversion coating and post-treatment, Our Part Washing process is a complete service and works throughout the fabrication service and the finishing service.

Along with the previously mentioned benefits, Curing is a vital chemical reaction that leaves the product finish hard and relatively safe from mild abrasion and aggressive corrosion. This process can be done in more than one way; ambient air-dry or in curing ovens at temps that exceed 240°.

Burn-Off Oven

From fixing paint mistakes (someone else’s of course) to simply cleaning our paint line hooks, our burn-off oven is put to good use. After a quick burn-off, a little clean up, and a fresh coat of paint, your parts will look better than new.

Why does our Burn-Off Oven work so well? Because super heating the air around parts turns the materials into ashes. From paint and powder coatings to rubber and machining oils, high temps do the job without degrading the integrity of the part.

Masking

Masking is a vital part of producing high quality products. We have die-cut masking patterns to protect machined surfaces as well as a wide range of plugs and caps to protect threaded holes and bolts. We provide permanent and temporary masking.

Masking allows the selected sections of a product to be protected from a fabrication or finishing service. This can be with both chemicals when etching and tapes, paints when only finishing just a section of the product. Masking is great in aiding the customization process of a project.

Screen Printing

Screen printing is a photographic process that transfers artwork onto a porous nylon screen which allows colored ink to flow through the screen and be deposited on an aluminum or plastic component. We can generally have just about any design created onto a screen for your parts.

Some of the advantages of Screen Printing are, brand recognition for your business displaying on your products, assembly instructions, product warnings/hazards, etc. Tri-State Fabricators produces Screen Printing of the highest quality so you know it’s durable.

Metal Finishing

Metal Finishing is the art of treating the exterior portion of product, often metal but can also be made of other materials, so that the surface is clean and free of any debris. Then the process of applying coats or either paint of powder coat takes place. This coating process improves the quality of the product in both appearance and resistance to wear and corrosion.

Tri-State Fabricators, Inc., understands that a project typically isn’t complete until a high-quality finish has been added to your product. This is why our painting and powder coating teams continuously inspect the products throughout the Metal Finishing process.
