


How to Choose the Right Low Voltage Fuse?

Choosing the right Low Voltage Fuse is a practical safety decision, not just a matter of matching an ampere rating. A fuse must suit the circuit’s operating voltage, normal load current, and available fault current. Its interrupting rating must be adequate for the fault current at its installation point. A mismatch can leave equipment poorly protected. Or cause unnecessary interruptions.

Start with the equipment nameplate and circuit details. Then compare them with the fuse manufacturer’s data sheet. Check the fuse class, time-current behavior, and physical dimensions. A motor circuit, for example, may experience brief starting currents that an unsuitable fuse cannot tolerate. A control circuit may need a different response. Small details matter. Also consider ambient temperature, enclosure conditions, and coordination with upstream and downstream protective devices. These factors can affect performance, even when the printed current rating seems correct.

There is no universal “best” fuse. Selection depends on the specific application and the protection goal. Standards and product classifications vary by region, so verify that the device is approved for the intended equipment and installation. When fault-current data or coordination requirements are uncertain, consult the equipment documentation and a qualified electrical professional. That check may feel slow. It is still worthwhile. This guide explains the key ratings and application questions to review, while recognizing that real installations can have details a general guide cannot see.
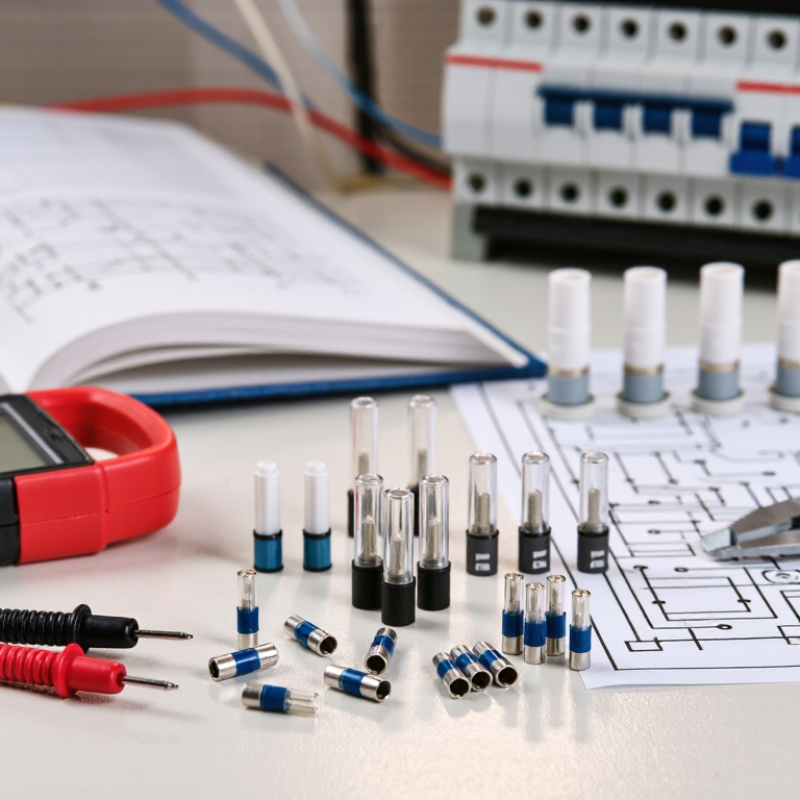
How to Choose the Right Low Voltage Fuse?

Define the Circuit and Its Protection Requirements

How to Choose the Right Low Voltage Fuse?

Define the Circuit and Its Protection Requirements

Start with the circuit. Record its nominal voltage, normal operating current, and maximum available fault current. Check the conductor size, insulation rating, and connection method. A fuse must protect the wiring, not only the connected equipment. For example, a 12-volt control circuit may carry two amps continuously but experience a higher startup surge. Motors, lamps, and capacitive loads often need different time-current characteristics.

Measure real conditions when possible. Do not rely only on a nameplate. Note the ambient temperature, enclosure ventilation, vibration, and expected duty cycle. High temperatures can reduce a fuse’s usable current capacity. In a crowded panel, heat can build quickly. Select a fuse with a voltage rating equal to or above the circuit voltage. Its interrupting rating must also exceed the prospective fault current. This detail is easy to miss.

Review the time-current curve before installation. A fast-acting fuse may protect sensitive electronics, while a time-delay type can tolerate brief motor inrush. Confirm compatibility with the fuse holder and available replacement procedure. Standards and local electrical rules should guide the final choice. A tidy calculation can still be wrong if the starting current was ignored. I have seen that mistake create repeated nuisance openings. Recheck the assumptions with measured data and, where needed, a qualified electrical professional.


How to Choose the Right Low Voltage Fuse? — Define the Circuit and Its Protection Requirements

Example circuit loads and candidate fuse ratings (amperes). These are illustrative starting points, not universal selections; the correct fuse depends on the circuit and its operating conditions.

Before selecting a fuse: establish the circuit’s AC or DC voltage, maximum continuous current, startup or inrush current, and conductor ampacity. Then check the fuse’s time-current behavior, rated voltage, and interrupting capacity against the circuit’s prospective fault current. Confirm the final choice against the applicable standards and manufacturer data.

Determine the Required Voltage and Current Ratings

Choosing the correct low voltage fuse begins with two numbers: voltage rating and current rating. The fuse voltage rating must equal or exceed the circuit’s maximum voltage. A lower rating can prevent safe interruption during a fault. Check whether the circuit uses AC or DC, because their interruption behavior differs.

Measure the normal operating current under real conditions, not only from a label. Motors, solenoids, and capacitive loads may draw a sharp inrush current during startup. A fuse that matches the running current may open too quickly. A fuse rated far above the load may allow wiring to overheat. Leave enough margin, but do not guess.

I also check ambient temperature, enclosure ventilation, wire size, and the fuse’s interrupting rating. Heat inside a sealed cabinet can reduce the usable current rating. The interrupting rating must exceed the possible fault current at the installation point. This detail is easy to overlook.

Use a calibrated meter and compare measurements with the equipment documentation. Confirm the fuse holder, terminal spacing, and replacement type are compatible. I once focused on the load current and missed a startup surge, which caused repeated failures. That mistake reinforced a practical lesson: record the current at startup, during steady operation, and under the heaviest expected load. When the readings disagree with the calculation, investigate before selecting the fuse.

Choose a Fuse Type and Time-Current Characteristic

How to Choose the Right Low Voltage Fuse?

Choose a fuse type and time-current characteristic before checking physical size. IEC 60269-1 classifies low-voltage fuses by operating behavior and application. A gG fuse provides general overload and short-circuit protection. An aM fuse mainly protects motor circuits against short circuits. It needs separate overload protection. Semiconductor circuits may require faster gR or gS protection.

Time-current curves show how quickly a fuse opens at different currents. A motor may draw five to seven times its rated current during startup. A fuse that reacts too quickly can interrupt normal starting. One that reacts too slowly may leave wiring exposed. Compare the curve with motor inrush, cable capacity, ambient temperature, and prospective fault current. NFPA’s Home Structure Fires report identifies electrical distribution and lighting equipment in roughly one quarter of reported home structure fires. That figure does not select a fuse, but it reinforces the cost of guessing.

Tips: Record the load’s normal current first. Then identify short-duration inrush. Check the fuse’s voltage rating, interrupting rating, and coordination with upstream protection. Do not select by ampere rating alone. In field work, I still verify the actual curve against the equipment manual; calculated values can miss cold starts or crowded enclosures. The “fastest” fuse is not automatically the safest choice. A poor match can create nuisance operation, heat, or delayed clearing. Recheck the decision with IEC 60269 requirements and local electrical rules.

Check Interrupting Capacity and Operating Conditions

How to Choose the Right Low Voltage Fuse?

Interrupting capacity is the first safety filter. It must exceed the prospective short-circuit current at the installation point. A fuse rated at 10 kA may fail dangerously on a 25 kA supply. Check the available fault current, not only the circuit’s normal load. IEC 60269 requires fuse tests under defined voltage, current, and power-factor conditions. Those conditions may differ from your panel. The rating label alone is not enough.

Operating conditions change fuse performance. Ambient temperature affects continuous current, while enclosure heat can accelerate aging. A fuse near a motor may face repeated inrush currents. A control circuit may need fast protection against delicate electronics. Select the voltage rating carefully, including direct-current applications. DC arcs can be harder to interrupt than AC arcs. Verify the time-current curve and let-through I²t value. Small details matter.

NFPA’s Electrical Fires report estimated about 32,000 U.S. home fires annually from electrical distribution and lighting equipment during 2015–2019. These fires caused roughly 470 deaths and 1,100 injuries. The figures do not prove that fuse selection caused each event. They do show why fault protection deserves measured engineering. A practical review should record cable size, ambient temperature, fault current, and expected inrush. Recheck the calculation after equipment changes. One weak assumption can invalidate an otherwise careful selection.

Verify Compatibility, Installation, and Replacement Requirements

Choosing the right low voltage fuse starts with verifying compatibility, not appearance. During panel inspections, I check the system voltage, normal operating current, fault level, and circuit type. A fuse must suit AC or DC operation, because interruption behavior can differ significantly. Its interrupting rating should exceed the available fault current. Never rely on a similar-looking fuse.

Fit matters too. Check the fuse class, body dimensions, terminal arrangement, and holder rating against the equipment documentation. A small mismatch can create loose connections, heat, or difficult removal. Installation should be performed with the circuit isolated and verified de-energized. Use the specified torque for terminals, keep conductors properly stripped, and avoid forcing the fuse into its holder. It sounds basic. It prevents trouble.

Replacement requires more than matching the amperage. Investigate why the original fuse operated. A short circuit, motor startup, overload, vibration, or moisture may be responsible. Replacing it with a higher-rated fuse can hide the fault and damage wiring. I have seen replacement work fail because the ambient temperature was ignored. Fuse ratings may require adjustment in hot enclosures or crowded panels. Record the fuse rating, date, circuit location, and observed condition. Recheck the installation after energizing, including unusual warmth or repeated operation. Documentation can be imperfect, so confirm critical details with the equipment manufacturer’s technical data and applicable electrical standards.

How to Choose the Right Low Voltage Fuse? - Verify Compatibility, Installation, and Replacement Requirements

Selection Dimension What to Verify Typical Data or Requirement Installation or Replacement Guidance
Circuit Voltage Confirm the system voltage and whether the circuit is AC or DC. Low-voltage systems commonly operate up to 1,000 V AC or 1,500 V DC, depending on the applicable standard. Select a fuse with a voltage rating equal to or higher than the circuit voltage. Do not substitute an AC-only fuse in a DC circuit unless its documentation specifically permits DC use.
Rated Current Determine the normal continuous load current and the expected start-up or inrush current. The fuse rating should protect the circuit without opening during normal operation or permitted inrush events. Never increase the fuse rating simply because the original fuse opened. Check the load, conductor ampacity, ambient temperature, and equipment instructions first.
Interrupting Rating Compare the fuse interrupting rating with the available prospective short-circuit current at the installation point. The fuse interrupting rating must be equal to or greater than the available fault current. Common ratings vary widely, from hundreds of amperes to tens of kiloamperes. Use the system short-circuit study, supply data, or qualified electrical assessment rather than estimating fault current from the normal load current.
Fuse Time-Current Characteristic Identify whether the circuit requires fast-acting, time-delay, or another specified operating characteristic. Fast-acting fuses are commonly used for semiconductor and sensitive electronic protection; time-delay types can tolerate motor, transformer, or capacitor inrush. Match the replacement characteristic to the equipment design. A time-delay fuse is not automatically an acceptable replacement for a fast-acting fuse.
Fuse Form and Dimensions Check the fuse family, body size, terminal arrangement, mounting method, and physical clearance. Common low-voltage forms include blade, cartridge, cylindrical, bolt-in, and square-body industrial fuses. Dimensions are not interchangeable solely because the current rating matches. Verify the holder or fuse base rating, contact spacing, terminal torque, heat dissipation, and available replacement clearance.
Applicable Standard and Markings Read the markings for voltage, amperes, interrupting rating, operating class, dimensions, and certification or standard reference. Common reference frameworks include IEC 60269 and national low-voltage fuse requirements such as UL 248, where applicable. The replacement should comply with the same required standard and application category as the original equipment design and local electrical regulations.
Conductor and Equipment Protection Confirm that the fuse protects the smallest conductor and the connected equipment against overload and short circuit. The selected fuse rating must not exceed the permitted ampacity of the protected conductor unless a documented code exception applies. Check conductor size, insulation temperature rating, installation method, grouping, ambient temperature, and voltage-drop requirements before final selection.
Ambient Temperature and Derating Assess the temperature inside the enclosure, airflow, nearby heat sources, and installation altitude when relevant. Fuse carrying capacity and operating time can change with ambient conditions. Derating values are product- and application-specific. Use the applicable fuse time-current and derating data. Do not rely on room-temperature ratings for hot, enclosed, or poorly ventilated installations.
Coordination and Selectivity Check coordination between upstream and downstream protective devices. Selective coordination requires the downstream device to clear relevant faults without unnecessarily opening the upstream device. Review published time-current curves and coordination tables where continuous service or critical loads require selective operation.
Installation Safety Verify isolation, absence of voltage, correct personal protective equipment, and safe access before replacement. Fuse replacement should be performed on a de-energized circuit unless a documented procedure specifically permits otherwise. Use an approved fuse puller where required, inspect the holder for heat damage, and tighten terminals to the specified torque.
Replacement Verification Compare the removed fuse with the circuit diagram, equipment manual, and original nameplate markings. The replacement should match voltage, current, interrupting rating, characteristic, physical format, standard, and application class. After installation, inspect for loose connections, abnormal heating, repeated operation, or a second fuse failure. Investigate the root cause instead of repeatedly replacing the fuse.

Powder Coat Booths

For those larger-sized parts, or smaller quantity runs, we have 2 independent powder coat booths and ovens. The quality, durability and affordability of today’s powder coating finishes make this the process of choice for world-class companies.

Powder coating advantages over other forms of coating are many. Materials used in the Powder coating process can be metals and non-metals that come in a multitude of thicknesses, textures, colors, etc. Another of Powder coating’s biggest advantages over conventional coatings is its ability to create finishes in many different textures. Powder Coating Booths allow us the ability to apply these advantages to large products.

Wet Paint Line

Tri-State Fabricators runs a full-service conveyor line for painting. Wet painting can provide protection or decoration to many different part styles. From start to finish, every project is easier to undergo random and point-based inspection by our skilled painting team.

Advantages to our Wet Paint Line are these lines start with product prep and ends with a thorough inspection of a high quality finished product. Our ability to complete large and small projects with a superior finish and doing so in a timely and economical fashion. This passes along the savings in production to our customers. When powder coating ins not an option, our Wet Paint Line gets the job done right the first time.

Wet Paint Booths

When the parts get big and heavy we roll-out our custom paint racks and oversize booth. By utilizing our partnerships with all the major paint brands, we can match virtually any color with wet paint.

The advantages of having access to a Wet Paint Booth are many. Large projects of many different shapes can be loaded into the booth. The Wet Paint Booth offers an environment that is much more controlled than a typical parts painting operation.

Not only are they used because of their controlled environment, but they’re are also advantageous when it comes to applying paint to parts that are needed in industries that require specialty coatings such as medical, aerospace, etc.

Military CARC

Our military forces have some very high standards when it comes to the finish of their vehicles and equipment. From the first pre-treatment step to final coat, it takes a great deal of knowledge and experience to protect the men and women of our armed forces. They deserve only the best, and Tri-State Fabricators provides it.

All of our processes are closely monitored by our staff and management teams. Both of which are highly trained in the processes of metal fabrication and finishing. Tri-State Fabricators’ goal is to always fully satisfy each and every customer, including the military. We will always put a 110% into what we do.

Glass-Bead Blasting

Abrasive media blasting is an excellent way to remove old paint, rust, and increase the paint/powder adhesion. Glass beads produce a much smoother and brighter finish than angular abrasives; leaving the part clean yet without any dimensional change. Chemically inert and environmentally friendly, we can recycle our beads approximately 30 times; making them a more preferred method of metal cleaning or surface finishing.

Advantages to Glass Bead Blasting are many. Glass bead blast media is used when a project is needing rough surfaces need to become smooth for applications of coatings such as paint. It is typically used to clean paint and rust from a product surface without deforming the surface it is being used on. Overall, compared to many other blasting media, Glass Bead Blasting is a very economical choice and those savings are always passed on to our customers.

Part Washing

Tri-State Fabricators utilize a zinc phosphate wash to clean and etch the material to ensure the best paint adhesion possible. The unique design of our 3-stage wash system does the work like a 5-stage. From Cleaning and rinsing to conversion coating and post-treatment, Our Part Washing process is a complete service and works throughout the fabrication service and the finishing service.

Along with the previously mentioned benefits, Curing is a vital chemical reaction that leaves the product finish hard and relatively safe from mild abrasion and aggressive corrosion. This process can be done in more than one way; ambient air-dry or in curing ovens at temps that exceed 240°.

Burn-Off Oven

From fixing paint mistakes (someone else’s of course) to simply cleaning our paint line hooks, our burn-off oven is put to good use. After a quick burn-off, a little clean up, and a fresh coat of paint, your parts will look better than new.

Why does our Burn-Off Oven work so well? Because super heating the air around parts turns the materials into ashes. From paint and powder coatings to rubber and machining oils, high temps do the job without degrading the integrity of the part.

Masking

Masking is a vital part of producing high quality products. We have die-cut masking patterns to protect machined surfaces as well as a wide range of plugs and caps to protect threaded holes and bolts. We provide permanent and temporary masking.

Masking allows the selected sections of a product to be protected from a fabrication or finishing service. This can be with both chemicals when etching and tapes, paints when only finishing just a section of the product. Masking is great in aiding the customization process of a project.

Screen Printing

Screen printing is a photographic process that transfers artwork onto a porous nylon screen which allows colored ink to flow through the screen and be deposited on an aluminum or plastic component. We can generally have just about any design created onto a screen for your parts.

Some of the advantages of Screen Printing are, brand recognition for your business displaying on your products, assembly instructions, product warnings/hazards, etc. Tri-State Fabricators produces Screen Printing of the highest quality so you know it’s durable.

Metal Finishing

Metal Finishing is the art of treating the exterior portion of product, often metal but can also be made of other materials, so that the surface is clean and free of any debris. Then the process of applying coats or either paint of powder coat takes place. This coating process improves the quality of the product in both appearance and resistance to wear and corrosion.

Tri-State Fabricators, Inc., understands that a project typically isn’t complete until a high-quality finish has been added to your product. This is why our painting and powder coating teams continuously inspect the products throughout the Metal Finishing process.
