


Choosing the right Lifting Bolts is not a matter of matching size alone. The correct choice depends on load direction, working load limit, thread engagement, material, and installation conditions. A bolt lifting a steel frame vertically faces different demands from one supporting a rotating machine.
Details matter.
In practice, experienced maintenance teams begin with the actual load, not the bolt already sitting in a toolbox. They check the load’s total weight, lifting angle, center of gravity, and possible shock loading. A small angle change can increase tension significantly. The manufacturer’s working load limit should remain visible and understandable, never guessed from diameter alone.
Thread compatibility is equally important. Confirm the thread type, pitch, length, and available engagement. Clean threads should seat fully without excessive force. Cross-threading can create hidden damage before the lift begins. The bolt material must also suit the environment, especially where moisture, chemicals, heat, or repeated lifting are present.
Inspect every bolt before use. Look for bent shanks, damaged threads, corrosion, stretched sections, and worn markings. One flaw may be enough.
Reliable selection also requires traceable documentation. Follow the manufacturer’s instructions and have a competent engineer review unusual lifts. Industry standards can guide inspection and rated capacity, but they do not replace site-specific judgment. A neat appearance can mislead. Even careful teams sometimes overlook side loading or uneven sling contact, so the selection process should include a deliberate pause, a second check, and a willingness to reject questionable hardware.
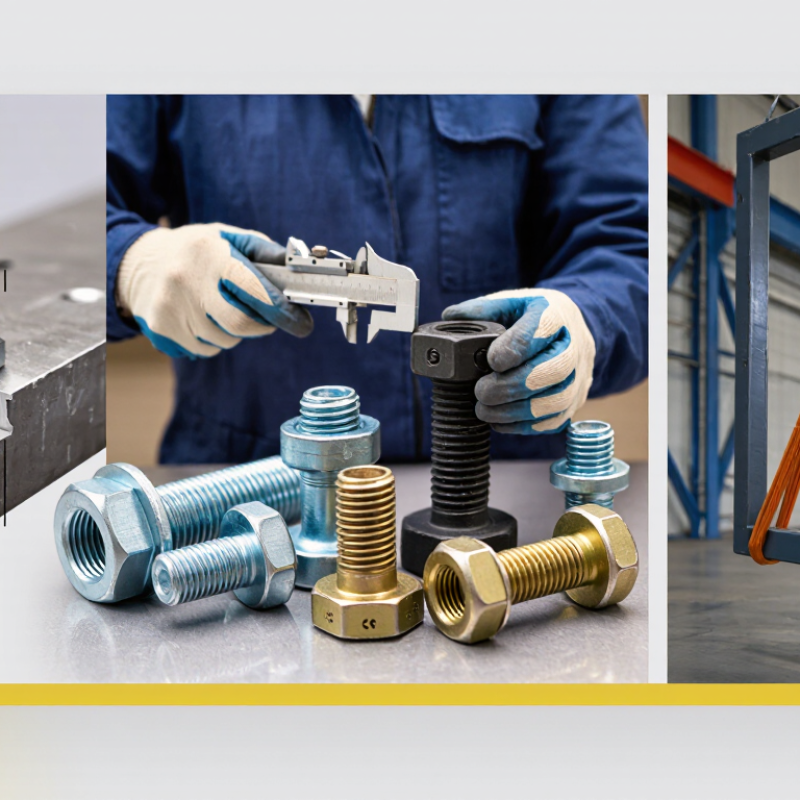
How to Choose the Right Lifting Bolts?
What Are Lifting Bolts and How Do They Work?
Lifting bolts are load-rated threaded fasteners designed to move equipment safely. Unlike ordinary bolts, they usually have a forged eye, ring, or lifting head. The threaded shank enters a tapped hole in the load. When tension is applied, the bolt transfers force through the threads and into the equipment body. Simple in principle. Not casual hardware.
Before choosing one, identify the load weight, thread size, material, and lifting direction. The working load limit must exceed the actual load, including sudden movement and unequal loading. Check the bolt’s markings and technical documentation. A vertically loaded bolt is not automatically safe for side pulling. Angled lifts can reduce capacity sharply, so follow the stated angle ratings. The threaded hole must also provide enough engagement and strength.
Installation matters as much as selection. Clean the hole, seat the shoulder fully, and keep the lifting point aligned with the force. Never stack washers to correct a poor fit. Do not weld, bend, heat, or paint over critical markings. Inspect for bent eyes, stretched threads, cracks, corrosion, or missing markings before every lift. Field inspections often reveal teams focusing on bolt size while overlooking the base metal. That mistake can fail quietly. A checklist helps, but it cannot replace an engineer’s review for unusual loads.

Lifting bolts, including forged eye bolts, are threaded load-bearing fittings used to connect lifting equipment to a machine, structure, or component. When installed correctly, the bolt transfers the lifting force through its threaded connection and shank. Selection should consider bolt diameter, working load limit, lift direction, thread engagement, material, and inspection condition.
The chart shows representative working load limits for forged steel eye bolts used in a vertical, in-line lift. Actual capacities vary by design, thread type, material, installation method, and lifting angle. Always follow the marked working load limit and the applicable manufacturer or safety standard.
Choosing a lifting bolt starts with the working load limit, not the bolt’s appearance. Check the load direction, lifting angle, and whether the force is straight or sideways. A bolt rated for vertical lifting may perform poorly under angled loading. Select a suitable thread diameter, pitch, and engagement length for the tapped hole. The bolt should fit smoothly without forcing or excessive play. Material strength matters, especially in outdoor, wet, or high-temperature environments. Surface coatings can improve corrosion resistance, but they do not repair poor design.
Tips: Confirm the working load limit from reliable technical documents. Match the bolt to the load, lifting angle, base material, and available thread depth. Inspect the head, threads, and shoulder before every use. Reject parts with cracks, bent sections, heavy wear, or damaged threads.
Eye orientation also deserves attention. A swivel design may suit changing load directions better than a fixed eye bolt. Never assume a larger bolt is automatically safer. Actual performance depends on geometry, installation, material quality, and loading conditions. Follow the manufacturer’s instructions and applicable lifting standards. In practice, small mistakes often happen during setup, not selection. I have seen users focus on diameter while overlooking thread engagement and side loading. That oversight can weaken an otherwise suitable connection. Record inspection findings, even when everything appears normal. Missing records make later decisions less reliable.
A lifting bolt should match the real load path, not just the load written on a drawing. Check the working load limit for the exact bolt size, grade, thread type, and lifting angle. A 1,000-kilogram load may create much higher tension when the sling pulls sideways. Keep the pull aligned with the bolt axis whenever possible. Side loading is often where mistakes begin.
Measure the load’s weight, center of gravity, and attachment points before selecting hardware. Uneven weight can transfer most of the force to one bolt. For a two-point lift, estimate how sling angles increase tension in each leg. Shallow sling angles create greater tension. Keep angles within the manufacturer’s stated limits. Use full thread engagement and confirm that the base material can withstand the force. A strong bolt cannot repair weak threads or thin steel.
Inspect every bolt before use. Look for bent shanks, damaged threads, corrosion, cracks, and stretched holes. Do not rely on appearance alone. A bolt may look acceptable after a shock load. That uncertainty deserves attention. Follow the manufacturer’s instructions and have a competent lifting professional verify the setup. I have seen teams focus on bolt capacity while ignoring sling contact with sharp edges. Protect the sling, control movement, and keep people outside the suspended-load area. Mistakes happen quickly. Reliability comes from matching every component to the same calculated load.
Choosing lifting bolts starts with the load path, not the bolt’s appearance. Confirm the load weight, lifting angle, thread type, and connection material.
A bolt rated for vertical lifting may be unsafe under side loading. Use only a clearly marked working load limit.
Follow the applicable regulations and engineering standards for your location. ASME B30.26 may guide rigging hardware requirements, while other standards may apply to lifting points or machinery.
Check the manufacturer’s technical data, test certificates, and traceability records.
Do not rely on a generic hardware-store bolt. It may look strong, but its steel grade and heat treatment could be unknown.
Inspect every lifting bolt before use. Look for stretched threads, bent eyes, cracks, deep corrosion, damaged shoulders, and unreadable markings.
The bolt should seat fully and align with the load. Never force it into a misaligned hole.
Tighten it according to the documented procedure, not personal judgment.
Stop the lift.
A practical inspection log should record the date, identification mark, condition, and inspector.
Remove any bolt that has suffered shock loading or unexplained deformation. Quarantine it until a qualified person evaluates it.
In real workplaces, records are sometimes incomplete. That is a weakness worth admitting, not ignoring.
When doubt remains, replace the bolt and review the lifting plan before work continues.
A lifting bolt must match the load, lifting direction, thread size, and mounting material. Check its working load limit before installation. Never rely on appearance alone. The bolt should have clear markings, undamaged threads, and no bends, cracks, or deep corrosion. Confirm that the lifting point and connected structure can support the planned load. A strong bolt cannot correct a weak mounting plate.
Clean the threaded hole and remove dirt, paint, or metal chips. Screw the bolt in by hand to prevent cross-threading. For a shoulder-type lifting bolt, seat the shoulder firmly against the mounting surface. Tighten it to the specified torque, using a calibrated torque wrench when required. Keep the load aligned with the bolt’s rated direction. Avoid side pulls, shock loading, dragging, and sudden starts. Use suitable slings and keep people outside the suspended-load area. Stop immediately if the bolt shifts or makes unusual noise.
Inspect the bolt before every lift, especially after an overload or impact. Look for bent eyes, stretched threads, looseness, rust, and contact marks. Remove damaged hardware from service and record the inspection. Store clean bolts in a dry place, away from chemicals and standing water. Do not repair, weld, heat, or modify them without written technical approval. A rushed inspection is a common failure point. Even experienced crews can miss small thread damage. If the marking, torque requirement, or load path is unclear, pause the lift and obtain competent engineering guidance.
| Selection or Maintenance Dimension | Recommended Practice | Key Data or Limit | Verification Before Use |
|---|---|---|---|
| Bolt Type | Choose a plain eye bolt for straight, in-line lifting only. Use a shoulder eye bolt or a swivel hoist ring when the design permits angular loading. | The approved working load limit (WLL) depends on the bolt design, size, material, installation, and loading direction. | Confirm the product marking, WLL, thread size, material grade, and intended loading direction. |
| Working Load Limit | Select a lifting bolt whose WLL is greater than the total lifted load, including attachments and foreseeable dynamic effects. | Never exceed the marked WLL. The assembly capacity is limited by its weakest component, such as the bolt, sling, shackle, or lifting point. | Check the load weight and compare it with the WLL for the actual lifting configuration. |
| Loading Direction | Keep a plain or shoulder eye bolt aligned with the direction of the sling pull. Do not allow side loading unless the lifting point is specifically rated for it. | Angular-load capacity is product-specific and may be lower than the vertical WLL. Do not estimate a reduction factor without the manufacturer’s instructions. | Ensure the sling, hook, and eye are aligned and that no edge or object is forcing the bolt sideways. |
| Thread Compatibility | Match the bolt thread diameter, pitch, form, and length to the tapped hole. Do not mix metric and inch threads or coarse and fine threads. | The bolt must achieve the required full thread engagement specified for the lifting point and base material. | Check that the threads are clean, undamaged, fully engaged, and free from cross-threading. |
| Base Material and Hole Condition | Install only in a sound, load-bearing component designed to support the lifting force. Do not use cracked, thin, damaged, or unverified tapped holes. | The base material and thread engagement must be capable of carrying the required load without pull-out, stripping, or fracture. | Inspect the hole for damage, contamination, excessive wear, corrosion, and sufficient depth before installation. |
| Shoulder Seating | For a shoulder eye bolt, seat the shoulder firmly against the load surface. Use a washer only when required by the design or instructions. | A visible gap, tilted shoulder, or improper washer arrangement can change the load path and reduce safety. | Confirm that the shoulder is fully seated and that the eye is oriented correctly before applying load. |
| Tightening Method | Tighten according to the lifting-point instructions. Use a calibrated torque wrench when a torque value is specified. | Torque values vary by bolt type, size, thread condition, lubrication, and manufacturer. Do not use a generic torque value. | Verify the required torque, thread lubricant condition, and final seating before lifting. |
| Sling Angle Effect | Keep sling legs as close to vertical as practical and account for the increased tension caused by low sling angles. | For a symmetrical two-leg sling, approximate tension in each leg as a percentage of the load: 90° from horizontal = 50%; 60° = 57.7%; 45° = 70.7%; 30° = 100%. | Confirm that the bolt, sling, and connecting hardware are rated for the calculated leg tension. |
| Hook and Sling Connection | Connect the hook or shackle correctly and prevent point loading on the eye. Do not force a hook into an undersized eye. | The connecting hardware must fit freely and retain the load without twisting, spreading, or bearing against an unsuitable edge. | Check hook latch operation, shackle pin engagement, eye contact, and freedom from snagging. |
| Trial Lift | Raise the load only a short distance first, pause, and check balance, seating, alignment, and stability. | Stop immediately if the lifting point tilts, loosens, deforms, or shows unexpected movement. | Keep personnel clear of the suspended load and never stand beneath it. |
| Pre-Use Inspection | Inspect every lifting bolt and connected component before each use, with additional formal inspections at intervals required by applicable rules and site procedures. | Look for cracks, bending, elongation, damaged threads, corrosion, wear, gouging, heat damage, and illegible markings. | Remove defective items from service immediately and identify them so they cannot be used accidentally. |
| Maintenance and Cleaning | Keep threads and contact surfaces clean. Protect the lifting point from moisture, chemicals, impact, and contamination. | Use only cleaning agents, corrosion protection, and thread lubricants permitted by the lifting-point instructions. | After cleaning, recheck markings, thread condition, seating surfaces, and moving parts where applicable. |
| Prohibited Practices | Do not shock-load, drag the load, use lifting bolts as tie-down points, weld or modify them, or use them for personnel lifting unless specifically designed and approved for that purpose. | Any modification, impact loading, or use outside the rated configuration can invalidate the WLL and cause sudden failure. | Stop the operation whenever the load, environment, or equipment differs from the approved lifting plan. |


For those larger-sized parts, or smaller quantity runs, we have 2 independent powder coat booths and ovens. The quality, durability and affordability of today’s powder coating finishes make this the process of choice for world-class companies.
Powder coating advantages over other forms of coating are many. Materials used in the Powder coating process can be metals and non-metals that come in a multitude of thicknesses, textures, colors, etc. Another of Powder coating’s biggest advantages over conventional coatings is its ability to create finishes in many different textures. Powder Coating Booths allow us the ability to apply these advantages to large products.
Tri-State Fabricators runs a full-service conveyor line for painting. Wet painting can provide protection or decoration to many different part styles. From start to finish, every project is easier to undergo random and point-based inspection by our skilled painting team.
Advantages to our Wet Paint Line are these lines start with product prep and ends with a thorough inspection of a high quality finished product. Our ability to complete large and small projects with a superior finish and doing so in a timely and economical fashion. This passes along the savings in production to our customers. When powder coating ins not an option, our Wet Paint Line gets the job done right the first time.
When the parts get big and heavy we roll-out our custom paint racks and oversize booth. By utilizing our partnerships with all the major paint brands, we can match virtually any color with wet paint.
The advantages of having access to a Wet Paint Booth are many. Large projects of many different shapes can be loaded into the booth. The Wet Paint Booth offers an environment that is much more controlled than a typical parts painting operation.
Not only are they used because of their controlled environment, but they’re are also advantageous when it comes to applying paint to parts that are needed in industries that require specialty coatings such as medical, aerospace, etc.
Our military forces have some very high standards when it comes to the finish of their vehicles and equipment. From the first pre-treatment step to final coat, it takes a great deal of knowledge and experience to protect the men and women of our armed forces. They deserve only the best, and Tri-State Fabricators provides it.
All of our processes are closely monitored by our staff and management teams. Both of which are highly trained in the processes of metal fabrication and finishing. Tri-State Fabricators’ goal is to always fully satisfy each and every customer, including the military. We will always put a 110% into what we do.
Abrasive media blasting is an excellent way to remove old paint, rust, and increase the paint/powder adhesion. Glass beads produce a much smoother and brighter finish than angular abrasives; leaving the part clean yet without any dimensional change. Chemically inert and environmentally friendly, we can recycle our beads approximately 30 times; making them a more preferred method of metal cleaning or surface finishing.
Advantages to Glass Bead Blasting are many. Glass bead blast media is used when a project is needing rough surfaces need to become smooth for applications of coatings such as paint. It is typically used to clean paint and rust from a product surface without deforming the surface it is being used on. Overall, compared to many other blasting media, Glass Bead Blasting is a very economical choice and those savings are always passed on to our customers.
Tri-State Fabricators utilize a zinc phosphate wash to clean and etch the material to ensure the best paint adhesion possible. The unique design of our 3-stage wash system does the work like a 5-stage. From Cleaning and rinsing to conversion coating and post-treatment, Our Part Washing process is a complete service and works throughout the fabrication service and the finishing service.
Along with the previously mentioned benefits, Curing is a vital chemical reaction that leaves the product finish hard and relatively safe from mild abrasion and aggressive corrosion. This process can be done in more than one way; ambient air-dry or in curing ovens at temps that exceed 240°.
From fixing paint mistakes (someone else’s of course) to simply cleaning our paint line hooks, our burn-off oven is put to good use. After a quick burn-off, a little clean up, and a fresh coat of paint, your parts will look better than new.
Why does our Burn-Off Oven work so well? Because super heating the air around parts turns the materials into ashes. From paint and powder coatings to rubber and machining oils, high temps do the job without degrading the integrity of the part.
Masking is a vital part of producing high quality products. We have die-cut masking patterns to protect machined surfaces as well as a wide range of plugs and caps to protect threaded holes and bolts. We provide permanent and temporary masking.
Masking allows the selected sections of a product to be protected from a fabrication or finishing service. This can be with both chemicals when etching and tapes, paints when only finishing just a section of the product. Masking is great in aiding the customization process of a project.
Screen printing is a photographic process that transfers artwork onto a porous nylon screen which allows colored ink to flow through the screen and be deposited on an aluminum or plastic component. We can generally have just about any design created onto a screen for your parts.
Some of the advantages of Screen Printing are, brand recognition for your business displaying on your products, assembly instructions, product warnings/hazards, etc. Tri-State Fabricators produces Screen Printing of the highest quality so you know it’s durable.
Metal Finishing is the art of treating the exterior portion of product, often metal but can also be made of other materials, so that the surface is clean and free of any debris. Then the process of applying coats or either paint of powder coat takes place. This coating process improves the quality of the product in both appearance and resistance to wear and corrosion.
Tri-State Fabricators, Inc., understands that a project typically isn’t complete until a high-quality finish has been added to your product. This is why our painting and powder coating teams continuously inspect the products throughout the Metal Finishing process.

