


A Commercial Display Cooler keeps products chilled while making them easy to see and reach. Choosing one involves more than comparing capacity or appearance. A unit that looks impressive may struggle in a warm, busy shop. Small details matter.
Start with the products you plan to display, their required storage conditions, and the space available. Measure doorways, aisles, and the intended installation area before comparing models. Then assess usable shelf space, temperature consistency, lighting, door style, and ventilation needs. Check the manufacturer’s specifications, including operating conditions and recommended maintenance. These details help you judge whether a cooler suits your actual setting, not just a product photo.
Running costs deserve attention, too. Compare energy information where available, and consider how often staff will open the doors. A crowded shelf can block airflow. That is easy to overlook. Think about cleaning access, replacement parts, and service support before committing. These factors affect daily reliability, though they may not be obvious during a showroom visit. There is no single best model for every business; the right choice depends on your products, foot traffic, layout, and budget. Even careful research has limits, so confirm key measurements and operating requirements with the supplier. Use this guide to compare options clearly and identify the trade-offs worth questioning before you buy.
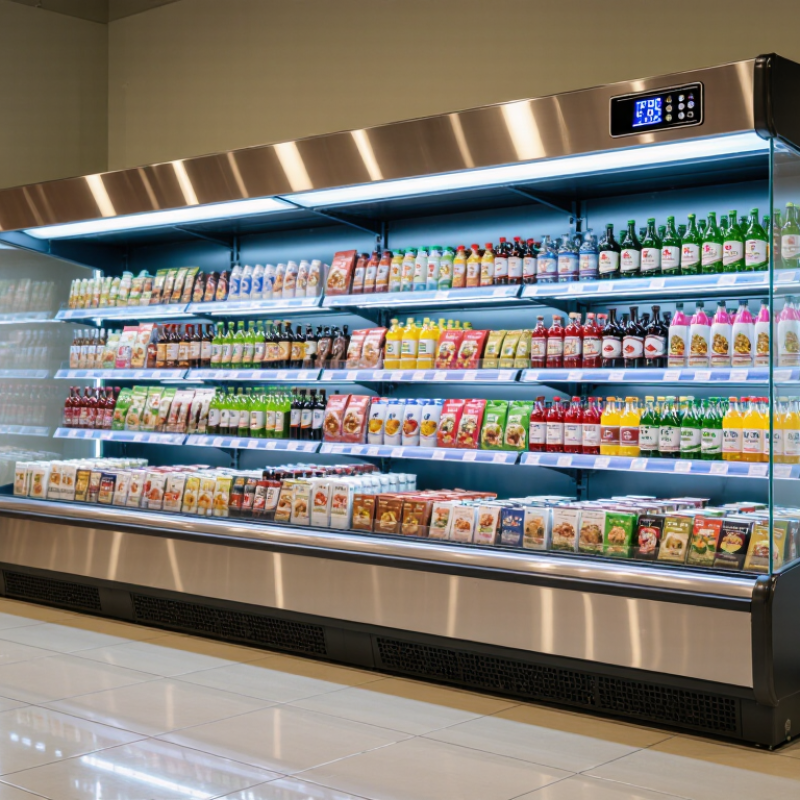
Choosing a commercial display cooler starts with the products, not the cabinet. Map the mix: bottled drinks need clear sightlines and easy restocking, while ready-to-eat foods need stable, monitored temperatures. The FDA Food Code sets 41°F (5°C) as the maximum for cold holding of many temperature-controlled foods; verify requirements for your specific products. Product size matters, too. Measure the tallest package and leave room for airflow rather than packing shelves edge to edge.
Next, define the display goal. A cooler facing a busy aisle needs readable labels, bright lighting, and doors or open access suited to customer traffic. DOE’s Better Buildings guidance notes that refrigeration can account for up to 40% of a grocery store’s energy use. ENERGY STAR reports that certified commercial refrigerators use about 20% less energy than standard models. Compare operating costs alongside purchase price. A bright display is useful, but glare can hide labels.
Capacity should match both peak demand and delivery rhythm. Estimate how many units must be visible, then check usable shelf area—not just the advertised total volume. Leave space for restocking and air circulation. I still find capacity easy to overestimate on paper. Fit matters. Check door swing, aisle clearance, and the route from receiving to the cooler; a cabinet that blocks replenishment can undermine the display.
Sources: FDA Food Code 2022; U.S. DOE Better Buildings; ENERGY STAR commercial refrigeration guidance.

Choosing a commercial display cooler starts with what customers need to see and how staff will restock it. An upright reach-in cooler suits narrow aisles and packaged drinks, while a low merchandiser keeps fresh items visible without blocking sightlines. Measure the doorway, aisle, and installation space before ordering. Measure twice. Check ventilation clearance, too; a tight fit can make servicing harder and cooling less consistent.
Glass swing doors seal well and offer familiar access, but need room to open. Sliding doors work in cramped aisles, though their tracks collect crumbs and need regular cleaning. Open-front cases invite quick grabs, yet may lose more cold air in busy areas. Not always. Consider foot traffic, nearby heat sources, and how often customers will open the case, rather than choosing by appearance alone.
Match shelf layout to product height and weight. Adjustable shelves help when bottle sizes change, but overloaded shelves can sag or restrict airflow. Leave space between products and keep interior vents clear. Try a typical load with the tallest bottles on display. A neat grid looks good in a plan, but real restocking often breaks it. Keep popular items near eye level and heavier stock lower for easier lifting. The most useful layout may look a little uneven.
Compare common commercial display cooler configurations by product type, customer access, and shelf arrangement. Actual capacity and dimensions vary by model, so check the product specifications and available floor space before purchasing.
| Cooler Type | Typical Door Style | Shelf Layout | Often Suited To | Key Selection Considerations |
|---|---|---|---|---|
| Upright glass-door merchandiser | One or more hinged or sliding glass doors | Multiple adjustable shelves; use even spacing for bottles or taller gaps for cartons and larger containers. | Bottled drinks, packaged foods, and grab-and-go items in shops, cafés, and convenience stores. | Check aisle clearance for hinged doors, visibility through the glass, shelf load limits, and whether the unit’s dimensions fit the intended location. |
| Open-front multideck display | No customer-facing doors; open display front | Several stepped or angled display shelves, often with a product ledge on each level. | High-turnover drinks, dairy products, and packaged snacks where customers need quick access. | Open-front designs can make products easy to reach but may use more energy than comparable closed-door displays. Follow the manufacturer’s installation and operating guidance. |
| Countertop display cooler | Usually a small hinged or sliding glass door | One or more compact shelves, depending on cabinet height; leave space for airflow around products. | Small quantities of canned or bottled drinks, desserts, and packaged impulse items at a service counter. | Measure the counter footprint and available ventilation space. Confirm that the usable shelf area suits the size and quantity of products being displayed. |
| Deli or serve-over display case | Typically an enclosed case with staff-side access; customer-facing glass may be fixed or lift-up. | One or more display decks or trays; arrange products in shallow rows for visibility and convenient service. | Chilled prepared foods, deli items, desserts, and other products served by staff. | Choose a case designed for the products and service style. Consider display visibility, staff access, cleaning needs, and the manufacturer’s stated temperature range. |
| Back-bar cooler | Usually hinged or sliding glass doors | Adjustable shelves arranged to fit bottles or cans; keep products accessible and avoid blocking internal airflow. | Packaged drinks stored and displayed behind a bar or in a compact service area. | Sliding doors can be useful where clearance is limited. Compare internal shelf dimensions with the bottle or can sizes you plan to stock. |
Quick decision guide: Choose a closed-door upright unit for visible, organized storage; an open-front multideck for easy self-service; a countertop unit for limited display space; or a serve-over case when staff hand products to customers. Select door operation and shelf spacing around your room layout and product sizes.
How to Choose a Commercial Display Cooler?
Compare Cooling Performance and Temperature Controls
A cooler can look powerful and still struggle during a busy service period. Compare its stated operating range, cooling capacity, and temperature recovery time. Ask whether performance data reflects a fully loaded cabinet or an empty test unit. The difference matters. Test the cooler with products on the shelves, then check temperatures at several points, including the top and front. Uneven readings may signal blocked airflow or overloaded shelves.
Frequent door openings add heat. A useful comparison includes how quickly the unit returns to its set temperature after doors open. Check whether fans distribute air evenly and whether automatic defrost interrupts cooling for long periods. These details can affect product quality, especially during peak hours. Small test differences can be hard to interpret, so compare models under similar room conditions.
Temperature controls should be easy to read and adjust without guesswork. Look for a digital display, a clearly positioned sensor, and high- or low-temperature alerts. Confirm that the control range suits the products you intend to display; colder is not always better. A sensor near the cooling outlet may not reflect conditions across every shelf. That’s an awkward detail, but worth checking. Ask for operating guidance and monitor actual cabinet temperatures after installation.
Compare recognized chilled-food temperature benchmarks when evaluating a cooler’s setpoint accuracy, temperature stability, and high-temperature alarms. Lower temperatures provide a greater safety margin, but always follow the rules that apply to your location and products.
How to use this chart: The U.S. FDA Food Code sets a maximum cold-holding temperature of 5°C (41°F). UK Food Standards Agency guidance gives a legal maximum of 8°C for chilled food and recommends keeping fridges at 5°C or below. When comparing coolers, check that the unit can maintain your chosen setpoint under normal operating conditions and has a clearly visible thermometer or alarm.
Sources: FDA Food Code 2022; UK Food Standards Agency: Chilling.
Before choosing a commercial display cooler, measure the full installation area, including doorways and turning space for delivery. Then check the cooler’s footprint against nearby counters, customer aisles, and staff work zones. A unit that fits on paper may still block a drawer or create a tight bottleneck. Measure twice. Note the ceiling height, too, if the cooler has a top-mounted condenser.
Check the electrical nameplate for voltage, current, and plug requirements, and compare them with the outlet and circuit available at the site. Have a qualified electrician assess uncertain wiring rather than relying on an adapter or extension cord. Do not guess. Leave the clearances specified by the manufacturer around air intakes and exhaust vents. Restricted airflow can make the unit run hotter, cool unevenly, or use more energy. Keep it away from ovens, sunny windows, and other strong heat sources where possible.
Safety also depends on the details around the cooler. Position it on a stable, level floor, and keep its cord away from wet areas and walking paths. Staff should be able to reach the plug or disconnect without moving loaded shelves. Keep ventilation openings clear during cleaning and restocking. Room plans are rarely perfect; recheck measurements after nearby fixtures are installed. That small extra check can catch a problem before delivery.
A commercial display cooler can look efficient under showroom conditions and still use more energy in a busy shop. Compare the stated annual energy consumption of models with similar capacity and layout. Check the figures in kilowatt-hours, not just the efficiency rating. A small difference matters when the unit runs all day. Yet published figures are not a promise. Warm room temperatures, frequent door openings, and blocked air vents can increase real-world use. Track the cooler’s energy use after installation if you can.
Maintenance affects both performance and repair bills. Ask how easily staff can reach filters, fans, and condenser coils. Dust on a coil can restrict heat transfer, so routine cleaning is practical, not cosmetic. Check door seals for gaps; a strip of paper that slides out easily may signal a poor seal. Keep a service record. It is easy to forget.
Look beyond the purchase price. Estimate energy costs over several years, then add likely cleaning, parts, and technician visits. Confirm the warranty terms and whether local service is available. A cheaper unit may cost more if parts are difficult to source. Estimates can be wrong, especially when sales change seasonally, so leave room in the budget for repairs. A little uncertainty is honest.


For those larger-sized parts, or smaller quantity runs, we have 2 independent powder coat booths and ovens. The quality, durability and affordability of today’s powder coating finishes make this the process of choice for world-class companies.
Powder coating advantages over other forms of coating are many. Materials used in the Powder coating process can be metals and non-metals that come in a multitude of thicknesses, textures, colors, etc. Another of Powder coating’s biggest advantages over conventional coatings is its ability to create finishes in many different textures. Powder Coating Booths allow us the ability to apply these advantages to large products.
Tri-State Fabricators runs a full-service conveyor line for painting. Wet painting can provide protection or decoration to many different part styles. From start to finish, every project is easier to undergo random and point-based inspection by our skilled painting team.
Advantages to our Wet Paint Line are these lines start with product prep and ends with a thorough inspection of a high quality finished product. Our ability to complete large and small projects with a superior finish and doing so in a timely and economical fashion. This passes along the savings in production to our customers. When powder coating ins not an option, our Wet Paint Line gets the job done right the first time.
When the parts get big and heavy we roll-out our custom paint racks and oversize booth. By utilizing our partnerships with all the major paint brands, we can match virtually any color with wet paint.
The advantages of having access to a Wet Paint Booth are many. Large projects of many different shapes can be loaded into the booth. The Wet Paint Booth offers an environment that is much more controlled than a typical parts painting operation.
Not only are they used because of their controlled environment, but they’re are also advantageous when it comes to applying paint to parts that are needed in industries that require specialty coatings such as medical, aerospace, etc.
Our military forces have some very high standards when it comes to the finish of their vehicles and equipment. From the first pre-treatment step to final coat, it takes a great deal of knowledge and experience to protect the men and women of our armed forces. They deserve only the best, and Tri-State Fabricators provides it.
All of our processes are closely monitored by our staff and management teams. Both of which are highly trained in the processes of metal fabrication and finishing. Tri-State Fabricators’ goal is to always fully satisfy each and every customer, including the military. We will always put a 110% into what we do.
Abrasive media blasting is an excellent way to remove old paint, rust, and increase the paint/powder adhesion. Glass beads produce a much smoother and brighter finish than angular abrasives; leaving the part clean yet without any dimensional change. Chemically inert and environmentally friendly, we can recycle our beads approximately 30 times; making them a more preferred method of metal cleaning or surface finishing.
Advantages to Glass Bead Blasting are many. Glass bead blast media is used when a project is needing rough surfaces need to become smooth for applications of coatings such as paint. It is typically used to clean paint and rust from a product surface without deforming the surface it is being used on. Overall, compared to many other blasting media, Glass Bead Blasting is a very economical choice and those savings are always passed on to our customers.
Tri-State Fabricators utilize a zinc phosphate wash to clean and etch the material to ensure the best paint adhesion possible. The unique design of our 3-stage wash system does the work like a 5-stage. From Cleaning and rinsing to conversion coating and post-treatment, Our Part Washing process is a complete service and works throughout the fabrication service and the finishing service.
Along with the previously mentioned benefits, Curing is a vital chemical reaction that leaves the product finish hard and relatively safe from mild abrasion and aggressive corrosion. This process can be done in more than one way; ambient air-dry or in curing ovens at temps that exceed 240°.
From fixing paint mistakes (someone else’s of course) to simply cleaning our paint line hooks, our burn-off oven is put to good use. After a quick burn-off, a little clean up, and a fresh coat of paint, your parts will look better than new.
Why does our Burn-Off Oven work so well? Because super heating the air around parts turns the materials into ashes. From paint and powder coatings to rubber and machining oils, high temps do the job without degrading the integrity of the part.
Masking is a vital part of producing high quality products. We have die-cut masking patterns to protect machined surfaces as well as a wide range of plugs and caps to protect threaded holes and bolts. We provide permanent and temporary masking.
Masking allows the selected sections of a product to be protected from a fabrication or finishing service. This can be with both chemicals when etching and tapes, paints when only finishing just a section of the product. Masking is great in aiding the customization process of a project.
Screen printing is a photographic process that transfers artwork onto a porous nylon screen which allows colored ink to flow through the screen and be deposited on an aluminum or plastic component. We can generally have just about any design created onto a screen for your parts.
Some of the advantages of Screen Printing are, brand recognition for your business displaying on your products, assembly instructions, product warnings/hazards, etc. Tri-State Fabricators produces Screen Printing of the highest quality so you know it’s durable.
Metal Finishing is the art of treating the exterior portion of product, often metal but can also be made of other materials, so that the surface is clean and free of any debris. Then the process of applying coats or either paint of powder coat takes place. This coating process improves the quality of the product in both appearance and resistance to wear and corrosion.
Tri-State Fabricators, Inc., understands that a project typically isn’t complete until a high-quality finish has been added to your product. This is why our painting and powder coating teams continuously inspect the products throughout the Metal Finishing process.

