How to Choose the Best Vibration Measurement Meter?

Choosing the right Vibration Measurement Meter can determine whether a machine receives timely maintenance or suffers an unexpected shutdown. In a workshop, a technician may inspect a motor bearing, pump housing, or fan assembly with limited time. The meter must convert subtle movement into useful evidence. A stable reading matters, but so do sensor placement, frequency range, measurement units, and operating conditions. Experience shows that a low price does not always mean poor performance. It can, however, hide important limitations.

This guide examines the practical factors behind a reliable purchase. It considers vibration velocity, acceleration, displacement, frequency analysis, sensor mounting, display clarity, and data storage. A technician working beside a noisy compressor needs more than a bright screen. The instrument should provide repeatable results, withstand regular handling, and support decisions that can be explained later. Calibration records and manufacturer documentation also deserve attention. They are easy to overlook.

Real maintenance work is rarely perfect. A sensor may sit slightly off-center, or a hot surface may affect the inspection. No meter removes every uncertainty. That is why experienced users compare readings, observe machine conditions, and record the measurement location. This guide also acknowledges a common weakness: specifications can appear impressive without matching actual field needs. The best choice depends on the equipment, inspection frequency, user skill, and maintenance goals. A careful selection process reduces guesswork and makes vibration data more useful.
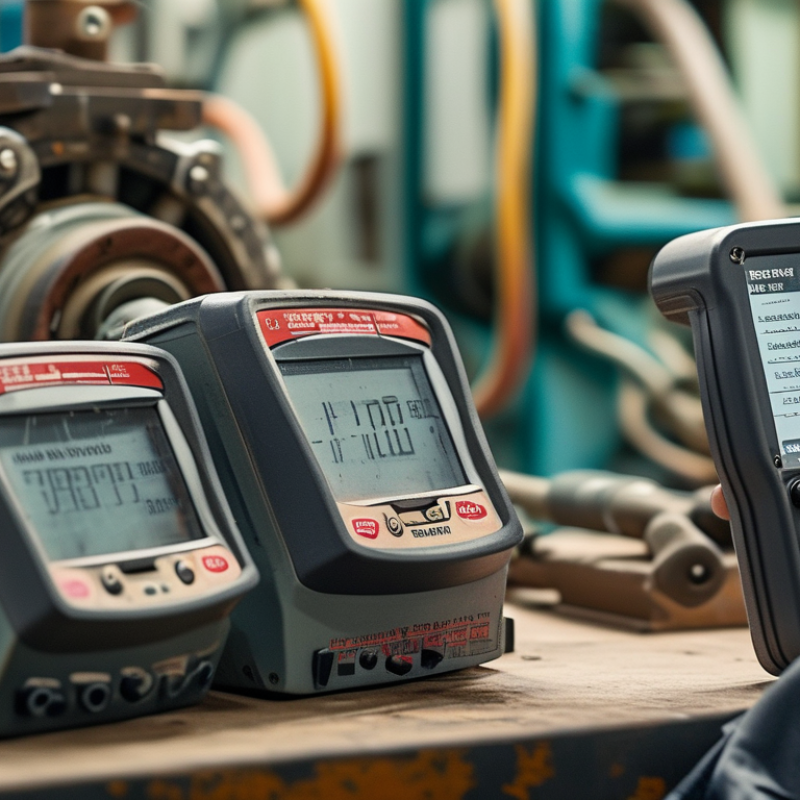
How to Choose the Best Vibration Measurement Meter?

Types of Vibration Measurement Meters and Their Core Functions

How to Choose the Best Vibration Measurement Meter?

Types of Vibration Measurement Meters and Their Core Functions

Choosing a vibration meter begins with the machine, not the instrument. A handheld accelerometer meter measures acceleration through a sensor attached to the housing. It works well on motors, pumps, fans, and gearboxes. Acceleration often reveals high-frequency bearing problems. Keep the sensor firmly positioned. A loose magnet can create misleading peaks.

Velocity meters are widely used for general machine condition checks. They show vibration in millimeters per second or inches per second. This reading helps compare equipment against maintenance limits and historical records. Displacement meters measure movement at lower frequencies. They suit large, slow machines and structures where shaft motion is important. The wrong measurement range can hide a developing fault.

For deeper diagnosis, choose a vibration analyzer with frequency spectrum functions. It can separate running speed, harmonics, and bearing-related frequencies. A data-logging meter stores readings from repeated inspection routes. This supports trend analysis rather than one-time decisions. Some technicians prefer non-contact proximity sensors for rotating shafts. These sensors measure shaft position and orbit movement without touching the surface. Calibration matters more than impressive screen features. I have seen clean-looking readings fail after poor sensor placement. No meter is perfect. Check temperature, mounting method, frequency range, and calibration status before trusting the result. A small field note may prevent a costly assumption.

Key Specifications to Compare Before Choosing a Meter

How to Choose the Best Vibration Measurement Meter?

Choosing a vibration meter starts with its measurement specifications, not its display size. Check whether it measures acceleration, velocity, displacement, or all three. For most rotating machinery, velocity RMS is useful for tracking overall severity. ISO 20816 provides evaluation guidance, but machine type and mounting conditions still matter.

Frequency range is equally important. A meter covering 10 Hz to 10 kHz may reveal imbalance, looseness, and bearing defects. However, a wide range does not guarantee useful results. Compare frequency resolution, sampling rate, crest factor, and envelope detection.

The U.S. Department of Energy’s Operations & Maintenance Best Practices guide reports that predictive maintenance can reduce maintenance costs by 25% to 30%.

Poor data selection can weaken those gains. Sensor mounting also changes the reading. Magnetic mounting is fast, but stud mounting usually gives better repeatability. Check calibration traceability, temperature limits, battery life, memory, and IP protection.

Field technicians often overlook measurement repeatability. That is a costly mistake. A meter with ±5% accuracy may appear suitable, yet inconsistent sensor pressure can create larger errors.

I would test the same machine at the same point several times. Then question any result that changes sharply without a mechanical explanation.

How to Match a Vibration Meter to Your Measurement Requirements

How to Choose the Best Vibration Measurement Meter?

Matching a vibration meter to your measurement requirements starts with the machine, not the instrument. For rotating equipment, velocity often reveals overall mechanical severity, while acceleration helps identify bearing or gear problems. Displacement remains useful at low speeds. Check the operating speed before choosing the measurement range. A meter that misses the relevant frequency band can produce a confident but misleading reading. That mistake is easy to make.

ISO 20816 provides guidance for evaluating machine vibration through measurements such as velocity. However, the standard does not replace equipment-specific limits or engineering judgment. For route-based maintenance, select a rugged meter with repeatable readings, clear units, and data storage. For fault diagnosis, you may need spectral analysis, envelope detection, higher-frequency response, and a better sensor connection. Magnetic mounting is convenient, but a stud-mounted sensor usually gives more consistent high-frequency results. Small details matter.

The U.S. Department of Energy’s Operations & Maintenance Best Practices Guide reports that predictive maintenance may reduce maintenance costs by 25–30% and downtime by 35–45%. Those figures support measurement programs, but they are not guaranteed savings. Asset criticality, operator training, mounting technique, and alarm settings change the outcome. In my view, buying the most advanced meter is often unnecessary. A simple instrument, used at the same points and under similar operating conditions, can be more reliable. Still, even experienced teams sometimes overlook temperature, load, or sensor pressure. Record them. Recheck them.

Step-by-Step Process for Selecting the Right Vibration Meter

Choosing a vibration meter should begin with the machine, not the instrument. Start by identifying the equipment, rotating speed, bearing type, and measurement points. A pump may need readings near bearings, couplings, and the motor housing. Mark each location clearly.

Define the fault you need to detect. Overall velocity can reveal imbalance or looseness, while acceleration often helps identify bearing damage. Check the expected frequency range before choosing a sensor. Confirm whether the meter supports displacement, velocity, acceleration, or all three. Select suitable units and measurement ranges. Small details matter.

Check the mounting method. A magnetic base is quick, but a fixed stud usually gives more repeatable results. Handheld probes can be useful, though pressure and angle may change readings. I once treated inconsistent readings as machine faults. The mounting method was the real problem. It was an expensive lesson.

Review the meter’s accuracy, calibration status, environmental rating, and data storage. Choose a device with traceable calibration and clear documentation. Compare its specifications with recognized vibration guidance, such as ISO 20816 practices. Test it on a known machine before field use. Record temperature, load, speed, location, and time with every reading. Without context, numbers can mislead. Recheck unusual results before making a maintenance decision. A practical meter should fit your workflow, not merely offer the largest feature list.

How to Choose the Best Vibration Measurement Meter

Step 1: Match the meter's frequency coverage to the machine condition you need to evaluate.

The ranges shown are representative engineering bands: low-speed machinery commonly requires low-frequency response, general rotating-machine screening often uses vibration velocity across a broader mid-frequency range, and bearing impact or envelope measurements require higher-frequency response. Confirm the required bandwidth, sensor type, measurement units, and applicable machine standard before selecting a meter.

Best Practices for Accurate Vibration Measurements

How to Choose the Best Vibration Measurement Meter?

Accurate vibration measurement starts with the machine, not the meter. Identify the equipment, shaft speed, bearing type, and expected vibration level. Choose a meter that covers the required frequency range. A basic overall-value meter may suit routine checks, while frequency analysis helps locate imbalance, looseness, or bearing damage. Select a suitable sensor, such as an accelerometer for high-frequency faults. Check whether the meter records RMS, peak, or peak-to-peak values. These readings are not interchangeable.

Mounting matters greatly. A loose magnetic connection can distort high-frequency results. For repeatable testing, use a stud mount when practical. Keep the sensor position consistent on every inspection. Mark the measurement points near bearings, then record direction and operating speed. Take readings after the machine reaches normal temperature and load. Background vibration can confuse the result. Compare measurements with a verified baseline, not only with general limits.

Tips: Calibrate the meter regularly. Inspect cables before testing. Keep the sensor surface clean. Repeat an unusual reading. I once trusted a single reading too quickly; the mounting was poor. That mistake changed the diagnosis. Avoid measuring beside heavy impacts or unstable supports. Save raw values, temperature, speed, and machine condition. Small details often explain large differences. Their importance is easy to underestimate.


Powder Coat Booths

For those larger-sized parts, or smaller quantity runs, we have 2 independent powder coat booths and ovens. The quality, durability and affordability of today’s powder coating finishes make this the process of choice for world-class companies.

Powder coating advantages over other forms of coating are many. Materials used in the Powder coating process can be metals and non-metals that come in a multitude of thicknesses, textures, colors, etc. Another of Powder coating’s biggest advantages over conventional coatings is its ability to create finishes in many different textures. Powder Coating Booths allow us the ability to apply these advantages to large products.

Wet Paint Line

Tri-State Fabricators runs a full-service conveyor line for painting. Wet painting can provide protection or decoration to many different part styles. From start to finish, every project is easier to undergo random and point-based inspection by our skilled painting team.

Advantages to our Wet Paint Line are these lines start with product prep and ends with a thorough inspection of a high quality finished product. Our ability to complete large and small projects with a superior finish and doing so in a timely and economical fashion. This passes along the savings in production to our customers. When powder coating ins not an option, our Wet Paint Line gets the job done right the first time.

Wet Paint Booths

When the parts get big and heavy we roll-out our custom paint racks and oversize booth. By utilizing our partnerships with all the major paint brands, we can match virtually any color with wet paint.

The advantages of having access to a Wet Paint Booth are many. Large projects of many different shapes can be loaded into the booth. The Wet Paint Booth offers an environment that is much more controlled than a typical parts painting operation.

Not only are they used because of their controlled environment, but they’re are also advantageous when it comes to applying paint to parts that are needed in industries that require specialty coatings such as medical, aerospace, etc.

Military CARC

Our military forces have some very high standards when it comes to the finish of their vehicles and equipment. From the first pre-treatment step to final coat, it takes a great deal of knowledge and experience to protect the men and women of our armed forces. They deserve only the best, and Tri-State Fabricators provides it.

All of our processes are closely monitored by our staff and management teams. Both of which are highly trained in the processes of metal fabrication and finishing. Tri-State Fabricators’ goal is to always fully satisfy each and every customer, including the military. We will always put a 110% into what we do.

Glass-Bead Blasting

Abrasive media blasting is an excellent way to remove old paint, rust, and increase the paint/powder adhesion. Glass beads produce a much smoother and brighter finish than angular abrasives; leaving the part clean yet without any dimensional change. Chemically inert and environmentally friendly, we can recycle our beads approximately 30 times; making them a more preferred method of metal cleaning or surface finishing.

Advantages to Glass Bead Blasting are many. Glass bead blast media is used when a project is needing rough surfaces need to become smooth for applications of coatings such as paint. It is typically used to clean paint and rust from a product surface without deforming the surface it is being used on. Overall, compared to many other blasting media, Glass Bead Blasting is a very economical choice and those savings are always passed on to our customers.

Part Washing

Tri-State Fabricators utilize a zinc phosphate wash to clean and etch the material to ensure the best paint adhesion possible. The unique design of our 3-stage wash system does the work like a 5-stage. From Cleaning and rinsing to conversion coating and post-treatment, Our Part Washing process is a complete service and works throughout the fabrication service and the finishing service.

Along with the previously mentioned benefits, Curing is a vital chemical reaction that leaves the product finish hard and relatively safe from mild abrasion and aggressive corrosion. This process can be done in more than one way; ambient air-dry or in curing ovens at temps that exceed 240°.

Burn-Off Oven

From fixing paint mistakes (someone else’s of course) to simply cleaning our paint line hooks, our burn-off oven is put to good use. After a quick burn-off, a little clean up, and a fresh coat of paint, your parts will look better than new.

Why does our Burn-Off Oven work so well? Because super heating the air around parts turns the materials into ashes. From paint and powder coatings to rubber and machining oils, high temps do the job without degrading the integrity of the part.

Masking

Masking is a vital part of producing high quality products. We have die-cut masking patterns to protect machined surfaces as well as a wide range of plugs and caps to protect threaded holes and bolts. We provide permanent and temporary masking.

Masking allows the selected sections of a product to be protected from a fabrication or finishing service. This can be with both chemicals when etching and tapes, paints when only finishing just a section of the product. Masking is great in aiding the customization process of a project.

Screen Printing

Screen printing is a photographic process that transfers artwork onto a porous nylon screen which allows colored ink to flow through the screen and be deposited on an aluminum or plastic component. We can generally have just about any design created onto a screen for your parts.

Some of the advantages of Screen Printing are, brand recognition for your business displaying on your products, assembly instructions, product warnings/hazards, etc. Tri-State Fabricators produces Screen Printing of the highest quality so you know it’s durable.

Metal Finishing

Metal Finishing is the art of treating the exterior portion of product, often metal but can also be made of other materials, so that the surface is clean and free of any debris. Then the process of applying coats or either paint of powder coat takes place. This coating process improves the quality of the product in both appearance and resistance to wear and corrosion.

Tri-State Fabricators, Inc., understands that a project typically isn’t complete until a high-quality finish has been added to your product. This is why our painting and powder coating teams continuously inspect the products throughout the Metal Finishing process.



