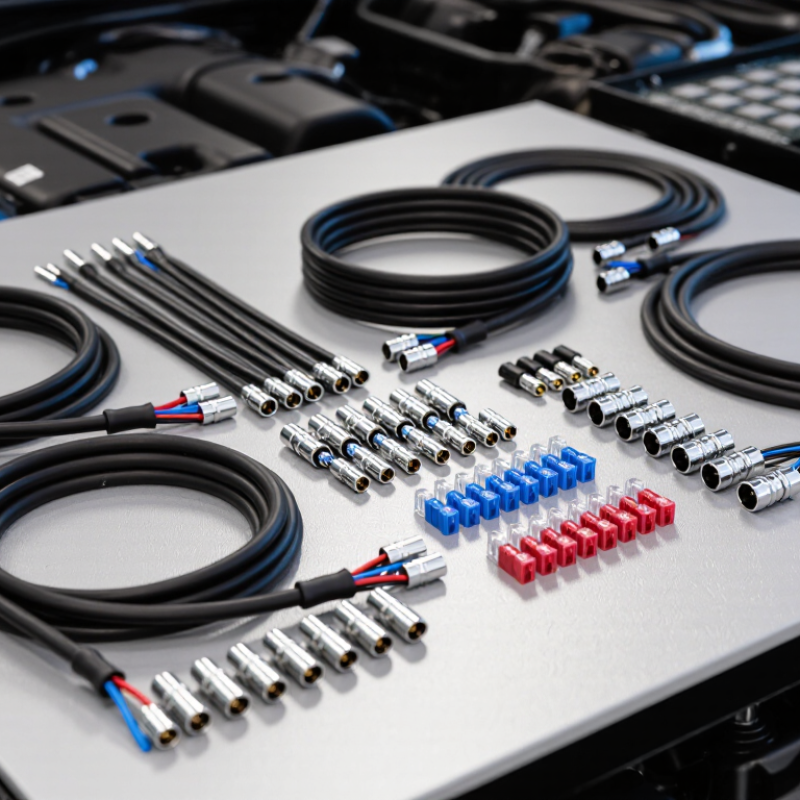
How to Choose the Best LED Harness in 2026?

Choosing the best LED Harness in 2026 requires more than matching a plug to a lamp. A reliable harness must carry current safely, resist heat, and protect every connection from vibration and moisture. It should also fit the vehicle, machine, or lighting project without forced bends or loose terminals. Small details matter. A warm connector can reveal a weak crimp long before the light fails.

Lighting engineer James R. Benya, PE, FIES, expresses the core principle clearly: “A good lighting system is designed as a complete system, not as separate parts.” The same thinking applies to an LED Harness. Look beyond wire color and advertised wattage. Check conductor size, insulation temperature rating, fuse protection, connector quality, grounding, and total cable length. For outdoor use, inspect the IP rating and sealing method. For engine bays, consider heat near exhaust components. For mobile equipment, test strain relief and vibration resistance.

Experience also teaches caution. The most expensive harness is not automatically the safest. The cheapest one may hide thin copper, weak crimps, or uncertain specifications. Neither assumption is dependable. Before selecting a product, compare its documented current capacity with the real load, including startup demand. Verify compatibility with the LED driver and control system. Then inspect a sample physically. Does the terminal lock firmly? Is the crimp clean? Does the cable bend without cracking?

This guide examines those practical questions, while admitting one limitation: product labels are not always complete. Careful verification remains essential.

How to Choose the Best LED Harness in 2026?

What Is an LED Harness and Why Does It Matter in 2026?

An LED harness is the wiring system that connects auxiliary lights to a vehicle’s power source and control switch. It usually includes wires, a fuse, a relay, connectors, and sometimes a dashboard switch. A proper harness controls current safely and reduces stress on the vehicle’s original wiring. Without it, bright lights may flicker, overheat wires, or drain the battery. Not ideal.

In 2026, this matters because vehicles often use sensitive electronic control systems. A poorly matched harness can create faults that are difficult to diagnose. When choosing one, check the light’s rated current, wire gauge, fuse size, and connector quality. The fuse should protect the circuit, not simply match the light’s appearance.

Sealed connectors help when mud, rain, or road spray reaches the installation. I have found that clear labels and extra cable length also save time during real repairs.

A relay is useful for higher-current lighting. It keeps heavy electrical loads away from small dashboard switches. Some modern harnesses include voltage monitoring or fault indicators, but these features are not always necessary. Do not trust impressive packaging alone. Test voltage at the light and inspect every ground connection. Follow the vehicle service manual when available. Even experienced installers can miss one loose terminal. A harness should fit the vehicle, the light, and the person maintaining it.

How to Match an LED Harness With Your Vehicle and Light System

How to Choose the Best LED Harness in 2026?

Matching an LED harness starts with the vehicle’s voltage, circuit design, and lamp load. Most passenger vehicles use 12-volt systems, while many commercial vehicles use 24 volts. Confirm this with a multimeter, not a guess. The harness must also support the light’s measured current, not only its advertised wattage.

For example, a 120-watt system draws about 10 amps at 12 volts before electrical losses. A 15-amp fuse may be suitable, but the vehicle manual and local standards should guide the final choice.

Wire size matters. SAE J1128 covers low-voltage primary cables, while ISO 6722 addresses automotive cable performance, including temperature resistance. Choose wiring with suitable insulation for engine-bay heat.

Add sealed connectors near the grille. Keep the relay and fuse away from splash zones. The U.S. Department of Energy’s 2023 solid-state lighting report shows laboratory LED efficacy can exceed 200 lumens per watt, but real vehicle performance depends on optics, voltage stability, and heat control.

More brightness does not fix poor wiring. I still see installations with bright lamps and weak grounds. That is an avoidable fault.

Modern vehicles may also monitor lighting circuits electronically. The International Energy Agency reported over 17 million electric cars were sold globally in 2024, reflecting increasingly sensitive electrical systems. Test for warning lights, flicker, and standby drain after installation. Leave room for revision.

Which Wiring, Power, and Connector Specifications Should You Check?

Choosing the best LED harness in 2026 starts with matching wiring to the real electrical load. Check the light’s rated wattage, then divide it by system voltage to estimate current. A 120-watt lamp draws about 10 amps on a 12-volt system. Select a wire gauge that handles this current across the full cable length. Longer runs need thicker conductors because voltage drop reduces brightness and creates heat. Keep the fuse close to the power source, with a rating slightly above normal operating current.

Use automotive-grade insulation with suitable temperature and abrasion resistance. Routing the harness near an engine or sharp bracket demands extra protection. Measure it cold. After installation, test voltage at the lamp while it operates. Ideally, the drop should remain below 3 percent. I once trusted a clean-looking harness without checking this measurement. The light worked, but the connector became warm after extended use.

Connector specifications deserve equal attention. Confirm the connector’s continuous current rating, terminal material, locking method, and sealing performance. A waterproof claim means little without a secure seal and proper crimping. Choose connectors with a firm latch that will not loosen under vibration. Check compatibility with the wire gauge and terminal size. Then perform a gentle pull test on every crimp. Small details matter. Leave enough slack for movement, but avoid loose loops that can catch on nearby components. Record the fuse size, wire gauge, and test results for future maintenance.

How to Choose the Best LED Harness in 2026? - Which Wiring, Power, and Connector Specifications Should You Check?

Use the following specifications as a practical comparison guide. Final selection should be based on the actual load, cable length, installation temperature, routing method, local electrical requirements, and the connector manufacturer's ratings.

Selection Dimension Recommended Specification or Calculation Typical Reference Value Why It Matters What to Check Before Purchase
System voltage Match the harness to the LED system's nominal voltage and allowable operating range. 12 V DC, 24 V DC, or 48 V DC systems An incorrect voltage can cause insufficient light output, overheating, or premature LED failure. Confirm the LED load voltage, vehicle or power-supply voltage, polarity, and maximum operating voltage.
Load current Calculate current using: I = P ÷ V. Use the maximum rated wattage, not only the average operating wattage. 120 W at 12 V = 10 A
120 W at 24 V = 5 A
Current determines the required wire size, fuse rating, relay rating, and connector capacity. Check the total wattage of all LED lamps, including start-up or driver inrush current where applicable.
Continuous-load allowance Select wiring and switching components with reserve capacity above the calculated operating current. Common design margin: 20–25% A margin helps compensate for heat, voltage variation, aging, and temporary overloads. Ensure the fuse protects the cable while the relay, switch, and connector can safely handle the expected current.
Wire gauge for short 12 V runs Use copper automotive cable and verify the actual ampacity for the installation environment. 18 AWG: up to about 5 A
16 AWG: up to about 7.5 A
14 AWG: up to about 15 A
12 AWG: up to about 20–25 A
Larger conductors carry more current with lower resistance and lower heat generation. Check conductor material, insulation temperature rating, bundling, ambient temperature, and local wiring requirements.
Wire gauge for longer runs Increase conductor size when the one-way cable length or current is high. Calculate voltage drop for both supply and return conductors. Target voltage drop: ≤3% for critical lighting; ≤5% for general lighting Voltage drop reduces brightness and can cause LED drivers to shut down or operate inefficiently. Measure the complete circuit length, including the ground or negative return path, and use the manufacturer's resistance data.
Fuse protection Install the fuse as close as practical to the power source and size it to protect the cable. Example: 10 A load with 12 AWG cable may use a 15 A fuse if permitted by the cable and equipment ratings The fuse interrupts a short circuit before the harness insulation or conductor overheats. Check fuse type, interrupt rating, environmental protection, replacement availability, and the cable's allowable current.
Relay or solid-state switch Choose a switching device rated above the maximum continuous current and compatible with the system voltage. Typical reserve: at least 25% above calculated load Proper switching capacity reduces contact heating, voltage loss, arcing, and premature failure. Verify coil voltage or control signal, contact current, inrush rating, terminal size, suppression requirements, and mounting location.
Connector current rating Use a connector whose current rating exceeds the maximum circuit current for the installed wire size. Common harness ranges: 3 A, 10 A, 15 A, 20 A, and 30 A per circuit Connector resistance and poor crimping can create localized heat even when the wire is adequately sized. Check rated current at the expected temperature, contact resistance, terminal size, locking method, and derating for multiple loaded circuits.
Connector sealing For exposed areas, select a sealed connector with a suitable ingress-protection rating. IP65: water jets resistant
IP67: temporary immersion up to specified conditions
IP68: manufacturer-defined continuous or deeper immersion conditions
Sealing protects contacts from water, dust, salt, mud, and corrosion. Check the complete mated connector rating, cable seals, unused-cavity plugs, latch security, and installation orientation.
Terminal and crimp quality Use terminals matched to the wire gauge, conductor type, insulation diameter, and connector housing. A correctly crimped terminal should have a firm mechanical grip and low electrical resistance Loose or incorrect crimps are common causes of intermittent lighting, heat buildup, and voltage drop. Check crimp-tool compatibility, terminal plating, pull-test requirements, strain relief, and whether soldering is permitted by the terminal manufacturer.
Insulation and temperature rating Select insulation suitable for the routing environment, oil exposure, abrasion, and heat. Common automotive cable ratings: 80–125°C, depending on cable type High temperature and chemical exposure can make unsuitable insulation brittle, soft, or damaged. Check temperature rating, abrasion resistance, oil and fuel resistance, UV exposure, flexibility, and minimum bend radius.
Ground or negative return Size the return conductor to carry the same current as the positive conductor unless a verified chassis-return design is used. Full-size negative return recommended for long, high-current, or corrosion-prone installations A weak ground can cause flickering, dim output, overheating, and difficult-to-diagnose faults. Check grounding-point cleanliness, fastener security, corrosion protection, return-path resistance, and cable routing.
Harness routing and protection Keep the harness away from exhaust components, sharp edges, moving parts, and pinch points. Use abrasion protection and secure the harness at regular intervals Mechanical damage can expose conductors and create short circuits or intermittent faults. Check loom protection, grommets, clips, bend radius, service loops, heat shielding, and clearance from suspension or steering components.
Control and polarity Confirm whether the LED assembly requires single-pole switching, two-pole isolation, dimming, or a controller-specific signal. Most basic DC LED loads require correct positive and negative polarity Incorrect polarity or incompatible control signals may prevent operation or damage electronic drivers. Check polarity markings, dimmer compatibility, PWM frequency requirements, controller output limits, and back-feed protection.
Serviceability Prefer replaceable fuses, accessible connectors, labeled branches, and enough harness length for maintenance. Label each branch by function and fuse position A serviceable harness reduces diagnostic time and prevents accidental reconnection errors. Check connector access, spare terminals, fuse access, branch identification, repair-terminal availability, and weatherproof service points.
Verification test Test voltage at the LED input while operating at the maximum expected load. Aim for no more than 3–5% circuit voltage drop Testing under load reveals resistance caused by undersized cable, poor grounds, weak crimps, or damaged connectors. Measure source voltage, LED-side voltage, current draw, connector temperature, fuse temperature, and voltage drop across the ground path.

Important: Wire ampacity values are general planning references, not universal code ratings. Actual allowable current depends on conductor material, insulation, ambient temperature, bundling, installation method, cable length, and applicable electrical standards. Always use the lower rating when the cable, connector, fuse, or LED equipment has different limits.

How to Evaluate Safety, Durability, Compatibility, and Installation

How to Choose the Best LED Harness in 2026?

A safe LED harness starts with the vehicle, not the light. Check the lamp’s current draw, voltage range, and connector type. Then inspect the fuse rating and wire gauge. A harness carrying excessive current may heat under the insulation. That risk is easy to miss. Look for abrasion-resistant sleeving, sealed connectors, and weatherproof relay housings. Certification marks should match the regulations in your market.

Durability depends on real installation conditions. Route wires away from exhaust parts, sharp brackets, and moving belts. Secure them with clips, leaving enough slack near hinges and suspension components. I often test a harness by gently pulling each terminal after installation. Loose terminals can create flickering, heat, or sudden failure. It is not a laboratory test, but it reveals careless assembly. Check ground points for clean, bare metal contact. Paint and rust can weaken the connection.

Compatibility also includes physical space and control behavior. Confirm whether the vehicle uses a switched or constant power circuit. Some systems may trigger warnings after accessories are added. Measure connector fit before final mounting. Do not force a mismatched plug. During installation, disconnect the battery when appropriate and protect the circuit with the correct fuse. Recheck every connection after a short drive. I still prefer a second inspection, because tidy wiring can hide one poorly crimped terminal.

How to Choose the Best LED Harness in 2026?

Compare each harness by giving the greatest weight to electrical safety, followed by durability, compatibility, and installation quality. This practical scoring framework helps standardize product evaluations without relying on brand-specific data.

Evaluation focus: Safety includes fuse protection, correct wire sizing, secure terminals, and resistance to overheating. Durability covers insulation quality, vibration resistance, moisture protection, and temperature tolerance. Compatibility considers voltage range, connector fit, current capacity, and vehicle or equipment integration. Installation measures routing, labeling, plug-and-play design, and serviceability.

How to Compare LED Harness Options for Performance and Value

How to Choose the Best LED Harness in 2026?

Compare LED harnesses by usable performance, not the number of wires or accessories in the box. Check the fixture’s current draw, then confirm the harness supports that load continuously. Wire length and gauge matter: longer runs increase resistance and can reduce voltage at the light. Measure voltage at the lamp while it is operating, not just at the battery. A bright workshop test can miss a drop that appears after a long, warm drive.

The U.S. Department of Energy’s Energy Saver guidance says LEDs use at least 75% less energy than incandescent lighting. That is useful context, not a harness-sizing rule; actual current depends on the specific light and vehicle voltage.

For a credible comparison, look for a stated current rating, suitable fuse protection, sealed connectors, and cable insulation rated for the installation environment. SAE J1128 provides requirements for low-voltage automotive primary cable, so ask whether the cable specification is documented. Details count.

Value includes installation time and reliability. Compare connector fit, included mounting hardware, and whether the fuse is easy to access. A cheaper kit may need extra adapters or longer cable, which adds cost and clutter. I still catch myself judging harnesses by thick-looking wire; appearance alone proves little. Check markings and specifications. Then consider serviceability: can you replace one damaged connector without rewiring the whole setup? That small convenience matters on a cold roadside.

Powder Coat Booths

For those larger-sized parts, or smaller quantity runs, we have 2 independent powder coat booths and ovens. The quality, durability and affordability of today’s powder coating finishes make this the process of choice for world-class companies.

Powder coating advantages over other forms of coating are many. Materials used in the Powder coating process can be metals and non-metals that come in a multitude of thicknesses, textures, colors, etc. Another of Powder coating’s biggest advantages over conventional coatings is its ability to create finishes in many different textures. Powder Coating Booths allow us the ability to apply these advantages to large products.

Wet Paint Line

Tri-State Fabricators runs a full-service conveyor line for painting. Wet painting can provide protection or decoration to many different part styles. From start to finish, every project is easier to undergo random and point-based inspection by our skilled painting team.

Advantages to our Wet Paint Line are these lines start with product prep and ends with a thorough inspection of a high quality finished product. Our ability to complete large and small projects with a superior finish and doing so in a timely and economical fashion. This passes along the savings in production to our customers. When powder coating ins not an option, our Wet Paint Line gets the job done right the first time.

Wet Paint Booths

When the parts get big and heavy we roll-out our custom paint racks and oversize booth. By utilizing our partnerships with all the major paint brands, we can match virtually any color with wet paint.

The advantages of having access to a Wet Paint Booth are many. Large projects of many different shapes can be loaded into the booth. The Wet Paint Booth offers an environment that is much more controlled than a typical parts painting operation.

Not only are they used because of their controlled environment, but they’re are also advantageous when it comes to applying paint to parts that are needed in industries that require specialty coatings such as medical, aerospace, etc.

Military CARC

Our military forces have some very high standards when it comes to the finish of their vehicles and equipment. From the first pre-treatment step to final coat, it takes a great deal of knowledge and experience to protect the men and women of our armed forces. They deserve only the best, and Tri-State Fabricators provides it.

All of our processes are closely monitored by our staff and management teams. Both of which are highly trained in the processes of metal fabrication and finishing. Tri-State Fabricators’ goal is to always fully satisfy each and every customer, including the military. We will always put a 110% into what we do.

Glass-Bead Blasting

Abrasive media blasting is an excellent way to remove old paint, rust, and increase the paint/powder adhesion. Glass beads produce a much smoother and brighter finish than angular abrasives; leaving the part clean yet without any dimensional change. Chemically inert and environmentally friendly, we can recycle our beads approximately 30 times; making them a more preferred method of metal cleaning or surface finishing.

Advantages to Glass Bead Blasting are many. Glass bead blast media is used when a project is needing rough surfaces need to become smooth for applications of coatings such as paint. It is typically used to clean paint and rust from a product surface without deforming the surface it is being used on. Overall, compared to many other blasting media, Glass Bead Blasting is a very economical choice and those savings are always passed on to our customers.

Part Washing

Tri-State Fabricators utilize a zinc phosphate wash to clean and etch the material to ensure the best paint adhesion possible. The unique design of our 3-stage wash system does the work like a 5-stage. From Cleaning and rinsing to conversion coating and post-treatment, Our Part Washing process is a complete service and works throughout the fabrication service and the finishing service.

Along with the previously mentioned benefits, Curing is a vital chemical reaction that leaves the product finish hard and relatively safe from mild abrasion and aggressive corrosion. This process can be done in more than one way; ambient air-dry or in curing ovens at temps that exceed 240°.

Burn-Off Oven

From fixing paint mistakes (someone else’s of course) to simply cleaning our paint line hooks, our burn-off oven is put to good use. After a quick burn-off, a little clean up, and a fresh coat of paint, your parts will look better than new.

Why does our Burn-Off Oven work so well? Because super heating the air around parts turns the materials into ashes. From paint and powder coatings to rubber and machining oils, high temps do the job without degrading the integrity of the part.

Masking

Masking is a vital part of producing high quality products. We have die-cut masking patterns to protect machined surfaces as well as a wide range of plugs and caps to protect threaded holes and bolts. We provide permanent and temporary masking.

Masking allows the selected sections of a product to be protected from a fabrication or finishing service. This can be with both chemicals when etching and tapes, paints when only finishing just a section of the product. Masking is great in aiding the customization process of a project.

Screen Printing

Screen printing is a photographic process that transfers artwork onto a porous nylon screen which allows colored ink to flow through the screen and be deposited on an aluminum or plastic component. We can generally have just about any design created onto a screen for your parts.

Some of the advantages of Screen Printing are, brand recognition for your business displaying on your products, assembly instructions, product warnings/hazards, etc. Tri-State Fabricators produces Screen Printing of the highest quality so you know it’s durable.

Metal Finishing

Metal Finishing is the art of treating the exterior portion of product, often metal but can also be made of other materials, so that the surface is clean and free of any debris. Then the process of applying coats or either paint of powder coat takes place. This coating process improves the quality of the product in both appearance and resistance to wear and corrosion.

Tri-State Fabricators, Inc., understands that a project typically isn’t complete until a high-quality finish has been added to your product. This is why our painting and powder coating teams continuously inspect the products throughout the Metal Finishing process.