


Choosing the right LED stop turn tail in 2026 requires more than comparing brightness, price, or online ratings. A reliable lamp must communicate braking, turning, and rear presence clearly in changing conditions. Rain, dust, vibration, tinted lenses, and weak vehicle wiring can all affect performance. The best choice begins with the vehicle’s voltage, socket type, mounting space, and intended use.
Automotive lighting consultant Daniel Stern has stated, “A lamp is not merely a light source; it is part of the vehicle’s communication system.” That principle remains important when evaluating LED stop turn tail products. A quality unit should provide a fast response, stable thermal control, even light distribution, and dependable sealing. Check the lens pattern carefully. Excessive glare is not the same as useful visibility.
Small details matter. Inspect the connector. Feel the housing.
In practical testing, compare the lamp during daylight, dusk, and heavy rain. Look for rapid flashing, uneven brightness, radio interference, or heat around the base. Some products appear powerful in photographs but perform poorly behind older lenses. That difference is easy to miss.
A thoughtful buyer should also review warranty terms, manufacturer testing, and replacement availability. Certifications can support trust, but they do not replace vehicle-specific verification. Even experienced installers can overlook polarity or load compatibility. I have found that “plug-and-play” claims sometimes need closer questioning. The perfect LED stop turn tail does not exist for every vehicle. Fit, beam control, durability, and real-world visibility must be balanced together. That is where careful selection begins.
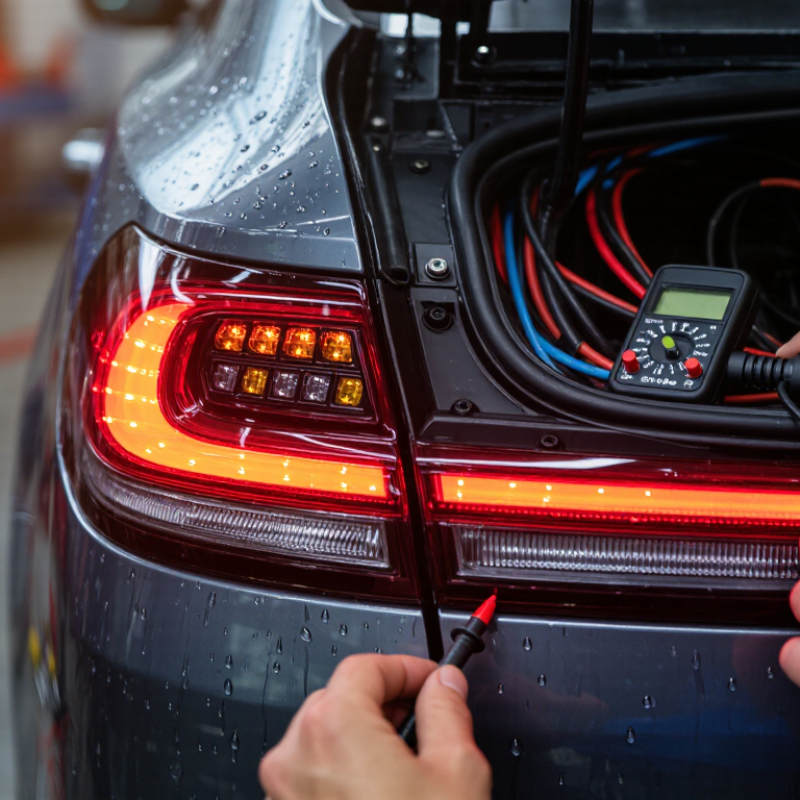
LED stop turn tail lights combine three lighting functions in one rear housing. The tail function glows dimly when the vehicle lights are on. The stop function becomes noticeably brighter when the brake pedal is pressed. The turn function flashes on the selected side. Three signals. One compact unit.
Inside, light-emitting diodes convert electrical current into light with little delay. A control circuit regulates current and prevents unstable brightness. A heat path remains important, because LEDs create less heat than bulbs but still warm their circuit board. Poor heat control can shorten service life. It is easy to overlook.
When choosing a unit, check the vehicle voltage and connector layout carefully. Confirm that the housing fits the existing mounting space. A sealed lens with a strong water-resistance rating helps protect contacts from rain and road spray. The flashing rate also matters. Some vehicles need a compatible flasher or load control to avoid rapid blinking. Test every function after installation, including the dim tail glow, bright braking light, and both turn signals. In practical inspections, wiring errors often appear as weak brightness or a reversed function. I would not trust appearance alone. A lamp can look excellent and still perform poorly after several wet, cold nights.

When choosing LED stop turn tail lights, begin with the vehicle. Record its model year, body style, voltage, and existing lamp connector. Check whether the vehicle uses separate or combined stop and turn circuits. Some newer vehicles monitor current electronically, so a replacement may need a compatible load solution. Do not rely on appearance alone. Physical fit matters too. Measure the housing, mounting holes, and available clearance before ordering.
Legal requirements deserve equal attention. Rules vary by country, state, and vehicle class. Confirm the required lamp colors, viewing angles, flash rate, reflector position, and minimum visibility distance. Look for recognized compliance markings and read the installation instructions carefully. A product listing may sound convincing, but official vehicle rules remain more reliable. When uncertain, consult the transport authority or a qualified inspection professional.
Lighting performance is not only about maximum brightness. The lamp should show a clear red tail glow, a stronger red brake signal, and an amber or red turn signal where permitted. Test it in daylight, rain, and darkness. Check for water entry, loose wiring, delayed response, and unwanted dashboard warnings. I have found that a lamp can look excellent on a workbench and perform poorly after installation. That is worth remembering. Recheck every connection after driving over rough roads, because small installation errors often appear later.
2026 How to Choose LED Stop Turn Tail Lights?
When comparing LED stop turn tail lights, do not judge brightness by appearance alone. A lamp can look intense in a garage yet disappear under direct sunlight. Check measured output, viewing angles, and lens uniformity. Higher brightness is not always better if it creates glare or uneven hot spots. I once chose a very bright light that looked impressive at night. Its side visibility was disappointing. That shortcut was wrong.
Beam pattern matters during real driving. The light should remain clear from straight behind and from reasonable side angles. Look for smooth coverage instead of a narrow central beam. Color also deserves careful attention. Stop functions should show a strong, consistent red, while turn signals need a distinct amber or approved signal color. A tinted lens can change the final color, so judge the assembled lamp, not the LED chips alone.
Response time is another practical difference. LEDs usually illuminate faster than traditional bulbs, giving following drivers slightly more warning. The delay should feel immediate, without flicker or a visible pause. Test the lamp repeatedly with the vehicle running, because voltage changes can reveal unstable electronics. Check it in daylight, rain, and darkness. Real conditions expose weaknesses.
I would also inspect sealing, connectors, and heat management. A bright lamp that fails after repeated temperature changes is not a reliable choice. Some specifications remain unclear, and that deserves caution. Compare test methods, not only advertised numbers.
How to Compare Brightness, Beam Pattern, Color, and Response Time
This normalized reference index compares common automotive lighting characteristics, where 100 represents the stronger performance level in the comparison. LED lighting typically provides faster switching, more consistent red color output, and better optical control than traditional incandescent lighting. Actual brightness and beam performance depend on lamp design, lens geometry, voltage, and applicable lighting regulations.
Choosing LED stop turn tail lights starts with size. Measure the existing lens, mounting hole, and available depth before ordering. A lamp may fit the opening but touch the frame behind it. Common formats include 4-inch round, 6-inch oval, and combination assemblies, but dimensions vary by manufacturer. Verify the visible lens area and light function against FMVSS 108 or applicable UNECE requirements. SAE J586 and J588 also provide useful performance references for stop and turn signals.
Mounting style affects durability. Rubber grommet lamps suit clean cutouts and absorb vibration. Flange-mounted units need accurate screw spacing and a sealed surface. Surface-mounted lights work on flat panels, but exposed wiring needs a protected route. I have seen installation failures caused by a shallow bracket, not a defective lamp. Leave room for connectors, heat, and water drainage.
Check the wiring diagram before cutting anything. Most systems use separate tail, stop, turn, and ground wires, while combination lamps may share circuits. Confirm whether the vehicle operates at 12 or 24 volts. LED assemblies usually draw less current; the U.S. Department of Energy reports that LEDs can use at least 75% less energy and last up to 25 times longer than incandescent lighting. That figure comes from general lighting, not a vehicle guarantee. A digital multimeter can identify polarity and voltage. Test braking, turning, and running lights independently. Ground quality matters. Really matters. Sodium chloride, vibration, and rushed sealing still defeat good hardware.
2026 How to Choose LED Stop Turn Tail Lights?
How to Evaluate Durability, Compatibility, Safety, and Overall Value
Fitment comes first. Measure the housing, mounting holes, lens shape, and connector before ordering. Check the vehicle voltage, polarity, and available space behind the lamp. A 12-volt light may not suit a 24-volt system. Confirm separate stop, turn, and tail functions. Some vehicles may also need load-compatible wiring to prevent dashboard warnings. Small details matter.
Durability depends on more than a bright lens. Look for sealed construction, corrosion-resistant terminals, and a weatherproof rating such as IP67. A strong polycarbonate lens should resist road debris and repeated vibration. Heat management also matters because LEDs can lose output when trapped inside a hot housing. During installation, I inspect the gasket and cable entry carefully. One weak seal can invite moisture. I have learned this after finding condensation inside a seemingly premium lamp.
Safety requires clear light separation and consistent output. Brake lighting should appear noticeably stronger than tail lighting, while turn signals need a distinct rhythm. Check the beam from several angles, not only directly behind the vehicle. Confirm that the lamp meets applicable regional lighting requirements. Marketing claims can be incomplete. Test the lights at night, in rain, and during a quick walk-around. Overall value includes installation time, warranty support, replacement availability, and stable performance. The cheapest option may become expensive after one failed season.
| Evaluation Dimension | Practical Metric | Recommended Target | Why It Matters | How to Verify | Suggested Weight |
|---|---|---|---|---|---|
| Electrical Compatibility | Operating voltage | 12 V or 12/24 V nominal; wide input range around 9–32 V is preferable for commercial vehicles | Prevents flicker, overheating, or premature failure caused by voltage variation | Check the technical data sheet and vehicle charging-system voltage | 10% |
| Electrical Compatibility | Current draw and load behavior | Low current consumption with stable operation; confirm compatibility with electronic flasher systems | LED lamps may draw less current than incandescent lamps and can cause hyper-flashing or warning messages | Measure current with a multimeter and verify whether a load resistor or compatible flasher is required | 8% |
| Physical Fit | Mounting pattern and dimensions | Exact match for mounting holes, grommet, flange, connector, and lamp depth | A small dimensional mismatch can cause water entry, vibration, or installation damage | Compare the drawing, hole spacing, overall dimensions, connector type, and cable exit position | 12% |
| Lighting Functions | Stop, turn, tail, and optional functions | Clearly separated functions with correct wire identification and polarity | Incorrect wiring can disable a safety function or create confusing signal patterns | Test each function independently before final installation | 10% |
| Photometric Performance | Visibility, beam distribution, and color | Uniform illumination, clear separation between functions, and color appropriate to the vehicle application | Brightness alone is not sufficient; poor beam distribution can reduce recognition by other drivers | Review photometric test data and inspect the lamp from multiple viewing angles | 15% |
| Regulatory Compliance | Applicable lighting standards and markings | Evidence of compliance with the regulations required in the installation market; relevant SAE or UNECE test references where applicable | A lamp can function correctly but still be unsuitable for road use if it lacks required approval | Check the lens marking, approval number, declaration, and test documentation | 15% |
| Water and Dust Resistance | Ingress protection rating | IP67 or higher for exposed vehicle locations; the rating should apply to the complete lamp assembly | Road spray, dust, washing, and condensation are common causes of LED and connector failure | Confirm the test report and inspect lens seals, housing joints, cable glands, and connectors | 10% |
| Vibration Resistance | Mechanical design and test evidence | Rigid housing, secure LED board, strain relief, and documented vibration testing | Continuous road vibration can loosen terminals, crack solder joints, or damage the housing | Review vibration-test conditions and check the quality of brackets, fasteners, and cable strain relief | 10% |
| Temperature Performance | Operating temperature range | At least approximately −40°C to +65°C for demanding outdoor applications; confirm the actual specification | Extreme cold, heat, and heat buildup can affect output, seals, electronics, and service life | Compare the rated range with the vehicle’s climate and mounting location | 8% |
| Materials and Construction | Housing, lens, gasket, and terminals | UV-resistant lens, corrosion-resistant terminals, durable housing, and replaceable or serviceable connectors where practical | Material quality influences fading, cracking, corrosion, and long-term sealing performance | Inspect material specifications, terminal plating, gasket compression, and lens clarity | 7% |
| Service Life | LED and electronic reliability | A documented LED life claim, thermal management, surge protection, and a low early-failure rate | LED longevity depends on heat, current control, sealing, vibration, and driver quality—not only the diode rating | Ask for life-test conditions, thermal design details, warranty terms, and failure-rate information | 6% |
| Installation Quality | Wiring, polarity, and connector design | Clearly labeled wires, sealed connectors, correct polarity guidance, and adequate cable length | Good installation design reduces wiring errors, corrosion, rework, and maintenance time | Review the wiring diagram and inspect connector sealing, terminals, and cable flexibility | 5% |
| Warranty and Support | Warranty coverage and technical assistance | Clear warranty period, defined exclusions, accessible technical documentation, and replacement support | Responsive support lowers downtime when a lamp or vehicle system requires troubleshooting | Read the warranty conditions and confirm availability of drawings, wiring data, and replacement parts | 4% |
| Overall Value | Total cost of ownership | Evaluate purchase price, installation labor, energy use, expected service life, downtime risk, and replacement cost together | The lowest purchase price may not provide the lowest operating cost over the vehicle’s service period | Use: Total Cost = Purchase + Installation + Maintenance + Expected Replacement + Downtime | 100% total |


For those larger-sized parts, or smaller quantity runs, we have 2 independent powder coat booths and ovens. The quality, durability and affordability of today’s powder coating finishes make this the process of choice for world-class companies.
Powder coating advantages over other forms of coating are many. Materials used in the Powder coating process can be metals and non-metals that come in a multitude of thicknesses, textures, colors, etc. Another of Powder coating’s biggest advantages over conventional coatings is its ability to create finishes in many different textures. Powder Coating Booths allow us the ability to apply these advantages to large products.
Tri-State Fabricators runs a full-service conveyor line for painting. Wet painting can provide protection or decoration to many different part styles. From start to finish, every project is easier to undergo random and point-based inspection by our skilled painting team.
Advantages to our Wet Paint Line are these lines start with product prep and ends with a thorough inspection of a high quality finished product. Our ability to complete large and small projects with a superior finish and doing so in a timely and economical fashion. This passes along the savings in production to our customers. When powder coating ins not an option, our Wet Paint Line gets the job done right the first time.
When the parts get big and heavy we roll-out our custom paint racks and oversize booth. By utilizing our partnerships with all the major paint brands, we can match virtually any color with wet paint.
The advantages of having access to a Wet Paint Booth are many. Large projects of many different shapes can be loaded into the booth. The Wet Paint Booth offers an environment that is much more controlled than a typical parts painting operation.
Not only are they used because of their controlled environment, but they’re are also advantageous when it comes to applying paint to parts that are needed in industries that require specialty coatings such as medical, aerospace, etc.
Our military forces have some very high standards when it comes to the finish of their vehicles and equipment. From the first pre-treatment step to final coat, it takes a great deal of knowledge and experience to protect the men and women of our armed forces. They deserve only the best, and Tri-State Fabricators provides it.
All of our processes are closely monitored by our staff and management teams. Both of which are highly trained in the processes of metal fabrication and finishing. Tri-State Fabricators’ goal is to always fully satisfy each and every customer, including the military. We will always put a 110% into what we do.
Abrasive media blasting is an excellent way to remove old paint, rust, and increase the paint/powder adhesion. Glass beads produce a much smoother and brighter finish than angular abrasives; leaving the part clean yet without any dimensional change. Chemically inert and environmentally friendly, we can recycle our beads approximately 30 times; making them a more preferred method of metal cleaning or surface finishing.
Advantages to Glass Bead Blasting are many. Glass bead blast media is used when a project is needing rough surfaces need to become smooth for applications of coatings such as paint. It is typically used to clean paint and rust from a product surface without deforming the surface it is being used on. Overall, compared to many other blasting media, Glass Bead Blasting is a very economical choice and those savings are always passed on to our customers.
Tri-State Fabricators utilize a zinc phosphate wash to clean and etch the material to ensure the best paint adhesion possible. The unique design of our 3-stage wash system does the work like a 5-stage. From Cleaning and rinsing to conversion coating and post-treatment, Our Part Washing process is a complete service and works throughout the fabrication service and the finishing service.
Along with the previously mentioned benefits, Curing is a vital chemical reaction that leaves the product finish hard and relatively safe from mild abrasion and aggressive corrosion. This process can be done in more than one way; ambient air-dry or in curing ovens at temps that exceed 240°.
From fixing paint mistakes (someone else’s of course) to simply cleaning our paint line hooks, our burn-off oven is put to good use. After a quick burn-off, a little clean up, and a fresh coat of paint, your parts will look better than new.
Why does our Burn-Off Oven work so well? Because super heating the air around parts turns the materials into ashes. From paint and powder coatings to rubber and machining oils, high temps do the job without degrading the integrity of the part.
Masking is a vital part of producing high quality products. We have die-cut masking patterns to protect machined surfaces as well as a wide range of plugs and caps to protect threaded holes and bolts. We provide permanent and temporary masking.
Masking allows the selected sections of a product to be protected from a fabrication or finishing service. This can be with both chemicals when etching and tapes, paints when only finishing just a section of the product. Masking is great in aiding the customization process of a project.
Screen printing is a photographic process that transfers artwork onto a porous nylon screen which allows colored ink to flow through the screen and be deposited on an aluminum or plastic component. We can generally have just about any design created onto a screen for your parts.
Some of the advantages of Screen Printing are, brand recognition for your business displaying on your products, assembly instructions, product warnings/hazards, etc. Tri-State Fabricators produces Screen Printing of the highest quality so you know it’s durable.
Metal Finishing is the art of treating the exterior portion of product, often metal but can also be made of other materials, so that the surface is clean and free of any debris. Then the process of applying coats or either paint of powder coat takes place. This coating process improves the quality of the product in both appearance and resistance to wear and corrosion.
Tri-State Fabricators, Inc., understands that a project typically isn’t complete until a high-quality finish has been added to your product. This is why our painting and powder coating teams continuously inspect the products throughout the Metal Finishing process.

