


Choosing Shower Glass in 2026 is not only about creating a modern, transparent bathroom. It is about balancing safety, privacy, maintenance, space, and long-term value. A clear glass panel can make a small bathroom feel larger, while textured or frosted glass can soften strong lighting and protect personal privacy. The wrong choice may show water spots every morning, restrict door movement, or make cleaning unnecessarily difficult.
Measure the shower area carefully before comparing styles. Note the ceiling height, wall alignment, drain position, and nearby fixtures. Tempered safety glass remains a dependable option, but thickness, edge treatment, hardware quality, and installation methods also deserve attention. Frameless designs look elegant, yet they demand accurate walls and professional fitting. Semi-frameless or framed systems may offer better stability in uneven spaces. Small details matter.
Real-world use often reveals what showroom displays hide. A coating that reduces mineral buildup can help, but it will not eliminate cleaning. Hard water still leaves marks. A squeegee helps more than many buyers expect. Check the manufacturer’s specifications, warranty terms, glass certification, and cleaning instructions before purchasing. A qualified installer should confirm that the enclosure fits local building requirements and operates safely.
There is no perfect choice.
Your household habits should guide the decision. Families with children may prioritize thicker glass, rounded hardware, and easy access. A rarely used guest bathroom may justify a simpler system. This guide examines the main Shower Glass options for 2026, including privacy levels, glass types, finishes, safety considerations, costs, and maintenance. It also questions popular design trends, because attractive materials are not always practical.
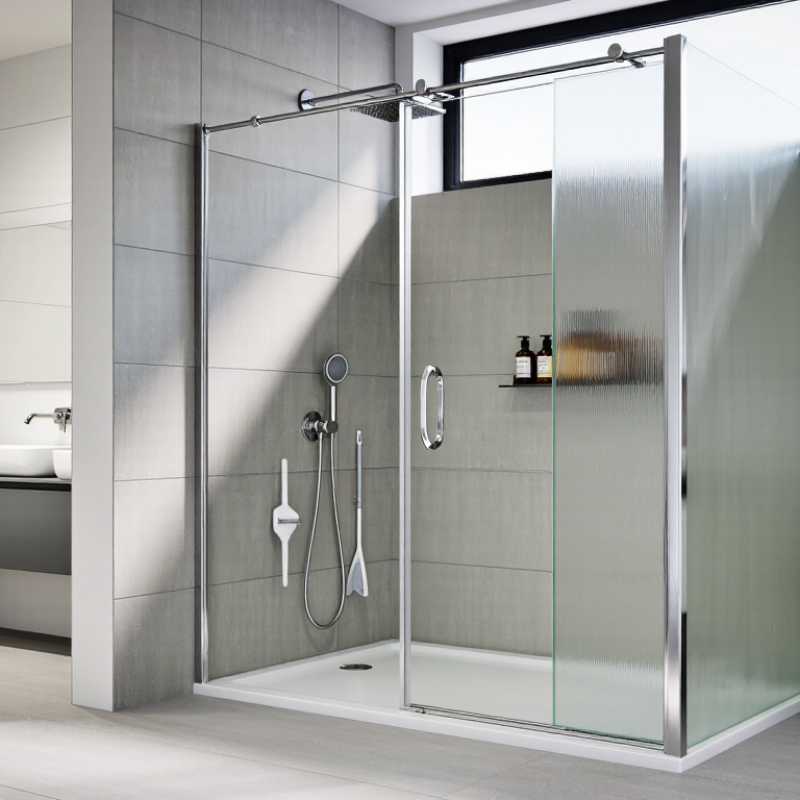
In a compact bathroom, start with movement, not the glass sample. Map the shower entry, toilet clearance, vanity drawers, and towel reach on the floor. An inward-swinging door may strike a person or fixture. An outward swing needs safe landing space. Sliding panels save clearance, but their tracks demand regular cleaning. For small rooms, a fixed panel can keep the wet zone open without stealing turning space.
The 2024 U.S. Houzz Bathroom Trends Study reported that 76% of renovating homeowners upgraded their shower area. That demand makes accurate planning more important than visual trends. Measure finished wall dimensions, tile thickness, curb slope, and wall plumbness. Do not measure only the rough opening. Even a few millimeters can create a leaking door gap. A certified installer should verify field measurements before fabrication.
Use tempered safety glass that meets applicable safety standards, such as ANSI Z97.1 or CPSC 16 CFR 1201, where required locally. Common residential options include 6 mm and 10 mm glass, but panel size, hardware, and support determine suitability. Frameless designs need stronger hinges and very stable walls. Wet-room layouts also require correct floor falls, waterproofing, and ventilation. I once prioritized a wide entrance and underestimated splash travel; the layout looked elegant, yet the nearby timber cabinet suffered. That mistake still influences my designs. A clearer panel is not always a safer bathroom. Privacy, glare, cleaning access, and the user’s mobility deserve equal attention.
| Planning Dimension | Bathroom Layout or Glass Requirement | Recommended Data or Specification | Why It Matters | Verification Before Installation |
|---|---|---|---|---|
| Available Shower Width | Measure the finished distance between the walls, curb, or fixed panels. | Record the opening at the top, middle, and bottom; use the smallest measurement for planning. | Walls and floors are rarely perfectly square, and small variations affect panel fit and door operation. | Measure after waterproofing, wall finishes, tile, and the shower base or curb are complete. |
| Shower Door Clearance | Allow the door to open without hitting a toilet, vanity, towel bar, or adjacent wall. | Provide a clear swing path based on the selected door width and hardware configuration. | A visually attractive enclosure may be impractical if the door obstructs bathroom fixtures or a safe exit route. | Draw the door swing to scale on the floor plan before ordering glass. |
| Compact Bathroom Layout | Use a sliding, pivot, or outward-opening door when an inward swing would interfere with the user or fixtures. | Consider a fixed screen or sliding enclosure where circulation space is limited. | These configurations can preserve usable floor area while keeping the wet zone separated. | Confirm that the chosen system still provides comfortable entry and adequate water containment. |
| Walk-In Shower Layout | Use a fixed glass panel with an open entry when the room has sufficient splash-control length. | Position the opening away from the main spray direction whenever possible. | Reducing direct spray toward the opening helps limit water escaping into the bathroom. | Review showerhead direction, panel length, entry location, and floor slope together. |
| Glass Safety Type | Use safety glazing designed for shower enclosures. | Tempered safety glass is commonly used; laminated safety glass may be appropriate for selected designs. | Safety glazing is designed to reduce injury risk compared with ordinary annealed glass when broken. | Check applicable local building codes and require compliance documentation from the fabricator. |
| Glass Thickness | Select thickness according to panel size, support conditions, hardware, and local requirements. | Common residential options include approximately 6 mm, 8 mm, and 10 mm glass. | Thicker glass generally feels more substantial, but structural suitability depends on the complete enclosure design. | Do not choose thickness by appearance alone; obtain a project-specific engineering or fabricator recommendation. |
| Panel Size and Support | Large or unsupported panels require careful placement of hinges, clips, channels, or stabilizing bars. | Use fixed supports where required by the glass size and enclosure configuration. | Proper support helps control movement and protects the glass, hardware, and surrounding tile. | Confirm maximum panel dimensions and hardware capacity with the glass professional before fabrication. |
| Door Orientation | Plan the door to open into a safe, unobstructed area; avoid layouts that trap the user inside the enclosure. | Outward-opening or two-way pivot arrangements may be appropriate, subject to code and hardware design. | The opening direction affects emergency access, circulation, and daily usability. | Check local code requirements, hinge limitations, curb position, and nearby fixtures. |
| Threshold and Floor Slope | Coordinate the glass line with the shower curb, threshold, and sloped shower floor. | The finished floor should direct water toward the drain and away from the bathroom entry. | Incorrect slope or glass placement can cause pooling, leakage, and difficult door operation. | Verify the finished level and slope before final measurements are taken. |
| Water Containment | Place fixed panels and seals according to the spray pattern and enclosure design. | Use compatible seals, sweeps, or gaskets where required by the door and panel system. | Glass alone does not guarantee a watertight enclosure; layout and sealing details are equally important. | Test the shower spray direction and inspect joints, corners, and the bottom door gap. |
| Glass Finish | Choose clear, textured, patterned, or low-visibility glass based on privacy and maintenance needs. | Clear glass maximizes visual openness; textured or patterned glass provides more privacy. | Surface pattern influences light transmission, privacy, cleaning effort, and the appearance of water marks. | Review a physical sample because texture, transparency, and color can vary by glass type. |
| Edge Treatment | All exposed glass edges should be finished appropriately for the enclosure design. | Specify polished or otherwise properly finished exposed edges where required. | Correct edge treatment improves handling safety, appearance, and compatibility with hardware. | Confirm edge finish, corner details, cutouts, and holes before fabrication. |
| Hardware Compatibility | Match hinges, handles, clips, brackets, and channels to the selected glass and panel arrangement. | Confirm hardware load capacity, hole locations, clearances, and corrosion resistance for wet areas. | Incompatible hardware can lead to misalignment, glass stress, premature corrosion, or difficult operation. | Use the hardware manufacturer’s installation requirements without mixing unapproved components. |
| Bathroom Ventilation | Provide effective ventilation for the shower room regardless of the glass style. | Use a properly sized exhaust fan or equivalent ventilation system in accordance with local code. | Ventilation reduces humidity, condensation, mold risk, and long-term damage to finishes and sealants. | Check that the fan exhausts outdoors where required and is not blocked by the enclosure layout. |
| Cleaning and Maintenance | Choose a surface and layout that allow easy access to all glass, corners, seals, and hardware. | Use a squeegee after showering and clean regularly with products suitable for the glass and finish. | Routine care helps reduce mineral deposits, soap residue, staining, and seal deterioration. | Avoid abrasive tools and chemicals that may damage coatings, metal finishes, or silicone joints. |
| Final Measurement | Take final measurements only after all relevant surfaces are finished. | Confirm width, height, diagonals, plumb, level, curb dimensions, and fixture clearances. | Accurate final dimensions reduce fabrication errors and installation delays. | Have measurements verified by the installer or glass fabricator before production. |
| Code and Safety Review | Ensure the enclosure complies with applicable building, glazing, accessibility, and safety requirements. | Check local regulations and recognized safety-glazing requirements, such as applicable ANSI or CPSC provisions. | Requirements can vary by jurisdiction, building type, shower configuration, and glass location. | Obtain approval from the local authority or a qualified professional when code requirements are uncertain. |

Choosing shower glass in 2026 involves more than selecting a clear panel. The glass type affects privacy, cleaning, light, and visual space. Clear tempered glass keeps a small bathroom bright and open. Frosted glass softens silhouettes but may show soap residue more clearly. Textured glass adds privacy and character, although its raised surface can collect mineral deposits. Tempered safety glass is the usual practical choice for shower enclosures because it is heat-treated and breaks into smaller pieces.
Thickness changes the enclosure’s feel and installation requirements. Six-millimeter glass suits many framed systems and remains relatively light. Eight-millimeter glass offers a sturdier feel for semi-frameless designs. Ten-millimeter glass looks substantial in frameless enclosures, but it needs accurate measurements and stronger hardware. Twelve-millimeter glass is not automatically better. It adds weight, cost, and greater demands on wall support.
Measure the opening after finished tiles are installed. Small errors can affect door alignment and water control. Ask the installer about edge polishing, hinge capacity, seals, and local safety requirements. In a coastal or hard-water area, easier-cleaning glass may be more valuable than extra thickness. I used to favor the heaviest option, but that judgment was too simple. A well-supported eight-millimeter panel can perform better than a poorly installed thicker one. Installation quality matters greatly. Regular ventilation and a quick squeegee also protect clarity, regardless of the glass selected.
Compare shower glass types and thickness options using approximate glass mass per square metre.
A common shower-enclosure option. It is heat-treated for increased strength and breaks into small granules if shattered.
Provides higher visual clarity and less green color than standard clear glass while using the same thickness-based mass calculation.
Uses bonded glass layers with an interlayer that helps retain fragments after breakage. Confirm local code and enclosure requirements before selecting it.
The chart uses the physical relationship between glass thickness and mass: approximately 2.5 kg per square metre for each millimetre of glass. Actual product weight can vary slightly because of coatings, interlayers, hardware cut-outs, and manufacturing tolerances. Final thickness should be confirmed with a qualified glass professional and local building requirements.
Choosing shower glass in 2026 means balancing privacy with natural light. Clear glass keeps sightlines open and can make a compact bathroom feel larger. However, it shows water marks, soap residue, and personal items easily. Regular squeegee use becomes important.
For moderate privacy, consider frosted, etched, or lightly textured glass. These options soften silhouettes while still allowing daylight to pass through. Dense patterns provide more coverage, but they can make the shower feel visually smaller. Textured surfaces also need careful cleaning because mineral deposits may collect in their grooves. The best choice depends on who uses the bathroom and when.
A practical approach is to test samples near a window and under artificial light. View each sample from several angles. Privacy can change dramatically when the room is brighter than the shower area. A darker finish may look elegant in a showroom, yet feel gloomy at home. Nothing is perfect. Also, do not ignore safety-rated tempered glass and professional installation. Accurate measurements, stable fittings, and correctly sealed edges help prevent leaks and reduce maintenance problems. A glass specialist can explain suitable thicknesses and door clearances for the planned layout.
Evaluate Safety, Hardware, Cleaning, and Maintenance
Safety should guide your shower glass choice. Tempered glass is widely used because it breaks into smaller, less sharp pieces. Ask for documented thickness and safety testing from the installer. Laminated glass can provide another protective layer, but it may need a different frame design. Check edges and corners carefully. Small chips can weaken the panel.
Hardware deserves equal attention. Choose corrosion-resistant hinges, handles, and brackets suited to a wet room. Stainless steel is practical, but its grade still matters. Cheap-looking hardware may fail sooner near constant steam and water. Confirm that the wall can support the glass weight. A professional should measure twice, inspect the studs, and explain the fixing method. Measurements can still be wrong.
Cleaning habits affect the glass every day. Use a soft squeegee after showering, especially around the lower corners. A mild, non-abrasive cleaner helps protect coatings and metal surfaces. Avoid rough pads and strong chemicals unless the manufacturer permits them. Inspect seals every few months. Replace loose or cracked seals before water reaches the wall. I once underestimated how quickly mineral spots collect in hard water. That mistake made maintenance harder. A frameless design looks clean, but it does not mean maintenance-free. Ventilation, careful drying, and honest inspections matter more than appearance.
Set a realistic budget before comparing shower glass. The 2024 Houzz & Home Study reports a median major bathroom renovation cost of $25,000 in the United States. Glass usually represents only part of that budget, but hardware, delivery, waterproofing, and labor can change the final price quickly. A basic framed enclosure may cost less than a custom frameless design. Measure twice.
Ask an experienced installer to inspect the walls, floor slope, and waterproofing before ordering panels. Uneven walls can create visible gaps around frameless glass. Poor drainage can leave water beneath the door. These problems are expensive to correct later. The National Glass Association’s glazing guidance supports using safety glazing materials in hazardous locations, while ANSI Z97.1 covers impact performance for safety glazing. Confirm that the glass and fittings meet applicable local requirements.
Request a written quote with glass thickness, edge treatment, hardware finish, sealant, installation time, and warranty terms. Houzz’s 2024 U.S. Bathroom Trends Study found that many renovating homeowners upgrade shower areas, reflecting stronger demand for durable, easier-to-clean designs. Still, “premium” does not always mean better for your room. I once underestimated the effect of a narrow doorway; the selected panel could not enter safely. A professional site visit would have exposed that mistake earlier.


For those larger-sized parts, or smaller quantity runs, we have 2 independent powder coat booths and ovens. The quality, durability and affordability of today’s powder coating finishes make this the process of choice for world-class companies.
Powder coating advantages over other forms of coating are many. Materials used in the Powder coating process can be metals and non-metals that come in a multitude of thicknesses, textures, colors, etc. Another of Powder coating’s biggest advantages over conventional coatings is its ability to create finishes in many different textures. Powder Coating Booths allow us the ability to apply these advantages to large products.
Tri-State Fabricators runs a full-service conveyor line for painting. Wet painting can provide protection or decoration to many different part styles. From start to finish, every project is easier to undergo random and point-based inspection by our skilled painting team.
Advantages to our Wet Paint Line are these lines start with product prep and ends with a thorough inspection of a high quality finished product. Our ability to complete large and small projects with a superior finish and doing so in a timely and economical fashion. This passes along the savings in production to our customers. When powder coating ins not an option, our Wet Paint Line gets the job done right the first time.
When the parts get big and heavy we roll-out our custom paint racks and oversize booth. By utilizing our partnerships with all the major paint brands, we can match virtually any color with wet paint.
The advantages of having access to a Wet Paint Booth are many. Large projects of many different shapes can be loaded into the booth. The Wet Paint Booth offers an environment that is much more controlled than a typical parts painting operation.
Not only are they used because of their controlled environment, but they’re are also advantageous when it comes to applying paint to parts that are needed in industries that require specialty coatings such as medical, aerospace, etc.
Our military forces have some very high standards when it comes to the finish of their vehicles and equipment. From the first pre-treatment step to final coat, it takes a great deal of knowledge and experience to protect the men and women of our armed forces. They deserve only the best, and Tri-State Fabricators provides it.
All of our processes are closely monitored by our staff and management teams. Both of which are highly trained in the processes of metal fabrication and finishing. Tri-State Fabricators’ goal is to always fully satisfy each and every customer, including the military. We will always put a 110% into what we do.
Abrasive media blasting is an excellent way to remove old paint, rust, and increase the paint/powder adhesion. Glass beads produce a much smoother and brighter finish than angular abrasives; leaving the part clean yet without any dimensional change. Chemically inert and environmentally friendly, we can recycle our beads approximately 30 times; making them a more preferred method of metal cleaning or surface finishing.
Advantages to Glass Bead Blasting are many. Glass bead blast media is used when a project is needing rough surfaces need to become smooth for applications of coatings such as paint. It is typically used to clean paint and rust from a product surface without deforming the surface it is being used on. Overall, compared to many other blasting media, Glass Bead Blasting is a very economical choice and those savings are always passed on to our customers.
Tri-State Fabricators utilize a zinc phosphate wash to clean and etch the material to ensure the best paint adhesion possible. The unique design of our 3-stage wash system does the work like a 5-stage. From Cleaning and rinsing to conversion coating and post-treatment, Our Part Washing process is a complete service and works throughout the fabrication service and the finishing service.
Along with the previously mentioned benefits, Curing is a vital chemical reaction that leaves the product finish hard and relatively safe from mild abrasion and aggressive corrosion. This process can be done in more than one way; ambient air-dry or in curing ovens at temps that exceed 240°.
From fixing paint mistakes (someone else’s of course) to simply cleaning our paint line hooks, our burn-off oven is put to good use. After a quick burn-off, a little clean up, and a fresh coat of paint, your parts will look better than new.
Why does our Burn-Off Oven work so well? Because super heating the air around parts turns the materials into ashes. From paint and powder coatings to rubber and machining oils, high temps do the job without degrading the integrity of the part.
Masking is a vital part of producing high quality products. We have die-cut masking patterns to protect machined surfaces as well as a wide range of plugs and caps to protect threaded holes and bolts. We provide permanent and temporary masking.
Masking allows the selected sections of a product to be protected from a fabrication or finishing service. This can be with both chemicals when etching and tapes, paints when only finishing just a section of the product. Masking is great in aiding the customization process of a project.
Screen printing is a photographic process that transfers artwork onto a porous nylon screen which allows colored ink to flow through the screen and be deposited on an aluminum or plastic component. We can generally have just about any design created onto a screen for your parts.
Some of the advantages of Screen Printing are, brand recognition for your business displaying on your products, assembly instructions, product warnings/hazards, etc. Tri-State Fabricators produces Screen Printing of the highest quality so you know it’s durable.
Metal Finishing is the art of treating the exterior portion of product, often metal but can also be made of other materials, so that the surface is clean and free of any debris. Then the process of applying coats or either paint of powder coat takes place. This coating process improves the quality of the product in both appearance and resistance to wear and corrosion.
Tri-State Fabricators, Inc., understands that a project typically isn’t complete until a high-quality finish has been added to your product. This is why our painting and powder coating teams continuously inspect the products throughout the Metal Finishing process.

