


Choosing an Ultrasonic Disperser is not a matter of selecting the highest wattage on a product sheet. The right instrument depends on your material, batch size, target particle size, and processing time. A thick pigment slurry behaves differently from a delicate emulsion. Details matter.
Professor Timothy J. Mason is a recognized sonochemistry researcher. A practical paraphrase of his field’s core lesson is: “Match the ultrasound conditions to the material and process, not just the machine’s rated power.” This is a paraphrase, not a verified verbatim quotation. It points to a common selection mistake: overlooking sample behavior while comparing specifications.
Start with the sample. Is it viscous, temperature-sensitive, abrasive, or prone to foaming? Then consider volume, vessel shape, probe diameter, and whether continuous operation is required. A narrow probe in a small tube may suit a laboratory trial, but it may not scale neatly to a larger batch. Watch the temperature. Ultrasound can heat a sample, and that may change the result.
The best choice is measurable. Ask suppliers for application data using a sample similar to yours, and confirm how performance was assessed. Record processing time, temperature, and dispersion quality during trials. Specifications alone can mislead. A careful test is better. Some uncertainty remains until you test your own material. That is not a flaw in the process; it is a reason to choose a flexible, well-supported system.
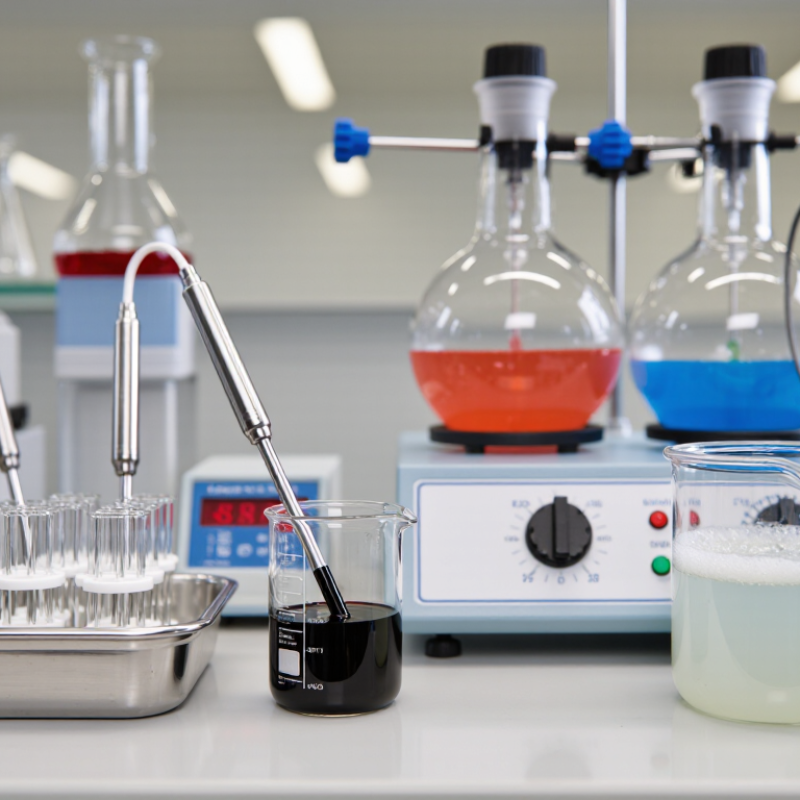
An ultrasonic disperser converts electrical energy into rapid mechanical vibration. A transducer drives a metal probe, often called a horn, which moves back and forth in the liquid. This motion creates alternating pressure waves. Tiny vapor bubbles form and collapse, producing localized shear and short-lived microjets. That is cavitation. These forces can break soft agglomerates and help droplets or particles spread more evenly. The effect is strongest near the probe, not uniform throughout the vessel.
Tips: Match probe size and amplitude to the sample volume. A narrow probe suits small batches, while larger volumes need careful coverage. Keep the probe immersed without touching the vessel. Use short pulses and monitor temperature. Heat can affect sensitive materials.
When choosing a unit, consider sample viscosity, target particle size, and operating time, not power alone. A high wattage rating does not guarantee a finer dispersion. Viscous liquids may need more energy and longer processing, yet excess energy can warm the sample or damage delicate structures. There is a trade-off. It is tempting to trust one specification, but performance also depends on probe depth, vessel shape, and formulation. Run a small trial and record the settings. The first result may be uneven; that is useful feedback, not a failure.

An ultrasonic disperser should match the sample, not just the batch size. Record the liquid volume, viscosity, solids content, and whether particles settle quickly. A thin liquid with a few fine powders behaves differently from a dense slurry. Note any foaming, heat sensitivity, or tendency to clump. Small details matter.
Define what “dispersed” means for your process. You may need fewer visible agglomerates, a narrower particle-size range, or a stable mixture after storage. Those are different targets. Also set practical limits: processing time, allowable temperature rise, and acceptable contamination from probe wear. If the sample is valuable, test a small portion before committing a full batch. Keep notes on probe depth, amplitude, pulse settings, and vessel shape; changing one can alter the result.
These estimates can be rough. That is a reason to test, not to guess confidently. Start with a measured volume and short processing intervals, checking temperature and appearance between runs. A wider vessel or deeper liquid may need a different probe position. Don’t assume more energy always improves the mixture; it can add heat or create foam. Record what failed, too. A slightly uneven sample may reveal that the real limit is viscosity, not equipment power.
Typical starting batch-volume ranges by probe tip diameter. The ranges are approximate; suitable volume depends on the instrument, vessel, sample viscosity, and required processing intensity.
How to use this chart: Start with your sample volume, then check which probe size covers it. Also consider viscosity, solids content, heat sensitivity, and desired particle size. Confirm the working-volume limits with the equipment specifications, and use temperature control when processing heat-sensitive samples.
Choosing an ultrasonic disperser means matching energy delivery to the material, not just buying the highest wattage. Mason and Lorimer’s technical reference Applied Sonochemistry (2002) describes power ultrasound in the approximate 20–100 kHz range. Lower-frequency systems, often near 20 kHz, can produce strong cavitation for breaking stubborn agglomerates. Higher frequencies may suit gentler processing, but results depend on viscosity, solids loading, and vessel geometry. There is no universal setting. A reported wattage alone can mislead; track specific energy in joules per milliliter and record temperature during trials.
Probe design matters at the same time. A narrow tip concentrates acoustic energy in a small zone, useful for a small batch or a localized treatment. A larger probe can cover more volume, but only if the generator supplies adequate amplitude. Keep the tip submerged without touching the vessel wall. For scale-up, compare the treated volume, probe area, and mixing pattern—not volume alone. Honestly, this part is often messier than equipment charts suggest.
Tips: Start with a low amplitude and short pulses. Check for a temperature rise, foam, or uneven dispersion. Change one variable at a time, then document the result. A simple log beats memory.
Rated capacity is only a starting point when choosing an ultrasonic disperser. Check whether the stated volume matches your actual batch size and vessel shape. A narrow beaker and a wide tank can behave differently, even with the same liquid volume. Consider viscosity, solids loading, and how quickly you need a uniform dispersion. Leave room for adjustment. A unit operating near its limit may offer little flexibility when materials or batch sizes change.
Controls matter during repeat runs. Look for adjustable amplitude, clear power readouts, and a timer or pulse mode if your process needs intermittent treatment. These features help operators reproduce settings and limit unnecessary heating. A useful bench check is to record the starting temperature, treatment time, and final appearance. Watch for settling or uneven texture after the sample rests. A tidy control panel is not proof of consistent results.
Operating conditions can change performance. Check the required power supply, available ventilation, and space around the instrument. Confirm that the probe can reach the working depth without touching the vessel wall or bottom. Heat-sensitive samples may need shorter pulses or external cooling. Small details matter. I would verify noise levels and cleaning access before purchase; they are easy to overlook, and published specifications may not capture your workspace.
| Selection Factor | What to Evaluate | Small-Batch Processing | Pilot-Scale Processing | Larger-Scale Processing |
|---|---|---|---|---|
| Working volume | Assess the actual batch size, vessel geometry, and whether the full volume must be processed uniformly. | Often suited to approximately 1–100 mL, depending on probe and vessel. | Commonly around 100 mL–2 L with an appropriately sized processor and probe. | Volumes above a few liters may require an industrial or flow-through configuration; confirm capacity for the specific material and process. |
| Power and probe size | Compare rated power, probe-tip diameter, and the energy needed for the sample—not just the maximum power rating. | Compact systems may provide roughly 50–500 W with smaller probes. | Systems in the approximate 500–1,500 W range may be used, subject to sample properties and duty cycle. | Higher-power systems, sometimes in the kilowatt range, may be needed; large volumes often benefit from continuous-flow processing. |
| Amplitude control | Look for adjustable amplitude and a clear method of setting or monitoring delivered energy. | Useful for tuning intensity in small or sensitive samples. | Helps maintain consistent processing when batch size or formulation changes. | Process validation is important; settings may not transfer directly between equipment sizes. |
| Pulse and duty-cycle controls | Check whether the instrument supports pulsed operation and specifies allowable operating time and rest periods. | Pulsing can limit heat buildup in small samples. | Adjust pulse settings to balance dispersion needs with temperature control. | Confirm the system is designed for the required continuous or intermittent production duty. |
| Temperature management | Estimate heat generation and decide whether an ice bath, jacketed vessel, or external cooling is needed. | Small samples can heat rapidly; monitor temperature during processing. | A jacketed vessel or recirculating chiller may help control batch temperature. | Plan for engineered cooling and temperature monitoring, especially during extended runs. |
| Sample properties | Consider viscosity, solids content, abrasiveness, volatility, and sensitivity to heat or shear. | Low-viscosity samples are generally easier to process with a probe. | Higher viscosity or solids loading can reduce circulation and require process trials. | Validate performance with the actual formulation; highly viscous or abrasive materials may need a different setup. |
| Vessel and probe placement | Check vessel diameter, liquid depth, probe immersion, clearance from the vessel bottom, and splash control. | Use a vessel that allows the probe to remain immersed without contacting the sides or bottom. | A stand and repeatable positioning improve consistency between batches. | Flow cells or purpose-designed vessels can improve repeatability and containment at higher throughput. |
| Process monitoring | Review timer, energy display, temperature measurement, and data-recording options. | A timer and temperature check may be sufficient for exploratory work. | Recorded operating settings support repeatable pilot runs. | Consider logging and process controls for production consistency and traceability. |
| Scale-up strategy | Determine how output will be matched across scales, such as by energy input, flow rate, or product-quality measurements. | Establish a baseline recipe and measure the resulting dispersion quality. | Use trials to identify settings that reproduce the target result at a larger volume. | Do not assume that increasing power in proportion to volume alone will preserve results; verify with representative testing. |
| Safety and maintenance | Evaluate acoustic enclosure needs, splash protection, ventilation, probe wear, and cleaning requirements. | Use appropriate eye and hearing protection and secure the vessel. | Plan for safe operation, routine inspection, and accessible cleaning. | Assess guarding, noise control, operator training, and maintenance access as part of system selection. |
Selection note: Volume and power ranges are indicative, not guaranteed equipment limits. Suitable capacity depends on probe design, vessel geometry, sample properties, processing time, and cooling. Confirm performance with representative material and operating conditions.
Choosing an ultrasonic disperser means weighing operator safety, upkeep, and the cost of keeping it reliable. Check that the unit has a secure enclosure, clear operating controls, and a way to manage heat and noise. A probe can warm a small sample quickly, so confirm that the instrument’s limits suit your materials and batch size. Small details matter. The right safety features reduce exposure to splashes, vibration, and excessive sound during routine work.
Tips: During a trial, inspect how easily the probe, vessel, and surrounding surfaces can be cleaned. Ask how often seals and other wear parts need replacement. Keep a simple maintenance log; missed cleaning can shorten component life and affect repeatability.
Compare the purchase price with replacement probes, service needs, energy use, and downtime over several years. A lower-cost unit may become expensive if parts are hard to obtain or cleaning takes too long. Conversely, paying for features your team rarely uses may not make sense. A spreadsheet helps, but it can miss the cost of interrupted work. Estimate realistic operating hours and include a modest allowance for repairs; exact costs are rarely predictable.


For those larger-sized parts, or smaller quantity runs, we have 2 independent powder coat booths and ovens. The quality, durability and affordability of today’s powder coating finishes make this the process of choice for world-class companies.
Powder coating advantages over other forms of coating are many. Materials used in the Powder coating process can be metals and non-metals that come in a multitude of thicknesses, textures, colors, etc. Another of Powder coating’s biggest advantages over conventional coatings is its ability to create finishes in many different textures. Powder Coating Booths allow us the ability to apply these advantages to large products.
Tri-State Fabricators runs a full-service conveyor line for painting. Wet painting can provide protection or decoration to many different part styles. From start to finish, every project is easier to undergo random and point-based inspection by our skilled painting team.
Advantages to our Wet Paint Line are these lines start with product prep and ends with a thorough inspection of a high quality finished product. Our ability to complete large and small projects with a superior finish and doing so in a timely and economical fashion. This passes along the savings in production to our customers. When powder coating ins not an option, our Wet Paint Line gets the job done right the first time.
When the parts get big and heavy we roll-out our custom paint racks and oversize booth. By utilizing our partnerships with all the major paint brands, we can match virtually any color with wet paint.
The advantages of having access to a Wet Paint Booth are many. Large projects of many different shapes can be loaded into the booth. The Wet Paint Booth offers an environment that is much more controlled than a typical parts painting operation.
Not only are they used because of their controlled environment, but they’re are also advantageous when it comes to applying paint to parts that are needed in industries that require specialty coatings such as medical, aerospace, etc.
Our military forces have some very high standards when it comes to the finish of their vehicles and equipment. From the first pre-treatment step to final coat, it takes a great deal of knowledge and experience to protect the men and women of our armed forces. They deserve only the best, and Tri-State Fabricators provides it.
All of our processes are closely monitored by our staff and management teams. Both of which are highly trained in the processes of metal fabrication and finishing. Tri-State Fabricators’ goal is to always fully satisfy each and every customer, including the military. We will always put a 110% into what we do.
Abrasive media blasting is an excellent way to remove old paint, rust, and increase the paint/powder adhesion. Glass beads produce a much smoother and brighter finish than angular abrasives; leaving the part clean yet without any dimensional change. Chemically inert and environmentally friendly, we can recycle our beads approximately 30 times; making them a more preferred method of metal cleaning or surface finishing.
Advantages to Glass Bead Blasting are many. Glass bead blast media is used when a project is needing rough surfaces need to become smooth for applications of coatings such as paint. It is typically used to clean paint and rust from a product surface without deforming the surface it is being used on. Overall, compared to many other blasting media, Glass Bead Blasting is a very economical choice and those savings are always passed on to our customers.
Tri-State Fabricators utilize a zinc phosphate wash to clean and etch the material to ensure the best paint adhesion possible. The unique design of our 3-stage wash system does the work like a 5-stage. From Cleaning and rinsing to conversion coating and post-treatment, Our Part Washing process is a complete service and works throughout the fabrication service and the finishing service.
Along with the previously mentioned benefits, Curing is a vital chemical reaction that leaves the product finish hard and relatively safe from mild abrasion and aggressive corrosion. This process can be done in more than one way; ambient air-dry or in curing ovens at temps that exceed 240°.
From fixing paint mistakes (someone else’s of course) to simply cleaning our paint line hooks, our burn-off oven is put to good use. After a quick burn-off, a little clean up, and a fresh coat of paint, your parts will look better than new.
Why does our Burn-Off Oven work so well? Because super heating the air around parts turns the materials into ashes. From paint and powder coatings to rubber and machining oils, high temps do the job without degrading the integrity of the part.
Masking is a vital part of producing high quality products. We have die-cut masking patterns to protect machined surfaces as well as a wide range of plugs and caps to protect threaded holes and bolts. We provide permanent and temporary masking.
Masking allows the selected sections of a product to be protected from a fabrication or finishing service. This can be with both chemicals when etching and tapes, paints when only finishing just a section of the product. Masking is great in aiding the customization process of a project.
Screen printing is a photographic process that transfers artwork onto a porous nylon screen which allows colored ink to flow through the screen and be deposited on an aluminum or plastic component. We can generally have just about any design created onto a screen for your parts.
Some of the advantages of Screen Printing are, brand recognition for your business displaying on your products, assembly instructions, product warnings/hazards, etc. Tri-State Fabricators produces Screen Printing of the highest quality so you know it’s durable.
Metal Finishing is the art of treating the exterior portion of product, often metal but can also be made of other materials, so that the surface is clean and free of any debris. Then the process of applying coats or either paint of powder coat takes place. This coating process improves the quality of the product in both appearance and resistance to wear and corrosion.
Tri-State Fabricators, Inc., understands that a project typically isn’t complete until a high-quality finish has been added to your product. This is why our painting and powder coating teams continuously inspect the products throughout the Metal Finishing process.

