


7 Tips for Choosing a Microbiology Cabinet

Choosing a Microbiology Cabinet is not simply a matter of comparing prices, sizes, or attractive product photos. The right cabinet should match the work, the materials handled, and the level of protection required. A cabinet designed for personnel and sample protection may differ greatly from a clean bench or a basic laboratory enclosure. Confusing these categories can create serious safety gaps. It happens more often than expected.

This guide presents seven practical tips for making a more informed choice. It considers airflow performance, filtration, cabinet dimensions, visibility, noise, ergonomics, certification, and long-term maintenance. Reliable selection should begin with a documented risk assessment and current manufacturer specifications. Guidance from qualified biosafety professionals and recognized laboratory standards also deserves careful attention. Do not rely on a sales brochure alone. Check certification records, service availability, filter replacement procedures, and installation requirements. A cabinet may perform well in a quiet showroom but behave differently beside doors, vents, or busy workstations. Small details matter. The best choice also supports consistent user behavior, because even advanced equipment cannot correct poor technique or neglected maintenance. Some recommendations may seem obvious, yet real laboratories often overlook cleaning access, electrical capacity, or future workflow changes. That is worth reconsidering. With these seven tips, laboratory managers, researchers, and purchasing teams can compare options more responsibly and identify a Microbiology Cabinet that supports safer, more practical daily work.
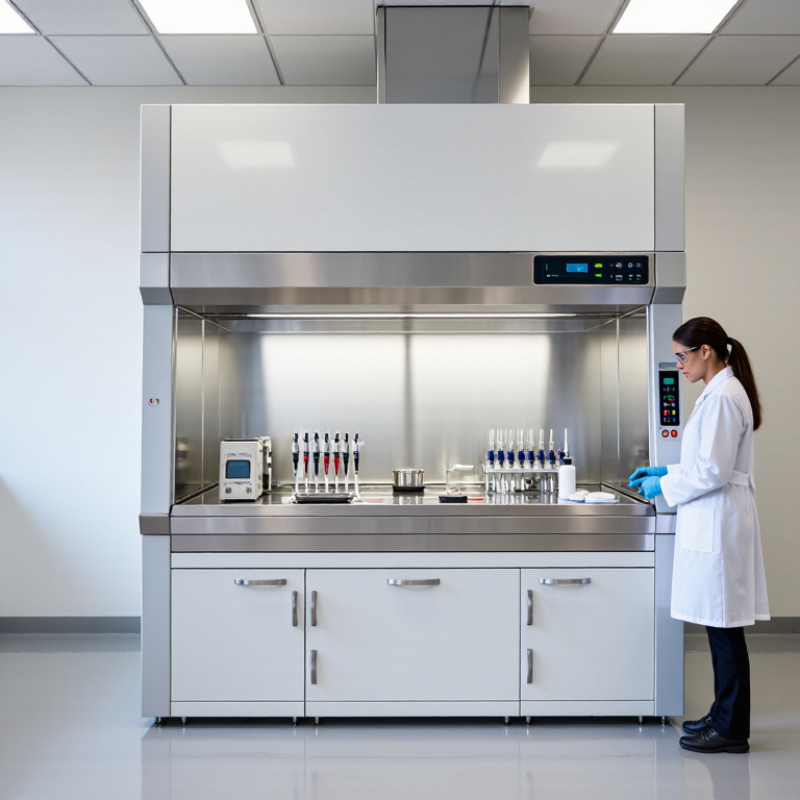
7 Tips for Choosing a Microbiology Cabinet

Identify the Microbiological Hazards and Protection Requirements

Choosing a microbiology cabinet begins with identifying the hazards, not comparing cabinet sizes. Describe the organisms, sample volumes, procedures, and possible aerosol generation. A sealed tube is different from vigorous mixing or centrifuge transfer. Ask whether the main concern is worker exposure, sample protection, environmental release, or all three. These needs guide the cabinet type, airflow pattern, and containment level.

Class I cabinets mainly protect personnel and the environment. Class II models can also protect the work and samples through controlled airflow. Class III systems provide a higher level of isolation for certain high-containment work. Do not choose by classification alone. Check whether the cabinet suits your facility, procedures, and risk assessment. If volatile chemicals are used, a recirculating cabinet may be unsuitable. Consult a qualified biosafety professional and follow applicable standards.

Look for verified airflow, HEPA filtration, clear alarms, easy decontamination, and accessible service areas. Confirm that installation testing and periodic certification are available locally. The room layout matters too. Doors, vents, and heavy traffic can disturb airflow. Staff training is essential. Keep the work surface uncluttered, and avoid blocking front or rear grilles. Small details matter. A cabinet can meet specifications yet perform poorly after careless installation. I have also learned that risk assessments need revision when protocols, organisms, or equipment change. A checklist helps, but it cannot replace observation, maintenance records, and honest review.


Match the Cabinet Type to the Intended Laboratory Procedures

7 Tips for Choosing a Microbiology Cabinet

Match the Cabinet Type to the Intended Laboratory Procedures

Choosing a microbiology cabinet should begin with the procedure, not the room size. A cabinet for sterile cell culture may be unsuitable for aerosol-generating work. Define the biological hazards, sample volume, operator movements, and required protection before comparing models.

A Class I cabinet protects personnel and the surrounding environment, but it does not protect the exposed sample. It may suit procedures where product sterility is not essential. A Class II biosafety cabinet provides personnel, product, and environmental protection through controlled airflow and filtration. It is commonly selected for culture handling, inoculation, and other procedures involving infectious materials. A Class III cabinet offers a sealed workspace for higher-containment applications. Use it only after a formal risk assessment and facility review.

For non-infectious sterile preparation, a laminar-flow clean bench may protect the work area. It does not protect the operator from hazardous aerosols. That distinction is often missed. Never treat a clean bench as a biosafety cabinet.

Match the cabinet to the actual workflow. Check whether pipetting, vortexing, open-plate handling, or waste transfer occurs inside it. Confirm that the cabinet supports safe access without blocking the front or rear grilles. Certification should occur after installation and at defined intervals. Airflow alarms, sash position, filter condition, and decontamination access also deserve attention. Even experienced teams can choose poorly when they focus on specifications alone. Observe the procedure in real time. The best choice may become obvious.

Evaluate Airflow, Filtration, and Containment Performance

7 Tips for Choosing a Microbiology Cabinet

Evaluate Airflow, Filtration, and Containment Performance

A microbiology cabinet should be selected through risk assessment, not appearance. The WHO Laboratory Biosafety Manual, 4th edition, stresses matching containment equipment to procedures, organisms, and exposure routes. Start by confirming the required cabinet class. Then review inflow and downflow specifications. For a Class II Type A2 cabinet, NSF/ANSI 49 specifies a minimum inflow velocity of 100 feet per minute, or approximately 0.51 meters per second.

Airflow must remain stable during normal work. Ask for test data covering velocity uniformity, alarms, sash position, and recovery after disturbance. A smoke visualization test can reveal turbulence near the front grille. Small changes matter. A misplaced bottle can disrupt the protective air curtain. The U.S. CDC and NIH BMBL, 6th edition, recommends field certification at least annually and after relocation. That certification should include inflow, downflow, HEPA filter integrity, and containment checks.

Filtration claims also need careful reading. HEPA filters are commonly rated at 99.97% efficiency for 0.3-micrometer particles under standardized conditions, according to U.S. federal filtration criteria. This figure does not guarantee safe containment. Gaps, damaged seals, or poor cabinet balance can bypass the filter. One uncomfortable truth: a cabinet may pass a filter test yet perform poorly during real handling. Request recent certification records, maintenance history, and documented alarm tests. Review noise, lighting, and ergonomics too. Operators who work awkwardly may create more airflow disturbances, even when the engineering data looks excellent.

7 Tips for Choosing a Microbiology Cabinet: Airflow, Filtration, and Containment Performance

Compare the typical minimum inflow velocity and HEPA filtration benchmark used for common microbiological safety cabinet classes. Class I cabinets are designed primarily for personnel and environmental protection, while Class II cabinets also protect the product through controlled vertical airflow. Class III cabinets provide the highest containment through a gas-tight enclosure and should be evaluated using manufacturer certification and site-specific risk assessment.

Selection tips: 1) Match the cabinet class to the biological risk. 2) Confirm the required inward airflow velocity. 3) Check HEPA filter efficiency and test method. 4) Review airflow uniformity and alarm functions. 5) Verify containment certification after installation. 6) Consider exhaust connection and room requirements. 7) Plan regular maintenance, decontamination, and filter replacement.

Check Cabinet Size, Ergonomics, Utilities, and Installation Needs

Choosing a microbiology cabinet starts with the work, not the catalog. Measure room width, door clearance, ceiling height, and service access. A cabinet may fit the bench and still block a doorway. It happens.

The CDC/NIH Biosafety in Microbiological and Biomedical Laboratories, 6th edition, recommends certification at least annually and after relocation. Installation planning therefore matters. Confirm exhaust requirements, electrical load, gas connections, heat output, and backup power needs before delivery.

Do not place the cabinet beside doors, busy walkways, or strong air vents. These drafts can disturb the protective airflow. NSF/ANSI 49 also provides recognized performance and field-certification requirements for Class II biosafety cabinets.

Ergonomics deserves equal attention. Check the working height, viewing angle, reach distance, noise level, and foot clearance. A deep cabinet can force shoulders forward during pipetting. That discomfort may become a daily error risk.

The WHO Laboratory Biosafety Manual, 4th edition, emphasizes risk assessment before selecting containment equipment. Match the cabinet’s internal width to real procedures, including racks, waste containers, and larger instruments.

Avoid choosing extra width without checking airflow and room ventilation. Bigger is not automatically safer. The final decision should be reviewed by qualified biosafety and facilities personnel, with installation records retained for future certification.

Compare Certification, Maintenance, Safety Features, and Total Cost

Choosing a microbiology cabinet requires more than comparing purchase prices. Certification is the first filter. The CDC/NIH BMBL recommends certification at least annually, and after relocation, repair, or filter replacement. Ask for testing against NSF/ANSI 49, using documented airflow, leak, and alarm results. A certificate without test details is weak evidence.

Tip 1: Match the cabinet to the hazard assessment. The WHO Laboratory Biosafety Manual, fourth edition, places risk assessment before equipment selection. Consider aerosols, organisms, procedures, and user exposure. Tip 2: Inspect safety features. Look for airflow alarms, sealed work zones, clear viewing panels, and accessible emergency controls. Small design details matter. A poorly positioned alarm may be ignored during a noisy procedure.

Tip 3: Calculate total cost over ten years, not one invoice. Include certification visits, filter replacement, electrical demand, service contracts, downtime, and room modifications. Tip 4: Request maintenance intervals and response times in writing. Tip 5: Check local service capability. Waiting weeks for a qualified technician can disrupt testing and create unsafe workarounds. Tip 6: Confirm the cabinet fits the room, doorways, benches, and exhaust plan. Tip 7: Compare noise and ergonomics, because fatigue encourages poor technique. I have seen teams focus on low energy use while overlooking certification travel costs. That comparison was incomplete. Industry guidance is valuable, but site-specific risk, workflow, and maintenance history should guide the final decision.

Powder Coat Booths

For those larger-sized parts, or smaller quantity runs, we have 2 independent powder coat booths and ovens. The quality, durability and affordability of today’s powder coating finishes make this the process of choice for world-class companies.

Powder coating advantages over other forms of coating are many. Materials used in the Powder coating process can be metals and non-metals that come in a multitude of thicknesses, textures, colors, etc. Another of Powder coating’s biggest advantages over conventional coatings is its ability to create finishes in many different textures. Powder Coating Booths allow us the ability to apply these advantages to large products.

Wet Paint Line

Tri-State Fabricators runs a full-service conveyor line for painting. Wet painting can provide protection or decoration to many different part styles. From start to finish, every project is easier to undergo random and point-based inspection by our skilled painting team.

Advantages to our Wet Paint Line are these lines start with product prep and ends with a thorough inspection of a high quality finished product. Our ability to complete large and small projects with a superior finish and doing so in a timely and economical fashion. This passes along the savings in production to our customers. When powder coating ins not an option, our Wet Paint Line gets the job done right the first time.

Wet Paint Booths

When the parts get big and heavy we roll-out our custom paint racks and oversize booth. By utilizing our partnerships with all the major paint brands, we can match virtually any color with wet paint.

The advantages of having access to a Wet Paint Booth are many. Large projects of many different shapes can be loaded into the booth. The Wet Paint Booth offers an environment that is much more controlled than a typical parts painting operation.

Not only are they used because of their controlled environment, but they’re are also advantageous when it comes to applying paint to parts that are needed in industries that require specialty coatings such as medical, aerospace, etc.

Military CARC

Our military forces have some very high standards when it comes to the finish of their vehicles and equipment. From the first pre-treatment step to final coat, it takes a great deal of knowledge and experience to protect the men and women of our armed forces. They deserve only the best, and Tri-State Fabricators provides it.

All of our processes are closely monitored by our staff and management teams. Both of which are highly trained in the processes of metal fabrication and finishing. Tri-State Fabricators’ goal is to always fully satisfy each and every customer, including the military. We will always put a 110% into what we do.

Glass-Bead Blasting

Abrasive media blasting is an excellent way to remove old paint, rust, and increase the paint/powder adhesion. Glass beads produce a much smoother and brighter finish than angular abrasives; leaving the part clean yet without any dimensional change. Chemically inert and environmentally friendly, we can recycle our beads approximately 30 times; making them a more preferred method of metal cleaning or surface finishing.

Advantages to Glass Bead Blasting are many. Glass bead blast media is used when a project is needing rough surfaces need to become smooth for applications of coatings such as paint. It is typically used to clean paint and rust from a product surface without deforming the surface it is being used on. Overall, compared to many other blasting media, Glass Bead Blasting is a very economical choice and those savings are always passed on to our customers.

Part Washing

Tri-State Fabricators utilize a zinc phosphate wash to clean and etch the material to ensure the best paint adhesion possible. The unique design of our 3-stage wash system does the work like a 5-stage. From Cleaning and rinsing to conversion coating and post-treatment, Our Part Washing process is a complete service and works throughout the fabrication service and the finishing service.

Along with the previously mentioned benefits, Curing is a vital chemical reaction that leaves the product finish hard and relatively safe from mild abrasion and aggressive corrosion. This process can be done in more than one way; ambient air-dry or in curing ovens at temps that exceed 240°.

Burn-Off Oven

From fixing paint mistakes (someone else’s of course) to simply cleaning our paint line hooks, our burn-off oven is put to good use. After a quick burn-off, a little clean up, and a fresh coat of paint, your parts will look better than new.

Why does our Burn-Off Oven work so well? Because super heating the air around parts turns the materials into ashes. From paint and powder coatings to rubber and machining oils, high temps do the job without degrading the integrity of the part.

Masking

Masking is a vital part of producing high quality products. We have die-cut masking patterns to protect machined surfaces as well as a wide range of plugs and caps to protect threaded holes and bolts. We provide permanent and temporary masking.

Masking allows the selected sections of a product to be protected from a fabrication or finishing service. This can be with both chemicals when etching and tapes, paints when only finishing just a section of the product. Masking is great in aiding the customization process of a project.

Screen Printing

Screen printing is a photographic process that transfers artwork onto a porous nylon screen which allows colored ink to flow through the screen and be deposited on an aluminum or plastic component. We can generally have just about any design created onto a screen for your parts.

Some of the advantages of Screen Printing are, brand recognition for your business displaying on your products, assembly instructions, product warnings/hazards, etc. Tri-State Fabricators produces Screen Printing of the highest quality so you know it’s durable.

Metal Finishing

Metal Finishing is the art of treating the exterior portion of product, often metal but can also be made of other materials, so that the surface is clean and free of any debris. Then the process of applying coats or either paint of powder coat takes place. This coating process improves the quality of the product in both appearance and resistance to wear and corrosion.

Tri-State Fabricators, Inc., understands that a project typically isn’t complete until a high-quality finish has been added to your product. This is why our painting and powder coating teams continuously inspect the products throughout the Metal Finishing process.
