How to Choose a Telecentric Macro Lens?

Choosing a telecentric macro lens is not merely a matter of selecting the highest magnification. It is a measurement decision. The wrong lens can make a circular part appear larger at one edge than another. That distortion may turn a precise inspection into an uncertain judgment.

Dr. Glenn D. Boreman, an optical engineering author and educator, offers a useful principle: “Measurement quality begins with defining the measurement requirement.” His point applies directly to telecentric imaging. Before comparing brands, identify the object size, working distance, sensor format, required resolution, and acceptable measurement error. A metal washer, molded plastic connector, or semiconductor feature may need very different optical performance. Small details matter.

A telecentric macro lens keeps magnification nearly constant when the object moves slightly along the optical axis. This makes edge measurements more stable. It also reduces perspective errors. Yet telecentricity is not magic. Lighting, focus, sensor alignment, and object positioning still influence results. A lens may deliver excellent specifications but perform poorly in a cramped production cell. That uncomfortable possibility deserves attention.

This guide explains how to compare object-space telecentricity, field of view, depth of field, working distance, and image-circle compatibility. It also considers coaxial lighting, distortion data, mounting constraints, and inspection speed. Some published specifications require careful interpretation. Real samples should be tested whenever possible. A practical choice is rarely the most expensive one. It is the lens that produces repeatable measurements under actual operating conditions.
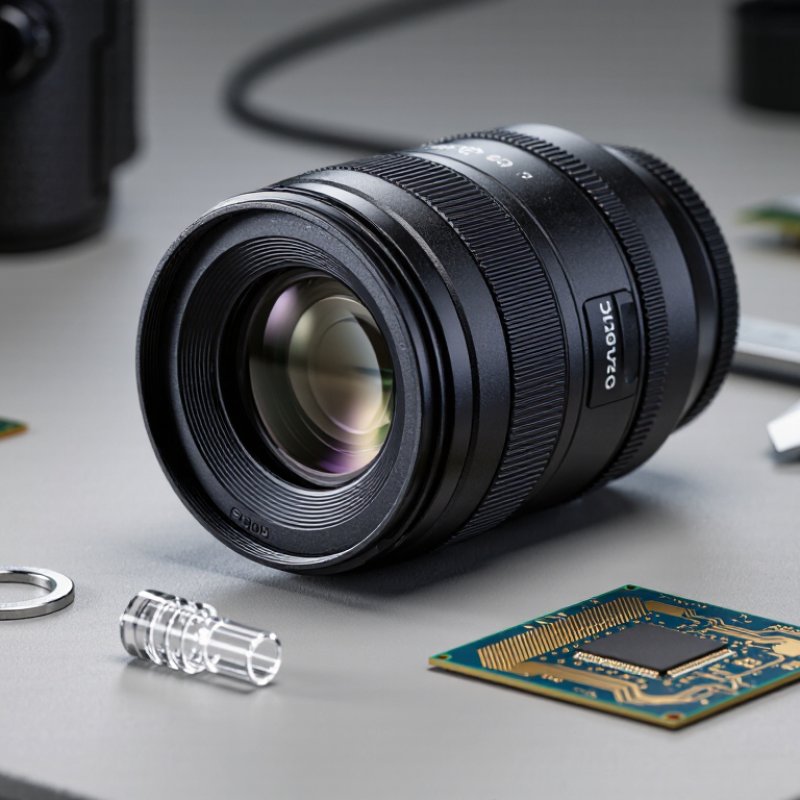
How to Choose a Telecentric Macro Lens?

Define Telecentric Macro Lens Design and Imaging Principles

How to Choose a Telecentric Macro Lens?

A telecentric macro lens places its entrance pupil near infinity. Chief rays then travel almost parallel to the optical axis. This design creates orthographic-like imaging, so object size changes less when working distance shifts. In production, that matters when measuring holes, edges, pins, or molded parts. A conventional lens may make the near edge appear larger. A telecentric lens keeps geometry calmer.

Choose magnification from the smallest feature and sensor size, not from working distance alone. The lens must cover the full sensor without dark corners. Check telecentricity error, distortion, numerical aperture, and depth of field. Higher numerical aperture improves resolution, but it usually narrows focus tolerance. EMVA 1288 recommends measuring signal, noise, and dynamic range under defined conditions; those figures are more useful than a sharpness claim alone. Very practical.

Grand View Research reported a global machine-vision market value of about 14.9 billion dollars in 2023, with strong projected growth through 2030. That growth increases pressure for repeatable inspection, but a larger market does not guarantee better measurements. I have seen setups fail because lighting was treated as an accessory. Use coaxial or telecentric illumination when surface reflections distort edges. Validate the complete lens, camera, light, and fixture together. A perfect lens can still produce imperfect data.

How to Choose a Telecentric Macro Lens?

Ideal telecentric imaging keeps magnification nearly constant when the object moves along the optical axis. The chart compares the theoretical magnification change caused by a 1 mm object shift at different magnifications.

Assumption: a 100 mm thin lens operating at the listed magnification. For a conventional lens, the approximate relative change is Δm/m ≈ m × Δz/f; an ideal object-space telecentric lens targets approximately 0% change because its chief rays are parallel to the optical axis.

Identify the Required Magnification, Working Distance, and Field of View

Choosing a telecentric macro lens starts with three practical measurements: magnification, working distance, and field of view. Magnification describes how large the object appears on the sensor. A 0.5× lens forms an image half the object’s actual size. Select the lowest magnification that reveals the smallest feature clearly. Higher magnification may improve detail, but it reduces the visible area and can make alignment harder.

Working distance is the space between the lens and the object. Measure it around the real fixture, not only the sample. Leave room for lighting, clamps, and small positioning errors. Field of view depends on sensor size and magnification. Divide the sensor’s active width by the lens magnification for a useful estimate. Check the height as well. A square part may fit horizontally but still be clipped vertically.

Tips: Sketch the object, sensor frame, and working distance on paper. Then test a calibrated target at the intended height. Look for edge distortion and brightness changes. A rushed estimate can fail later.

In practical inspections, I compare the required feature size with the lens resolution and depth of field. Telecentric imaging helps preserve object dimensions when height changes slightly, but it cannot fix poor focus or unstable mounting. Use a longer working distance when access is limited. Still, excessive distance may require more lighting and a larger lens. My own measurements have improved when I rechecked the sensor specifications, because assumptions about sensor size are surprisingly easy to miss.

How to Choose a Telecentric Macro Lens? - Identify the Required Magnification, Working Distance, and Field of View

Practical selection guide based on sensor size, object dimensions, working distance, and inspection tolerance

Inspection Requirement Recommended Magnification Typical Working Distance Example Sensor Format Approx. Sensor Width Approx. Horizontal Field of View Recommended Use
Large component or wide-area measurement 0.10× Approximately 100–150 mm 1-inch sensor 13.2 mm Approximately 132 mm Large parts, tray inspection, dimensional checks with generous field coverage
Medium-sized part with moderate measurement detail 0.25× Approximately 80–110 mm 2/3-inch sensor 8.8 mm Approximately 35.2 mm Connectors, molded components, medium-size machined parts
Detailed inspection of a small component 0.50× Approximately 65–90 mm 1/1.8-inch sensor 7.2 mm Approximately 14.4 mm Small mechanical parts, printed features, surface-defect inspection
High-detail dimensional measurement 1.00× Approximately 55–80 mm 1/1.8-inch sensor 7.2 mm Approximately 7.2 mm Fine edges, small holes, precision profiles, and close dimensional tolerances
Very small feature or microscope-level inspection 2.00× Approximately 50–75 mm 1/1.8-inch sensor 7.2 mm Approximately 3.6 mm Micro-features, precision components, and detailed surface analysis
Magnification Formula

Required magnification = sensor dimension ÷ required object-space field of view.

Field of View Rule

Object-space field of view ≈ sensor width ÷ magnification. Allow about 10–20% extra margin around the part.

Working Distance

Select a working distance that accommodates fixtures, lighting, part height, and robotic or conveyor access.

Selection Notes
  • Telecentric lenses are preferred when measurement accuracy must remain stable despite small object-position changes.
  • Higher magnification generally reduces the field of view and depth of field, so part flatness and focus stability become more important.
  • The listed field-of-view values are calculated examples using common sensor widths; actual values depend on the lens design and image circle.
  • Confirm sensor compatibility, distortion specification, illumination clearance, and calibration accuracy before final selection.


Compare Object-Space, Image-Space, and Bi-Telecentric Lens Types

How to Choose a Telecentric Macro Lens?

Choosing a telecentric macro lens starts with the measurement problem, not the camera. Object-space telecentric lenses keep chief rays nearly parallel before they reach the lens. This design reduces perspective errors and keeps magnification stable when an object moves slightly along the optical axis. It suits dimensional inspection, such as checking a metal pin’s diameter or a molded part’s edge. Working distance and field coverage still require careful checking. Small setup errors can become expensive surprises.

Image-space telecentric lenses

Image-space telecentric lenses control the rays near the sensor. They help keep light striking the image plane more perpendicularly, which can improve illumination uniformity and reduce sensor-side shading. However, they do not remove object-side perspective by themselves. They may fit systems where sensor performance and image consistency matter more than strict dimensional accuracy.

Bi-telecentric lenses

Bi-telecentric lenses control both sides of the optical path. They provide the strongest perspective suppression and more consistent magnification, making them valuable for high-precision gauging. They are often larger, heavier, and less forgiving about alignment. Space matters. Measure twice.

In practice, I would compare the required tolerance, object depth, working distance, and lighting geometry. A bi-telecentric lens is not automatically the best choice. It can be excessive for simple presence inspection. Conversely, an object-space lens may disappoint when parts vary in height. Real systems are rarely perfect, so allow adjustment room around focus, mounting, and illumination.

Evaluate Resolution, Depth of Field, Distortion, and Light Performance

How to Choose a Telecentric Macro Lens?

Choosing a telecentric macro lens starts with the measurement task, not the catalog specification. In my lab work, I compare resolution against the smallest feature that must be inspected. A fine pitch target should reveal clean edges under actual production lighting. Sensor pixel size matters too. A lens may look sharp, yet soften details across the image corners. Check test charts at the intended working distance and aperture. Do not rely on center sharpness alone.

Depth of field is equally important. A narrow aperture can increase usable depth, but diffraction may reduce resolution. Telecentric designs also help control perspective changes when object height varies. Distortion should remain very low for dimensional inspection, especially near the field edges. Still, “zero distortion” is rarely a practical assumption. I once selected a lens with excellent resolution but insufficient depth of field. The result was accurate only when parts sat perfectly flat. That choice was not perfect. Light performance can decide the final result. Evaluate transmission, flare control, and compatibility with ring, coaxial, or backlighting. A dark corner can imitate a defect.

Tips: Test the complete camera, lens, light, and fixture together. Measure repeatability, not just one impressive image. Record exposure settings and edge sharpness. Leave room for small alignment errors. A shorter working distance may improve brightness, but it can reduce access for lighting and handling. If possible, inspect real samples with scratches, curved surfaces, and reflective finishes. Those details often expose weaknesses that a clean calibration target hides.

Match Lens Specifications with Camera, Sensor, and Inspection System

How to Choose a Telecentric Macro Lens?

Choosing a telecentric macro lens begins with the camera, not just magnification. Match the lens image circle to the sensor’s active area. Otherwise, corners may darken or lose detail. Check the sensor format, pixel size, resolution, and camera interface. Small pixels reveal optical weaknesses quickly. They also make focusing less forgiving. Determine the required field of view from the largest inspection part. Add only a modest margin. Excess space wastes valuable pixels.

Working distance must suit the mechanical layout, lighting, and safety clearance. A longer distance may simplify illumination, but it can reduce available resolution. Check the lens aperture and depth of field against the part’s height variation. Telecentricity helps maintain stable dimensions when objects move slightly along the optical axis. It does not correct poor lighting or unstable fixturing. Match distortion specifications with your measurement tolerance. A low-distortion lens may still perform poorly if the camera and software are not calibrated together. This is often overlooked.

Tips: Print a calibration target at the planned working distance. Measure the field of view, edge sharpness, and dimensional repeatability. Test the actual inspection light, not a temporary lamp. Review several samples, including imperfect parts. A lens that looks excellent on one flat target may struggle with reflective edges, deep recesses, or uneven surfaces. Allow time for adjustment; the first setup is rarely final.

Powder Coat Booths

For those larger-sized parts, or smaller quantity runs, we have 2 independent powder coat booths and ovens. The quality, durability and affordability of today’s powder coating finishes make this the process of choice for world-class companies.

Powder coating advantages over other forms of coating are many. Materials used in the Powder coating process can be metals and non-metals that come in a multitude of thicknesses, textures, colors, etc. Another of Powder coating’s biggest advantages over conventional coatings is its ability to create finishes in many different textures. Powder Coating Booths allow us the ability to apply these advantages to large products.

Wet Paint Line

Tri-State Fabricators runs a full-service conveyor line for painting. Wet painting can provide protection or decoration to many different part styles. From start to finish, every project is easier to undergo random and point-based inspection by our skilled painting team.

Advantages to our Wet Paint Line are these lines start with product prep and ends with a thorough inspection of a high quality finished product. Our ability to complete large and small projects with a superior finish and doing so in a timely and economical fashion. This passes along the savings in production to our customers. When powder coating ins not an option, our Wet Paint Line gets the job done right the first time.

Wet Paint Booths

When the parts get big and heavy we roll-out our custom paint racks and oversize booth. By utilizing our partnerships with all the major paint brands, we can match virtually any color with wet paint.

The advantages of having access to a Wet Paint Booth are many. Large projects of many different shapes can be loaded into the booth. The Wet Paint Booth offers an environment that is much more controlled than a typical parts painting operation.

Not only are they used because of their controlled environment, but they’re are also advantageous when it comes to applying paint to parts that are needed in industries that require specialty coatings such as medical, aerospace, etc.

Military CARC

Our military forces have some very high standards when it comes to the finish of their vehicles and equipment. From the first pre-treatment step to final coat, it takes a great deal of knowledge and experience to protect the men and women of our armed forces. They deserve only the best, and Tri-State Fabricators provides it.

All of our processes are closely monitored by our staff and management teams. Both of which are highly trained in the processes of metal fabrication and finishing. Tri-State Fabricators’ goal is to always fully satisfy each and every customer, including the military. We will always put a 110% into what we do.

Glass-Bead Blasting

Abrasive media blasting is an excellent way to remove old paint, rust, and increase the paint/powder adhesion. Glass beads produce a much smoother and brighter finish than angular abrasives; leaving the part clean yet without any dimensional change. Chemically inert and environmentally friendly, we can recycle our beads approximately 30 times; making them a more preferred method of metal cleaning or surface finishing.

Advantages to Glass Bead Blasting are many. Glass bead blast media is used when a project is needing rough surfaces need to become smooth for applications of coatings such as paint. It is typically used to clean paint and rust from a product surface without deforming the surface it is being used on. Overall, compared to many other blasting media, Glass Bead Blasting is a very economical choice and those savings are always passed on to our customers.

Part Washing

Tri-State Fabricators utilize a zinc phosphate wash to clean and etch the material to ensure the best paint adhesion possible. The unique design of our 3-stage wash system does the work like a 5-stage. From Cleaning and rinsing to conversion coating and post-treatment, Our Part Washing process is a complete service and works throughout the fabrication service and the finishing service.

Along with the previously mentioned benefits, Curing is a vital chemical reaction that leaves the product finish hard and relatively safe from mild abrasion and aggressive corrosion. This process can be done in more than one way; ambient air-dry or in curing ovens at temps that exceed 240°.

Burn-Off Oven

From fixing paint mistakes (someone else’s of course) to simply cleaning our paint line hooks, our burn-off oven is put to good use. After a quick burn-off, a little clean up, and a fresh coat of paint, your parts will look better than new.

Why does our Burn-Off Oven work so well? Because super heating the air around parts turns the materials into ashes. From paint and powder coatings to rubber and machining oils, high temps do the job without degrading the integrity of the part.

Masking

Masking is a vital part of producing high quality products. We have die-cut masking patterns to protect machined surfaces as well as a wide range of plugs and caps to protect threaded holes and bolts. We provide permanent and temporary masking.

Masking allows the selected sections of a product to be protected from a fabrication or finishing service. This can be with both chemicals when etching and tapes, paints when only finishing just a section of the product. Masking is great in aiding the customization process of a project.

Screen Printing

Screen printing is a photographic process that transfers artwork onto a porous nylon screen which allows colored ink to flow through the screen and be deposited on an aluminum or plastic component. We can generally have just about any design created onto a screen for your parts.

Some of the advantages of Screen Printing are, brand recognition for your business displaying on your products, assembly instructions, product warnings/hazards, etc. Tri-State Fabricators produces Screen Printing of the highest quality so you know it’s durable.

Metal Finishing

Metal Finishing is the art of treating the exterior portion of product, often metal but can also be made of other materials, so that the surface is clean and free of any debris. Then the process of applying coats or either paint of powder coat takes place. This coating process improves the quality of the product in both appearance and resistance to wear and corrosion.

Tri-State Fabricators, Inc., understands that a project typically isn’t complete until a high-quality finish has been added to your product. This is why our painting and powder coating teams continuously inspect the products throughout the Metal Finishing process.



