


Choosing the right Sae Led Lightbar begins with more than brightness or a low purchase price. It requires a clear understanding of visibility, optical performance, vehicle compatibility, and operating conditions. SAE International’s J845 standard addresses optical warning devices for authorized emergency, maintenance, and service vehicles. Its testing framework considers photometric performance, flash characteristics, and visibility. That distinction matters. A lightbar can look powerful in a dark driveway yet perform poorly through rain, dust, or midday glare.
Real-world selection also depends on evidence. The U.S. Department of Energy has reported that LED technology generally delivers higher efficiency and longer service life than traditional lighting sources. However, efficiency claims vary between products. Buyers should examine measured wattage, thermal management, warranty terms, and test conditions. The National Highway Traffic Safety Administration has repeatedly emphasized conspicuity and safe operation in emergency vehicle guidance. Therefore, beam pattern, mounting height, color selection, and synchronization deserve careful review. More light is not always better.
Fit the work, not the marketing.
A reliable Sae Led Lightbar should match the vehicle roof, electrical system, duty cycle, and local operating requirements. Review SAE J845 or J595 references carefully, because compliance language may differ by application and jurisdiction. Look for documented test results, ingress protection ratings, vibration testing, and replacement support. This article will compare those factors in practical terms, from a driver’s seat facing wet glass to a fleet manager reviewing five-year maintenance costs. No selection guide is perfect. Product data can be incomplete, and field conditions remain unpredictable. Careful verification is still the strongest safeguard.
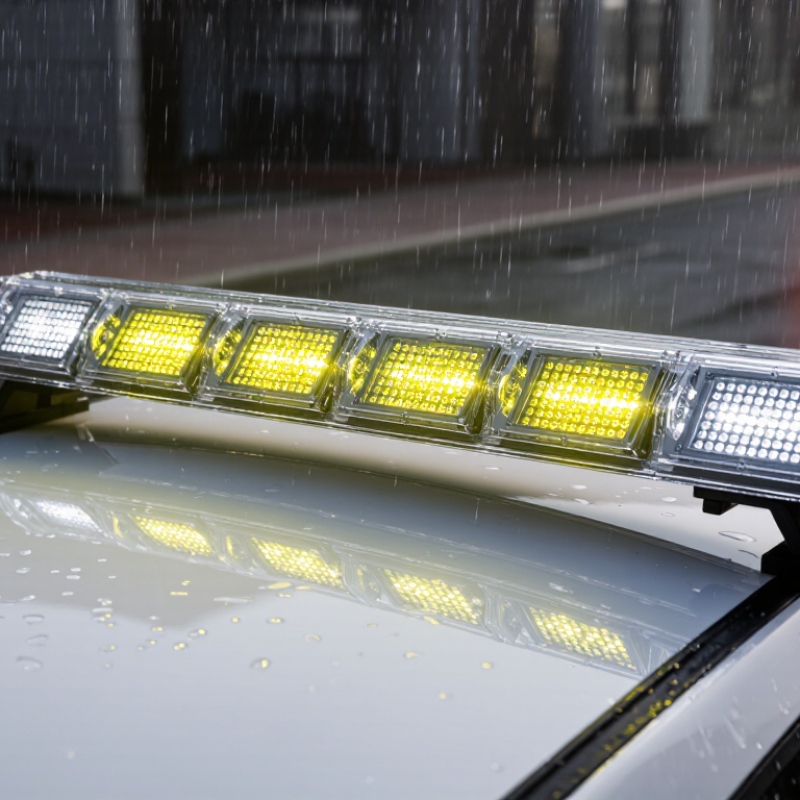
How to Choose the Right SAE LED Lightbar?
Define the Mission: Match SAE J845 Class 1 or 2 Warning Requirements
Before comparing brightness claims, identify the vehicle’s operating environment. SAE J845 defines performance classes for optical warning devices, including Class 1 and Class 2. Class 1 is the higher-intensity category; Class 2 provides a lower output. The standard evaluates measured light performance, not simply the number of LEDs or a product’s appearance. Check the lightbar’s test documentation against the applicable SAE J845 edition. Details matter.
Match the class to real conditions. A vehicle working beside sunlit roads, fast traffic, or large equipment may need the stronger warning output of Class 1. For controlled sites or lower ambient light, Class 2 may be suitable, subject to the vehicle’s role and applicable requirements. SAE J845 classification is not a substitute for checking local rules or agency specifications. A bright beam can also create glare, so mounting height, viewing angles, and flash pattern deserve attention.
Specify the required class before selecting size or features. Ask for documented SAE J845 test results, and confirm the exact model and configuration tested. A lightbar’s color or LED count alone does not prove compliance. In practice, teams sometimes choose by appearance first. That is easy to regret when the unit is installed high on a cab, partially blocked, or difficult to see from the side.
| Decision Factor | Class 1 Consideration | Class 2 Consideration | Practical Selection Check |
|---|---|---|---|
| Typical mission profile | Consider Class 1 when the vehicle regularly operates in high-risk or high-priority situations where stronger warning performance is required. | Consider Class 2 for duties where a lower warning-output class is suitable for the operating environment and applicable rules. | Document the vehicle’s tasks, operating locations, and required warning level before comparing products. |
| Traffic and roadside exposure | May be appropriate for demanding roadside or emergency-response work, subject to the relevant vehicle requirements and local regulations. | May suit less demanding service or maintenance duties when the responsible authority permits this class. | Consider traffic speed, lane exposure, work duration, sight lines, and whether the vehicle is stationary or moving. |
| Light output classification | Class 1 represents a higher performance class than Class 2 under the applicable SAE J845 test criteria. | Class 2 represents a lower performance class than Class 1 under the applicable SAE J845 test criteria. | Request test documentation for the exact lightbar configuration; do not infer a class from appearance or LED count. |
| Ambient conditions | Evaluate whether the mission calls for the higher class in bright daylight or other challenging viewing conditions. | Assess whether the lower class is adequate for the expected ambient light and work setting. | SAE class alone does not guarantee a specific viewing distance in every environment. |
| Glare and close-range exposure | Higher output should be managed carefully to reduce unnecessary glare for nearby workers and road users. | A lower class may be preferable where close-range exposure is frequent, if it still meets the mission’s requirements. | Review dimming options, nighttime operating procedures, mounting position, and applicable rules. |
| Compliance verification | Confirm that the precise model and configuration are documented as meeting the required SAE J845 class. | Confirm that the precise model and configuration are documented as meeting the required SAE J845 class. | Check the test report or compliance documentation, including the tested configuration and any limitations. |
| Color, flash pattern, and installation | Class selection does not by itself establish that a color, pattern, or installation is legally permitted. | Class selection does not by itself establish that a color, pattern, or installation is legally permitted. | Verify permitted colors, flash patterns, placement, and use with the relevant jurisdiction and vehicle authority. |
| Recommended decision | Choose Class 1 when the mission or governing requirement calls for the higher performance class and the installation is authorized. | Choose Class 2 when it meets the documented mission requirement and is permitted for the vehicle and jurisdiction. | When requirements are unclear, consult the fleet authority, safety officer, or applicable regulator before purchase. |
Important: SAE J845 class is a performance classification based on standardized testing. It is not, by itself, proof that a lightbar’s color, flash pattern, installation, or use is legal in a particular jurisdiction.

Before choosing an SAE LED lightbar, confirm the vehicle’s electrical system and the lightbar’s specified input range. “12 V” and “24 V” are nominal values, not exact running voltages; charging systems commonly operate near 14 V and 28 V. Check the vehicle manual and measure voltage at the intended connection point, especially on equipment with mixed-voltage circuits. A mismatch can cause unreliable operation or damage. Small detail, big consequence.
Measure the usable roof area, not just the roof’s widest point. Record front-to-back length, side-to-side width, roof curvature, and the distance between rails or mounting points. Leave clearance for doors, antennas, vents, and raised roof edges. SAE J845 classifies optical warning devices into performance classes, but its criteria do not confirm that a lightbar physically fits a specific vehicle. Fit still needs a tape measure.
Mounting matters, too. SAE J575 sets environmental test methods for vehicle lighting equipment, including vibration and moisture exposure. These are useful checks when comparing product documentation, but they cannot predict every vehicle’s roof movement or mounting stress. I’ve seen measurements taken only at the center; that can miss a curved roof and lead to awkward brackets. Measure at several points, then compare the bar’s length, feet, and mounting range with the vehicle’s actual roof.
Verify the vehicle’s nominal electrical system, then measure the usable roof space before choosing a lightbar.
Fit check: Match the lightbar’s specified input voltage to the vehicle system. Measure the roof’s usable mounting width and check clearance, roof curvature, and mounting points against the lightbar dimensions. Nominal voltage alone does not confirm compatibility.
Choosing the right SAE LED lightbar starts with its photometric evidence, not its appearance. Ask for SAE J575 test records and review the tested configuration carefully. A lab result is useful only when it matches the actual lens, controller, and mounting position.
Candela shows intensity in a specific direction. It does not describe the entire warning field. A lightbar with impressive peak candela may leave weak areas at the sides. Check measurements across several angles, especially near the driver’s eye level. Look for steady output, clear separation, and consistent visibility in daylight, rain, and dusty conditions. Field experience matters here. Reflections from wet pavement can also change what operators perceive.
Flash patterns deserve equal attention. Alternating patterns can create strong movement cues, while simultaneous flashes may appear broader but less dynamic. Review flash rate, duty cycle, and the number of active sections. A pattern that looks excellent in a dark workshop may become tiring or unclear beside traffic. My own early mistake was choosing brightness before studying distribution. That decision looked reasonable, but it ignored glare and side visibility. Compare test data with real mounting height and viewing distance. Then question anything that sounds perfect.
A durable lightbar needs more than bright output. Require IP67 protection under IEC 60529. The first digit, 6, means the housing is dust-tight. The second digit, 7, allows temporary immersion in water up to one meter for 30 minutes. This matters when a vehicle crosses muddy roads, heavy rain, or shallow floodwater.
IP67 is a laboratory rating, not a promise of unlimited abuse. It does not prove resistance to high-pressure washing, vibration, stone impact, or salt exposure. SAE J575 environmental tests can help assess those vehicle-lighting stresses. Check whether the test evidence covers temperature cycling and mechanical vibration.
Look closely at the cable entry, lens seal, and mounting hardware. These small parts often fail first.
The U.S. Department of Energy’s solid-state lighting reports commonly reference LED lifetimes reaching 50,000 hours under controlled conditions. That figure describes the light source, not always the complete lightbar. Heat, moisture, and poor wiring can shorten real service life.
I would ask for an IEC 60529 test report, test date, sample identification, and laboratory details. A certificate without traceable evidence feels incomplete. Real-world durability is rarely perfect. That is worth admitting before purchase.
Assess the installation before comparing brightness claims. S&P Global Mobility reported that the average U.S. vehicle age reached 12.6 years in 2024. Older wiring may have corrosion, weak grounds, or limited alternator capacity. Measure voltage at the battery and lightbar connector. Then calculate current draw: watts divided by system voltage. A 240-watt lightbar uses about 20 amps at 12 volts, before wiring losses. That load can matter during idling.
EMC compliance deserves equal attention. SAE J575 and SAE J595 define important laboratory tests for vibration, moisture, dust, and warning-light performance. CISPR 25 addresses radio-frequency emissions in vehicles, but its limits vary by frequency. Ask for the complete test report, not only an “EMC compliant” label. ISO/IEC 17025 accreditation adds credibility to laboratory results. Still, paperwork cannot reveal every installation problem. Routing power cables beside communication wiring may create noise. I have seen clean-looking installations behave poorly after grounding changes.
Tips: Check fuse size, cable temperature, relay rating, and connector sealing. Request a written warranty with coverage periods, exclusions, labor terms, and return procedures. A long warranty is not automatically strong. Confirm whether water intrusion and vibration failures are included. Leave room for doubt, especially when test conditions differ from your vehicle.


For those larger-sized parts, or smaller quantity runs, we have 2 independent powder coat booths and ovens. The quality, durability and affordability of today’s powder coating finishes make this the process of choice for world-class companies.
Powder coating advantages over other forms of coating are many. Materials used in the Powder coating process can be metals and non-metals that come in a multitude of thicknesses, textures, colors, etc. Another of Powder coating’s biggest advantages over conventional coatings is its ability to create finishes in many different textures. Powder Coating Booths allow us the ability to apply these advantages to large products.
Tri-State Fabricators runs a full-service conveyor line for painting. Wet painting can provide protection or decoration to many different part styles. From start to finish, every project is easier to undergo random and point-based inspection by our skilled painting team.
Advantages to our Wet Paint Line are these lines start with product prep and ends with a thorough inspection of a high quality finished product. Our ability to complete large and small projects with a superior finish and doing so in a timely and economical fashion. This passes along the savings in production to our customers. When powder coating ins not an option, our Wet Paint Line gets the job done right the first time.
When the parts get big and heavy we roll-out our custom paint racks and oversize booth. By utilizing our partnerships with all the major paint brands, we can match virtually any color with wet paint.
The advantages of having access to a Wet Paint Booth are many. Large projects of many different shapes can be loaded into the booth. The Wet Paint Booth offers an environment that is much more controlled than a typical parts painting operation.
Not only are they used because of their controlled environment, but they’re are also advantageous when it comes to applying paint to parts that are needed in industries that require specialty coatings such as medical, aerospace, etc.
Our military forces have some very high standards when it comes to the finish of their vehicles and equipment. From the first pre-treatment step to final coat, it takes a great deal of knowledge and experience to protect the men and women of our armed forces. They deserve only the best, and Tri-State Fabricators provides it.
All of our processes are closely monitored by our staff and management teams. Both of which are highly trained in the processes of metal fabrication and finishing. Tri-State Fabricators’ goal is to always fully satisfy each and every customer, including the military. We will always put a 110% into what we do.
Abrasive media blasting is an excellent way to remove old paint, rust, and increase the paint/powder adhesion. Glass beads produce a much smoother and brighter finish than angular abrasives; leaving the part clean yet without any dimensional change. Chemically inert and environmentally friendly, we can recycle our beads approximately 30 times; making them a more preferred method of metal cleaning or surface finishing.
Advantages to Glass Bead Blasting are many. Glass bead blast media is used when a project is needing rough surfaces need to become smooth for applications of coatings such as paint. It is typically used to clean paint and rust from a product surface without deforming the surface it is being used on. Overall, compared to many other blasting media, Glass Bead Blasting is a very economical choice and those savings are always passed on to our customers.
Tri-State Fabricators utilize a zinc phosphate wash to clean and etch the material to ensure the best paint adhesion possible. The unique design of our 3-stage wash system does the work like a 5-stage. From Cleaning and rinsing to conversion coating and post-treatment, Our Part Washing process is a complete service and works throughout the fabrication service and the finishing service.
Along with the previously mentioned benefits, Curing is a vital chemical reaction that leaves the product finish hard and relatively safe from mild abrasion and aggressive corrosion. This process can be done in more than one way; ambient air-dry or in curing ovens at temps that exceed 240°.
From fixing paint mistakes (someone else’s of course) to simply cleaning our paint line hooks, our burn-off oven is put to good use. After a quick burn-off, a little clean up, and a fresh coat of paint, your parts will look better than new.
Why does our Burn-Off Oven work so well? Because super heating the air around parts turns the materials into ashes. From paint and powder coatings to rubber and machining oils, high temps do the job without degrading the integrity of the part.
Masking is a vital part of producing high quality products. We have die-cut masking patterns to protect machined surfaces as well as a wide range of plugs and caps to protect threaded holes and bolts. We provide permanent and temporary masking.
Masking allows the selected sections of a product to be protected from a fabrication or finishing service. This can be with both chemicals when etching and tapes, paints when only finishing just a section of the product. Masking is great in aiding the customization process of a project.
Screen printing is a photographic process that transfers artwork onto a porous nylon screen which allows colored ink to flow through the screen and be deposited on an aluminum or plastic component. We can generally have just about any design created onto a screen for your parts.
Some of the advantages of Screen Printing are, brand recognition for your business displaying on your products, assembly instructions, product warnings/hazards, etc. Tri-State Fabricators produces Screen Printing of the highest quality so you know it’s durable.
Metal Finishing is the art of treating the exterior portion of product, often metal but can also be made of other materials, so that the surface is clean and free of any debris. Then the process of applying coats or either paint of powder coat takes place. This coating process improves the quality of the product in both appearance and resistance to wear and corrosion.
Tri-State Fabricators, Inc., understands that a project typically isn’t complete until a high-quality finish has been added to your product. This is why our painting and powder coating teams continuously inspect the products throughout the Metal Finishing process.

