How to Choose the Right PNP Bipolar Transistor?

Choosing the right Pnp Bipolar Transistor begins with the circuit’s real demands, not a familiar part number. Voltage, collector current, gain, switching speed, and heat must work together. A transistor that survives a bench test may still fail inside a warm enclosure. That lesson appears often in repair and prototype work.

William Shockley, a pioneer of transistor engineering, is often credited with saying, “The transistor is the most important invention of the twentieth century.” His statement reflects the device’s lasting importance, but practical selection requires more than historical admiration. Engineers should compare the datasheet’s collector-emitter voltage, continuous collector current, DC current gain, saturation voltage, and transition frequency. These figures describe performance under specific conditions. They do not promise identical results in every circuit.

Look closely at the operating point. A Pnp Bipolar Transistor may need a negative base-emitter bias in a high-side switching stage. Check the resistor network, load current, and available base drive. Then inspect thermal resistance and the safe operating area. Small packages can become surprisingly hot near their current limits. Gain also varies widely between samples. That detail is easy to overlook.

A careful choice leaves margin. Usually.

This guide explains how to match electrical ratings, switching behavior, package design, and thermal performance with confidence. It also examines common selection mistakes, including trusting typical gain values or ignoring pulse conditions. Some recommendations remain conditional. Real circuits are imperfect, and measured behavior should challenge assumptions. A reliable Pnp Bipolar Transistor is selected through evidence, calculation, and practical testing.
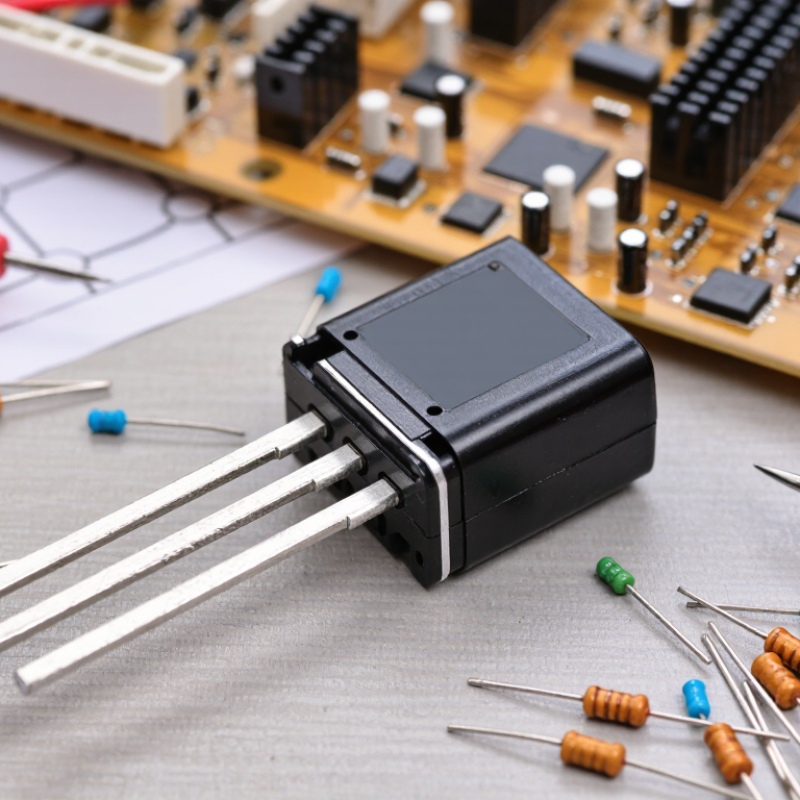
How to Choose the Right PNP Bipolar Transistor?

PNP Bipolar Transistor Fundamentals and Operating Principles

How to Choose the Right PNP Bipolar Transistor?

A PNP bipolar transistor conducts when its emitter is more positive than its base. In a silicon device, the base usually sits about 0.6–0.7 volts below the emitter. Conventional current enters the emitter and leaves through the collector. Base current flows outward through the base terminal. This direction often confuses new designers.

For high-side switching, connect the emitter to the positive rail. Pull the base lower to turn the device on. Select the transistor by checking collector current, emitter-collector voltage, power dissipation, and safe operating area. Do not design around typical hFE values. Production spread and temperature can change gain significantly. Use forced beta for switching calculations, then verify the base resistor with the controller’s actual voltage limits. Keep it practical.

Industry demand remains strong. WSTS forecast global semiconductor sales at 611.2 billion dollars in 2024, followed by 687.4 billion dollars in 2025. The Semiconductor Industry Association reported 526.8 billion dollars in 2023 sales. These figures include many device types, not only bipolar transistors, but they show why dependable component selection matters. JEDEC terminology also emphasizes rated temperature, leakage, and electrical test conditions. I still recheck these values under heat. A transistor that works on a cool bench may fail near its thermal limit. Look for VEC(sat), leakage current, package thermal resistance, and tested current conditions before choosing a part.

Identify Voltage, Current, and Power Requirements

Choosing the right PNP bipolar transistor starts with three questions: How much voltage, current, and power will it handle?

Measure the circuit, not only the nominal values. For voltage, check the maximum collector-emitter voltage, VCEO, and compare it with the highest supply voltage. Add practical margin for switching spikes and wiring errors. A 12-volt rail may briefly rise much higher. That detail is easy to miss.

Current needs equal attention. Estimate the largest collector current, IC, during startup, load changes, and permitted fault conditions. Do not use the absolute maximum rating as the normal operating point. If the load draws 600 milliamps, a 700-milliamp device leaves little breathing room. Base current also matters because a PNP transistor needs sufficient drive for efficient saturation. Check the forced beta value in the datasheet, rather than trusting the headline gain. Datasheets can be misunderstood.

Power is where many selections fail. Calculate transistor dissipation with P = VCE × IC under the worst realistic condition. During linear operation, heat may build quickly, even when current seems modest. Check junction temperature, thermal resistance, package limits, and airflow. A small package on a crowded board may need derating. I would test a prototype with a thermometer and oscilloscope, then compare measured temperature with the calculation. The first estimate is rarely perfect. Review switching speed, leakage, and safe operating area before approving the design.

Compare Gain, Switching Speed, and Frequency Characteristics

How to Choose the Right PNP Bipolar Transistor?

When selecting a PNP bipolar transistor, start with gain, not the highest current rating. DC gain, or hFE, changes with collector current and temperature. A device rated at 100 may perform very differently at a few milliamps. Check the datasheet test conditions carefully. In a high-side circuit, I usually calculate base current with margin, then verify saturation voltage under the real load.

Gain is only part of the decision. Switching speed depends on storage time, junction capacitance, and base-drive resistance. A transistor can switch slowly when its base is driven too deeply into saturation. That delay matters in pulse circuits and power control.

I once selected a high-gain part for a compact control board, but its stored charge caused visible timing errors. The calculation looked fine. The waveform did not.

For faster operation, examine transition times and the transition frequency, fT. Higher fT often suggests better high-frequency performance, but it is not a guarantee in every circuit. Read the test current and voltage behind that number. Compare output capacitance, reverse transfer capacitance, and thermal limits as well. A low-noise, high-frequency design may need modest gain with predictable capacitance. Measure the actual collector waveform with a suitable probe. Small probe errors can hide switching delays. Datasheets help, but bench results deserve equal attention.

Check Package Type, Thermal Limits, and Mounting Conditions

How to Choose the Right PNP Bipolar Transistor?

Package choice is a thermal decision, not merely a footprint decision. A compact SOT-23 package saves board space, but its limited copper area can raise junction temperature quickly. Larger TO-126 or TO-220 packages usually provide better heat spreading. JEDEC JESD51-1 and JESD51-2A define methods for measuring junction-to-ambient and junction-to-case thermal resistance. These values are useful, but they are not automatic guarantees.

Check the datasheet’s maximum junction temperature, power dissipation, and thermal resistance. Many silicon transistors specify a 150°C junction limit, yet real designs should maintain a safer margin.

For example, at 0.8 W and 100°C/W, the estimated temperature rise is 80°C. Add a 40°C ambient temperature, and the junction may reach 120°C. That leaves little room for airflow changes or enclosure heating.

Mounting conditions can change everything. A copper area of only a few square centimeters may cool a surface-mount package more effectively than expected, but poor solder coverage can reverse that advantage. IPC-2221C recommends considering copper thickness, thermal paths, and board construction during layout. Keep high-current traces short and wide. Use thermal vias when the package pad supports them. I have seen designs pass bench testing, then fail inside a sealed enclosure. The overlooked detail was airflow. A forced-air rating should never replace an enclosure-level thermal test. Check the package drawing carefully, because lead spacing and pad geometry are easy to misread.

Select and Validate the Transistor for Your Circuit Application

How to Choose the Right PNP Bipolar Transistor?

Select and Validate the Transistor for Your Circuit Application

A PNP bipolar transistor should be selected from circuit evidence, not only catalog numbers. Start with the load current, supply voltage, switching frequency, and available base-drive voltage. Keep collector-emitter voltage comfortably above the circuit maximum. A 20% margin is a practical starting point, but inductive loads may require more protection.

Check the datasheet under your real operating conditions. A transistor rated for 1 A may need substantial heat removal at elevated temperature. Calculate power using P = VCE × IC, then compare the result with the derated thermal resistance. Base current also matters. Forced beta provides a safer switching estimate than the headline gain value. That number can disappoint.

The Semiconductor Industry Association reported global semiconductor sales of 627.6 billion US dollars in 2024, showing the scale and pressure of modern component supply chains. However, market growth does not guarantee equivalent parts. Use the manufacturer’s qualification data, package drawings, and production status records. For automotive designs, AEC-Q101 test coverage can support validation, but it does not replace application testing. Build a prototype with the intended PCB layout. Measure voltage spikes, temperature rise, turn-off time, and leakage after thermal cycling. I would also test the weakest expected supply condition. Engineers sometimes overlook it. Recheck the design when the transistor operates near its limits.

How to Choose the Right PNP Bipolar Transistor? - Select and Validate the Transistor for Your Circuit Application

Representative engineering selection data for common PNP bipolar transistor applications

Application Profile Typical Circuit Function Recommended VCEO Recommended IC Minimum hFE at Design Current Target VCE(sat) Typical fT Suggested Package Class Validation Focus
Low-Voltage Signal Switching Sensor interfaces, level shifting, small indicator loads 20–40 V 10–100 mA ≥100 ≤0.25 V at IC = 50 mA 100–300 MHz Small-signal SMD or TO-92 Confirm leakage, logic thresholds, noise, and pin configuration
General-Purpose Load Driver Relays, solenoids, lamps, buzzers, and small motors 40–80 V 0.2–1 A ≥80 ≤0.35 V at IC = 0.5 A 50–150 MHz Power SMD or compact TO-126 Check forced beta, transient suppression, and junction temperature
Medium-Power Switching Power distribution, battery protection, and actuator control 60–120 V 1–5 A ≥60 ≤0.6 V at IC = 2 A 20–100 MHz TO-220, DPAK, or equivalent Verify SOA, heat sinking, current gain at temperature, and switching loss
High-Voltage Switching Automotive loads, industrial control, and flyback pre-drivers 120–250 V 0.1–2 A ≥40 ≤1.0 V at IC = 1 A 10–60 MHz High-voltage TO-126 or TO-220 Allow voltage margin, test avalanche stress, and check turn-off behavior
Analog Amplifier Audio stages, sensor gain blocks, and linear control circuits 30–100 V 1–500 mA ≥150 Not normally the primary criterion 80–250 MHz Low-noise SMD or TO-92 Measure noise, matching, linearity, gain variation, and thermal drift
High-Speed Switching Pulse circuits, fast level translators, and timing interfaces 20–60 V 10–300 mA ≥100 ≤0.3 V at the specified pulse current 300–800 MHz Small-signal SMD Validate storage time, junction capacitance, rise/fall time, and layout parasitics
Selection rule: Choose a PNP transistor with adequate voltage and current margin, then validate its worst-case power dissipation using PD ≈ VCE × IC. Confirm the safe operating area, thermal resistance, gain at the actual load current, base-drive capability, and maximum junction temperature under real operating conditions.


Powder Coat Booths

For those larger-sized parts, or smaller quantity runs, we have 2 independent powder coat booths and ovens. The quality, durability and affordability of today’s powder coating finishes make this the process of choice for world-class companies.

Powder coating advantages over other forms of coating are many. Materials used in the Powder coating process can be metals and non-metals that come in a multitude of thicknesses, textures, colors, etc. Another of Powder coating’s biggest advantages over conventional coatings is its ability to create finishes in many different textures. Powder Coating Booths allow us the ability to apply these advantages to large products.

Wet Paint Line

Tri-State Fabricators runs a full-service conveyor line for painting. Wet painting can provide protection or decoration to many different part styles. From start to finish, every project is easier to undergo random and point-based inspection by our skilled painting team.

Advantages to our Wet Paint Line are these lines start with product prep and ends with a thorough inspection of a high quality finished product. Our ability to complete large and small projects with a superior finish and doing so in a timely and economical fashion. This passes along the savings in production to our customers. When powder coating ins not an option, our Wet Paint Line gets the job done right the first time.

Wet Paint Booths

When the parts get big and heavy we roll-out our custom paint racks and oversize booth. By utilizing our partnerships with all the major paint brands, we can match virtually any color with wet paint.

The advantages of having access to a Wet Paint Booth are many. Large projects of many different shapes can be loaded into the booth. The Wet Paint Booth offers an environment that is much more controlled than a typical parts painting operation.

Not only are they used because of their controlled environment, but they’re are also advantageous when it comes to applying paint to parts that are needed in industries that require specialty coatings such as medical, aerospace, etc.

Military CARC

Our military forces have some very high standards when it comes to the finish of their vehicles and equipment. From the first pre-treatment step to final coat, it takes a great deal of knowledge and experience to protect the men and women of our armed forces. They deserve only the best, and Tri-State Fabricators provides it.

All of our processes are closely monitored by our staff and management teams. Both of which are highly trained in the processes of metal fabrication and finishing. Tri-State Fabricators’ goal is to always fully satisfy each and every customer, including the military. We will always put a 110% into what we do.

Glass-Bead Blasting

Abrasive media blasting is an excellent way to remove old paint, rust, and increase the paint/powder adhesion. Glass beads produce a much smoother and brighter finish than angular abrasives; leaving the part clean yet without any dimensional change. Chemically inert and environmentally friendly, we can recycle our beads approximately 30 times; making them a more preferred method of metal cleaning or surface finishing.

Advantages to Glass Bead Blasting are many. Glass bead blast media is used when a project is needing rough surfaces need to become smooth for applications of coatings such as paint. It is typically used to clean paint and rust from a product surface without deforming the surface it is being used on. Overall, compared to many other blasting media, Glass Bead Blasting is a very economical choice and those savings are always passed on to our customers.

Part Washing

Tri-State Fabricators utilize a zinc phosphate wash to clean and etch the material to ensure the best paint adhesion possible. The unique design of our 3-stage wash system does the work like a 5-stage. From Cleaning and rinsing to conversion coating and post-treatment, Our Part Washing process is a complete service and works throughout the fabrication service and the finishing service.

Along with the previously mentioned benefits, Curing is a vital chemical reaction that leaves the product finish hard and relatively safe from mild abrasion and aggressive corrosion. This process can be done in more than one way; ambient air-dry or in curing ovens at temps that exceed 240°.

Burn-Off Oven

From fixing paint mistakes (someone else’s of course) to simply cleaning our paint line hooks, our burn-off oven is put to good use. After a quick burn-off, a little clean up, and a fresh coat of paint, your parts will look better than new.

Why does our Burn-Off Oven work so well? Because super heating the air around parts turns the materials into ashes. From paint and powder coatings to rubber and machining oils, high temps do the job without degrading the integrity of the part.

Masking

Masking is a vital part of producing high quality products. We have die-cut masking patterns to protect machined surfaces as well as a wide range of plugs and caps to protect threaded holes and bolts. We provide permanent and temporary masking.

Masking allows the selected sections of a product to be protected from a fabrication or finishing service. This can be with both chemicals when etching and tapes, paints when only finishing just a section of the product. Masking is great in aiding the customization process of a project.

Screen Printing

Screen printing is a photographic process that transfers artwork onto a porous nylon screen which allows colored ink to flow through the screen and be deposited on an aluminum or plastic component. We can generally have just about any design created onto a screen for your parts.

Some of the advantages of Screen Printing are, brand recognition for your business displaying on your products, assembly instructions, product warnings/hazards, etc. Tri-State Fabricators produces Screen Printing of the highest quality so you know it’s durable.

Metal Finishing

Metal Finishing is the art of treating the exterior portion of product, often metal but can also be made of other materials, so that the surface is clean and free of any debris. Then the process of applying coats or either paint of powder coat takes place. This coating process improves the quality of the product in both appearance and resistance to wear and corrosion.

Tri-State Fabricators, Inc., understands that a project typically isn’t complete until a high-quality finish has been added to your product. This is why our painting and powder coating teams continuously inspect the products throughout the Metal Finishing process.



