


Why Choose the Right Manometer Connector?

Choosing the right Manometer Connector is a small decision with visible consequences. A mismatched thread can leak; an awkward fitting can twist a tube or crowd the gauge. The reading may look plausible, yet the setup may still be wrong. Details matter.

Grand View Research valued the global pressure sensor market at USD 15.3 billion in 2023 and projected continued growth. That figure covers pressure sensors, not manometer connectors, but it shows the scale of equipment relying on dependable pressure measurement. ASME B40.100 also sets guidance for pressure gauges and related devices. Together, these sources underline a practical point: connector choice belongs in the measurement plan, not as an afterthought. John G. Webster, an instrumentation scholar and editor of the Measurement, Instrumentation, and Sensors Handbook, offers a useful perspective: “A measurement is only as useful as the system that produces it.” This is a paraphrase of his work, not a verbatim quotation.

In practice, check the port thread, pressure range, wetted materials, and installation space before ordering. Confirm whether the connection needs an adapter, seal, or isolation from vibration. A connector that fits on the bench may be difficult to tighten beside a pipe elbow. That happens. And it can be missed.

This guide explains how to compare connector types, avoid common compatibility errors, and choose a connection suited to the instrument and working conditions. No single fitting is right for every setup. The details deserve a second look.
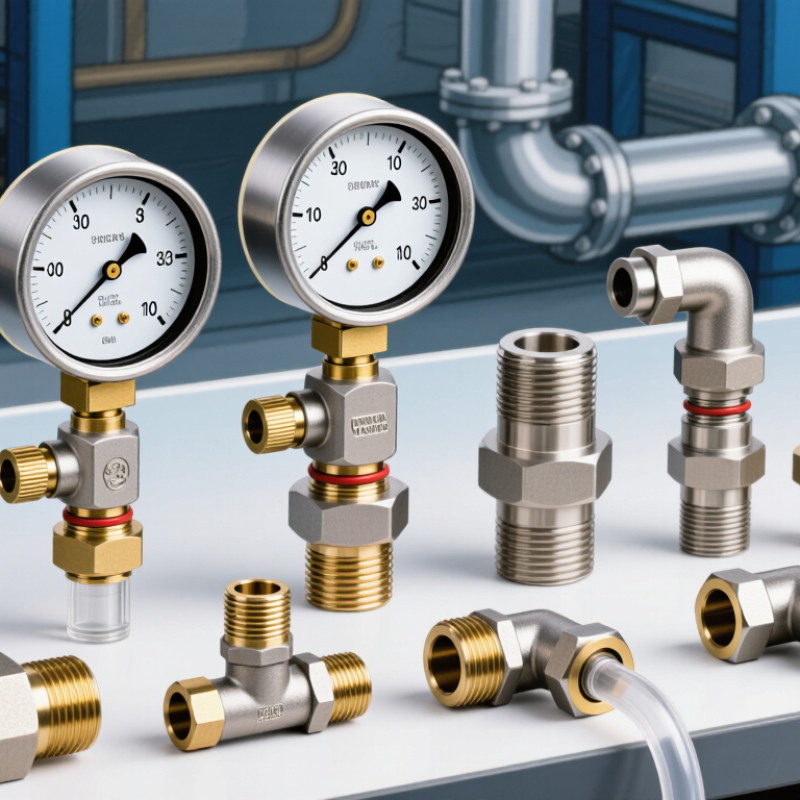
Why Choose the Right Manometer Connector?

What a Manometer Connector Does in a Pressure Measurement System

Why Choose the Right Manometer Connector?

A manometer connector links the instrument to the pressure source, creating a path for pressure to reach the sensing element. It also helps keep that path sealed and properly aligned. Small part. Big consequence. A loose thread or damaged seal can let air escape, causing readings to drift or respond slowly. A narrow or poorly matched passage may also restrict pressure changes. The display might look steady, but that does not prove the connection is sound.

Choosing a connector means checking more than whether its threads fit. Match the port type, tubing size, pressure range, and materials to the instrument and the measured medium. For example, a connector exposed to warm air or a damp process may need different material compatibility than one used on a dry bench.

Follow the instrument maker’s specified fitting and sealing method; overtightening can damage threads or seals. Then check for leaks using a procedure suitable for the setup. A connector is not a substitute for calibration, either. It is easy to overlook this detail, especially when the instrument appears to work. Still, a careful connection makes pressure readings more dependable and troubleshooting less confusing.


How Connector Design Affects Accuracy, Safety, and Compatibility

Why Choose the Right Manometer Connector?

A manometer can give misleading readings when its connector does not match the instrument or test port. Thread size, sealing method, and alignment all matter. A loose fit may allow air to escape, while a mismatched thread can damage the port. Even a small leak can shift a low-pressure reading. Small details matter.

Connector design also affects safety and compatibility. Check the connector’s pressure rating and material against the fluid, temperature, and operating conditions. A rigid metal fitting may suit a stable bench setup, while a flexible connection can reduce strain where tubing moves. Keep the connection straight and supported; side loading can loosen fittings over time. In practice, a connector that fits on the bench may still be awkward in a crowded installation. That is worth checking before measurement.

Tips: Confirm thread type and sealing face before assembly. Use the specified seal, and tighten only as recommended. Do not force it. After connection, check for leaks and compare the reading with a known reference when possible. If readings remain unstable, inspect the connector as well as the manometer; I have seen the fitting overlooked because the instrument seemed more likely to be at fault.

Common Manometer Connector Types and Their Applications

Why Choose the Right Manometer Connector?
Common Manometer Connector Types and Their Applications

Barbed connectors grip flexible tubing and work well for low-pressure bench checks or temporary air lines. Match the barb diameter to the tubing’s inside diameter; a loose fit can leak, while an oversized barb may split soft tubing. Threaded connectors suit fixed installations and rigid pressure ports. NPT and BSP threads can look similar, but they are not interchangeable by default. Compression fittings provide a firm connection to rigid tubing, such as copper or stainless-steel lines. Small detail. The seal matters.

Quick-connect couplings are useful when technicians move a manometer between test points. They save time, but their seals and pressure ratings must suit the application. Choose materials compatible with the measured gas or liquid, and check the instrument’s pressure limit. Connector choice can affect readings: a leak, kinked tube, or trapped liquid may cause slow response or unstable measurements. It is easy to focus on the gauge and overlook the fitting, so inspect both during setup.

Tips: Confirm thread type, tubing size, and pressure rating before connecting. Tighten fittings securely, but do not overtighten plastic ports. After installation, apply pressure gradually and check for leaks before recording readings. A quick check is worthwhile.

Why Choose the Right Manometer Connector? — Common Manometer Connector Types and Their Applications
Connector type How it connects and seals Common applications Advantages Important considerations
Metric or unified straight thread (such as M10 × 1 or 1/4-28 UNF) The straight threads provide clamping force; sealing is usually made by an O-ring, gasket, or sealing washer rather than by the threads themselves. Portable digital manometers, compact instruments, and equipment with a specified instrument port. Compact connection and repeatable assembly when the specified seal and mating port are used. Thread size alone does not identify the sealing method. Confirm pitch, gender, seat, and seal type before connecting.
NPT tapered pipe thread Tapered threads tighten against each other; a suitable thread sealant is commonly used where permitted by the instrument and application. Industrial pressure measurement in North American piping and process systems. Widely used pipe connection with a mechanically tight fit when correctly assembled. NPT is not interchangeable with BSP threads. Excessive tightening or sealant entering the pressure port can damage or obstruct an instrument.
BSPP parallel pipe thread (G thread) Parallel threads typically retain the connection; sealing is made at a bonded seal, gasket, O-ring, or designated seat. Instrumentation and pneumatic or hydraulic equipment using parallel-port connections. Allows a defined sealing surface and can be disconnected without relying on a tapered thread seal. Identify the required sealing face and gasket. A BSPP thread does not normally seal by thread interference alone.
BSPT tapered pipe thread (R thread) Tapered threads form the joint; an appropriate sealing method is selected for the fluid, pressure, and instrument instructions. Pipework and measurement installations that specify tapered BSP connections. Provides a compact threaded connection for compatible ports. Do not assume BSPT and NPT are interchangeable, even when their nominal sizes appear similar.
Compression tube fitting A nut compresses a ferrule or ferrules onto tubing to create a mechanical seal. Permanent or semi-permanent instrument tubing for gas and liquid pressure lines. Provides a robust tubing connection without requiring a threaded pipe joint at the tubing end. Use tubing with the specified outside diameter and material. Follow the fitting maker’s assembly instructions and avoid reusing ferrules unless approved.
Hose barb A flexible hose is pushed over the ridged barb; a clamp may be required to retain the hose and improve sealing. Low-pressure air lines, sampling hoses, and liquid-column manometer connections. Simple to attach and suitable for flexible tubing of a compatible inside diameter. Check hose material, temperature, pressure rating, and fit. A barb is not appropriate for every high-pressure application.
Flare fitting (such as 37° or 45° flare) The flared tubing end seals against a matching cone; the threads provide clamping force rather than the seal. Metal tubing systems where the equipment specifies a matching flare standard. Metal-to-metal seating can provide a dependable joint when the flare geometry is matched. Flare angles and standards must match. Do not mix 37° and 45° components or use thread sealant on the sealing face.
Push-to-connect tube fitting A collet grips the tube and an internal seal seals against its outside surface. Quick connections for compatible plastic or metal tubing in pneumatic measurement setups. Fast installation and release without tools for many suitable tube-and-fitting combinations. Confirm tube outside diameter, material, pressure rating, and compatibility with the fitting’s seal. Cut tubing square and keep it free of scratches.
Hose coupling or quick-disconnect coupling Matching coupling halves connect through a locking mechanism and internal sealing elements. Test benches and portable setups that require frequent connection and disconnection. Speeds up changeovers and can reduce handling of threaded connections. Use compatible coupling halves and verify pressure rating, flow path, and valve arrangement; some couplings can trap pressure when disconnected.
Selection tip: Match the connector to the manometer’s specified port, the tubing or hose, the measured medium, and the operating pressure. Check thread standard, size, pitch, gender, sealing surface, and material compatibility before installation.

Key Factors for Matching a Connector to a Manometer and Process

Why Choose the Right Manometer Connector?

Key Factors for Matching a Connector to a Manometer and Process

A connector must match the instrument port, process fitting, pressure, temperature, and fluid. Check thread type and sealing method, not just nominal size. ISO 228-1 covers parallel pipe threads that generally seal with a gasket or seal face; ISO 7-1 covers threads designed to make pressure-tight joints. Mixing them can cause leaks, damaged threads, or readings affected by pressure loss. Small parts matter.

Material compatibility deserves equal attention. A stainless-steel connector may suit many water or oil systems, but corrosive media and cleaning chemicals can change the choice. Also consider vibration, pulsation, and installation clearance. A bulky adapter can place extra load on a small instrument port. ASME B40.100 expresses pressure-gauge accuracy as a percentage of span: a 1% class on a 100 psi range corresponds to about ±1 psi under reference conditions. The connector cannot improve that accuracy, but a poor seal or clogged passage can undermine the measurement. I have seen connector selection treated as an afterthought; that is an easy assumption to revisit.

Tips: Verify the port drawing, thread standard, seal type, and wetted materials before ordering. Compare the connector’s pressure and temperature ratings with actual process conditions, including startup spikes. For hazardous or pulsating service, have a qualified engineer review the installation.

Why Choose the Right Manometer Connector?

Matching the connector to the manometer and process starts with the thread standard and sealing method. Similar-looking thread diameters do not guarantee compatibility.

Approximate external major diameters are shown in millimetres for selected sizes: NPT values follow ASME B1.20.1, and BSPP (G) values follow ISO 228-1. NPT threads are tapered; BSPP threads are parallel. Confirm the thread form, seal design, pressure and temperature limits, and process-medium compatibility before selecting a connector.

How to Install and Inspect a Connector for Reliable Readings

A reliable pressure reading starts at the connection, not the dial. Before installation, confirm the connector’s thread type, size, pressure rating, and sealing method match the instrument and process port. Parallel and tapered threads seal differently; a mismatched fitting can damage threads or leak. Use the specified torque, and hold the connector flats with a wrench rather than twisting the gauge body.

Small detail. Keep sealing surfaces clean and free of scratches.

After installation, pressurize the line gradually and inspect the joint for leaks using an appropriate leak-detection method. Check for movement, corrosion, damaged threads, and residue around the seal.

ASME B40.100 lists pressure-gauge accuracy grades including Grade 2A at ±0.5% of span and Grade 3A at ±0.25%.

Those figures describe the gauge, not the whole measurement system; a poor connector can still undermine a good instrument. NIST measurement-traceability guidance also emphasizes documented calibration links, so record connector changes and inspection findings alongside calibration dates.

One judgment call remains: inspection frequency should reflect vibration, pressure cycling, and the process environment, not a calendar alone. I would recheck sooner after any leak or impact.

Powder Coat Booths

For those larger-sized parts, or smaller quantity runs, we have 2 independent powder coat booths and ovens. The quality, durability and affordability of today’s powder coating finishes make this the process of choice for world-class companies.

Powder coating advantages over other forms of coating are many. Materials used in the Powder coating process can be metals and non-metals that come in a multitude of thicknesses, textures, colors, etc. Another of Powder coating’s biggest advantages over conventional coatings is its ability to create finishes in many different textures. Powder Coating Booths allow us the ability to apply these advantages to large products.

Wet Paint Line

Tri-State Fabricators runs a full-service conveyor line for painting. Wet painting can provide protection or decoration to many different part styles. From start to finish, every project is easier to undergo random and point-based inspection by our skilled painting team.

Advantages to our Wet Paint Line are these lines start with product prep and ends with a thorough inspection of a high quality finished product. Our ability to complete large and small projects with a superior finish and doing so in a timely and economical fashion. This passes along the savings in production to our customers. When powder coating ins not an option, our Wet Paint Line gets the job done right the first time.

Wet Paint Booths

When the parts get big and heavy we roll-out our custom paint racks and oversize booth. By utilizing our partnerships with all the major paint brands, we can match virtually any color with wet paint.

The advantages of having access to a Wet Paint Booth are many. Large projects of many different shapes can be loaded into the booth. The Wet Paint Booth offers an environment that is much more controlled than a typical parts painting operation.

Not only are they used because of their controlled environment, but they’re are also advantageous when it comes to applying paint to parts that are needed in industries that require specialty coatings such as medical, aerospace, etc.

Military CARC

Our military forces have some very high standards when it comes to the finish of their vehicles and equipment. From the first pre-treatment step to final coat, it takes a great deal of knowledge and experience to protect the men and women of our armed forces. They deserve only the best, and Tri-State Fabricators provides it.

All of our processes are closely monitored by our staff and management teams. Both of which are highly trained in the processes of metal fabrication and finishing. Tri-State Fabricators’ goal is to always fully satisfy each and every customer, including the military. We will always put a 110% into what we do.

Glass-Bead Blasting

Abrasive media blasting is an excellent way to remove old paint, rust, and increase the paint/powder adhesion. Glass beads produce a much smoother and brighter finish than angular abrasives; leaving the part clean yet without any dimensional change. Chemically inert and environmentally friendly, we can recycle our beads approximately 30 times; making them a more preferred method of metal cleaning or surface finishing.

Advantages to Glass Bead Blasting are many. Glass bead blast media is used when a project is needing rough surfaces need to become smooth for applications of coatings such as paint. It is typically used to clean paint and rust from a product surface without deforming the surface it is being used on. Overall, compared to many other blasting media, Glass Bead Blasting is a very economical choice and those savings are always passed on to our customers.

Part Washing

Tri-State Fabricators utilize a zinc phosphate wash to clean and etch the material to ensure the best paint adhesion possible. The unique design of our 3-stage wash system does the work like a 5-stage. From Cleaning and rinsing to conversion coating and post-treatment, Our Part Washing process is a complete service and works throughout the fabrication service and the finishing service.

Along with the previously mentioned benefits, Curing is a vital chemical reaction that leaves the product finish hard and relatively safe from mild abrasion and aggressive corrosion. This process can be done in more than one way; ambient air-dry or in curing ovens at temps that exceed 240°.

Burn-Off Oven

From fixing paint mistakes (someone else’s of course) to simply cleaning our paint line hooks, our burn-off oven is put to good use. After a quick burn-off, a little clean up, and a fresh coat of paint, your parts will look better than new.

Why does our Burn-Off Oven work so well? Because super heating the air around parts turns the materials into ashes. From paint and powder coatings to rubber and machining oils, high temps do the job without degrading the integrity of the part.

Masking

Masking is a vital part of producing high quality products. We have die-cut masking patterns to protect machined surfaces as well as a wide range of plugs and caps to protect threaded holes and bolts. We provide permanent and temporary masking.

Masking allows the selected sections of a product to be protected from a fabrication or finishing service. This can be with both chemicals when etching and tapes, paints when only finishing just a section of the product. Masking is great in aiding the customization process of a project.

Screen Printing

Screen printing is a photographic process that transfers artwork onto a porous nylon screen which allows colored ink to flow through the screen and be deposited on an aluminum or plastic component. We can generally have just about any design created onto a screen for your parts.

Some of the advantages of Screen Printing are, brand recognition for your business displaying on your products, assembly instructions, product warnings/hazards, etc. Tri-State Fabricators produces Screen Printing of the highest quality so you know it’s durable.

Metal Finishing

Metal Finishing is the art of treating the exterior portion of product, often metal but can also be made of other materials, so that the surface is clean and free of any debris. Then the process of applying coats or either paint of powder coat takes place. This coating process improves the quality of the product in both appearance and resistance to wear and corrosion.

Tri-State Fabricators, Inc., understands that a project typically isn’t complete until a high-quality finish has been added to your product. This is why our painting and powder coating teams continuously inspect the products throughout the Metal Finishing process.
