7 Tips for Choosing the Best Street Outdoor Lights
Choosing a Street Outdoor Light is not just a matter of picking the brightest fixture. A road can look bright while leaving a pedestrian’s face in shadow. On wet asphalt, poorly directed light can create harsh glare and obscure the curb. Small details matter. The International Energy Agency’s Energy Efficiency 2023 report estimates that lighting accounts for about 15% of global electricity use. That figure covers lighting broadly, not streetlights alone, but it shows why efficiency deserves attention. U.S. Department of Energy guidance for municipal street lighting emphasizes matching light distribution and controls to the application—not simply choosing the highest output.
These seven tips will help you compare brightness, beam pattern, color appearance, durability, energy use, controls, and maintenance needs. Lighting researcher Dr. Mariana Figueiro has described light as “the most powerful synchronizer of the human circadian system.” Her work offers a useful reminder: outdoor lighting affects people, not just pavement. Still, no single color temperature or fixture suits every street. A quiet residential lane, a busy crossing, and a parking entrance have different visual needs. Look beyond a product photo; ask for photometric data and examine where the light actually falls. A specification can look perfect on paper and disappoint on site. That is worth questioning. The best choice balances visibility, comfort, operating cost, and dependable performance over time.
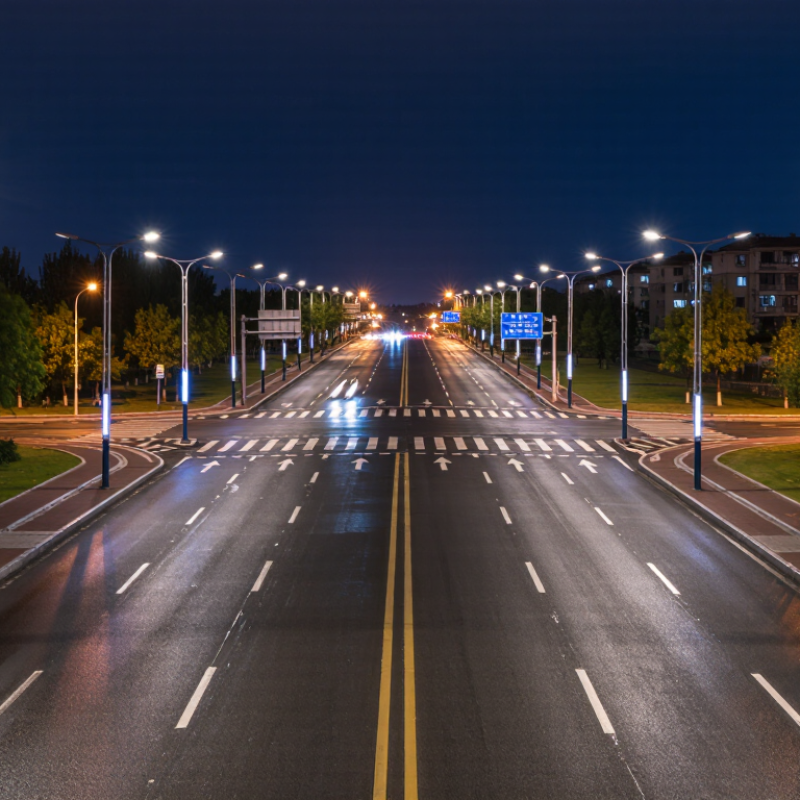
Understand the Street’s Purpose, Layout, and Lighting Needs
Street lighting should begin with the street’s purpose, not a fixture catalog. A quiet residential lane needs comfortable visibility for walkers, cyclists, driveways, and house numbers. A busy crossing has different demands: people must see approaching traffic, curb edges, and one another. Look at the ground. Walk the route after dusk and note dark corners, overhanging trees, parked vehicles, and the places where people actually cross. A daytime plan can miss these obstacles, and a tidy map may not show how a delivery truck blocks a light.
Sketch the street layout, including intersections, paths, bends, entrances, and existing poles. Their spacing and height affect how evenly light reaches the pavement. Too much brightness in one spot can make nearby areas seem darker, while poorly aimed lights may shine into windows or create glare for drivers. More light is not always better. Match the lighting level to how the street is used, then check whether the pavement and faces remain easy to see. A lighting professional can review a photometric plan against local requirements. Still, plans have limits: branches grow, and parking patterns change. Revisit the street at night after installation, and be willing to adjust what looked right on paper.
Select the Right Brightness and Color Temperature
Street lighting should make faces, curbs, and crossing points visible without turning the road into a bright, flat scene. Compare lumen output, not watts, since watts describe energy use rather than light produced. The right output depends on pole height, spacing, road width, and fixture optics. A high-output lamp can still leave dark gaps if its beam is poorly aimed. Too much light may also create glare for drivers and people walking nearby.
Color temperature changes how a street feels. Around 3000K often gives a warm, comfortable appearance, while 4000K can make details look crisper but may feel stark in a quiet residential area. Higher numbers are not automatically safer. Check after dark. Look at the pavement from a driver’s eye level, and notice whether faces remain visible near the edges of the beam. A small test area can reveal problems before many fixtures are installed. There is rarely one perfect setting; nearby homes, tree cover, and wet pavement can all change the result. Even a careful choice may need adjustment.
Choose Efficient LEDs and Suitable Light Distribution
Street lighting should make routes visible without sending bright light into homes or drivers’ eyes. Choose LEDs by useful light output, not wattage alone; two fixtures with similar power can distribute light very differently. Check the proposed lumen output, color temperature, and dimming options against the street’s needs. Watts alone mislead. A warm or neutral white tone often feels less harsh than very cool light, but the right choice depends on visibility needs and surrounding conditions.
Light distribution matters as much as efficiency. Review a photometric plan showing how light falls between poles, along sidewalks, and across crossings. Look for dark gaps and bright pools, especially near driveways and intersections. A well-matched roadway optic can direct more light downward, reducing wasted spill and glare. Pole height and spacing affect the result, so compare layouts rather than choosing fixtures in isolation. Ask for measurements at pedestrian level as well as on the road. In practice, site details can complicate a neat plan: trees grow, signs block beams, and pavement reflects light unevenly. Recheck the layout after installation; a small adjustment may improve comfort more than simply increasing brightness.
Compare Durability, Weather Resistance, and Maintenance
Street lights endure more than rain. Their housings face grit, vibration, temperature swings, and occasional bumps from maintenance equipment. Compare the housing material, lens, seals, and fasteners together; a sturdy metal body means little if water can enter around a loose gasket. Check the product’s stated ingress-protection rating, but remember it describes resistance to dust and water, not impact strength or service life. Details matter.
Match weather resistance to the site. Near the coast, salt can corrode exposed hardware, so corrosion-resistant finishes and fasteners deserve close attention. In places with hard freezes, look for sealed connections and materials rated for the expected temperature range. A covered entry and an open roadside corner have different demands. It’s easy to overestimate one rating.
Maintenance affects long-term value. Ask how crews can reach the driver, wiring, and mounting points, and whether common parts can be replaced without removing the whole fixture. Smooth lenses are usually easier to clean than deep decorative grooves, where dust and insects collect. Check the maker’s cleaning instructions and inspection schedule. In practice, the lowest-maintenance option may cost more upfront, and that trade-off is not always obvious. Keep access equipment and cleaning time in the comparison, too.
Check Safety Standards, Smart Controls, and Long-Term Costs
Street lighting must withstand rain, dust, vibration, and years of nightly use. Before comparing appearance, check that each fixture meets applicable local safety standards and is rated for its exposure. Confirm suitable grounding, secure mounting, and protected electrical connections. Ask a qualified installer to verify compatibility with the site’s wiring and poles. A certificate alone is not enough.
Smart controls can reduce wasted light and energy. A photocell can switch lamps on at dusk, while timers can dim them during quieter hours. Motion sensors may help in low-traffic areas, but test their response on a dark evening; trees, passing cars, or heavy rain can affect performance. Keep a manual override available. Small details matter. I would not assume every control setting will work well without seeing it in place.
Compare long-term costs, not just purchase prices. Look at energy use, expected service life, warranty coverage, and the cost of replacing drivers or sensors. Maintenance may require a lift truck and a crew, so access matters too. A cheaper fixture can become expensive if parts are hard to replace. That is not trivial. I would still double-check the maintenance estimate; it is easy to overlook labor when comparing product sheets.
7 Tips for Choosing the Best Street Outdoor Lights
Check safety standards, smart controls, and long-term costs before choosing a fixture.
Estimated annual electricity cost by fixture load
Estimates assume each fixture runs 12 hours per day and electricity costs $0.16 per kWh. Costs are calculated from fixture wattage and exclude purchase, installation, and maintenance. Before buying, check applicable local electrical and roadway-lighting requirements, and consider photocells, timers, or dimming controls to reduce unnecessary operating hours.





