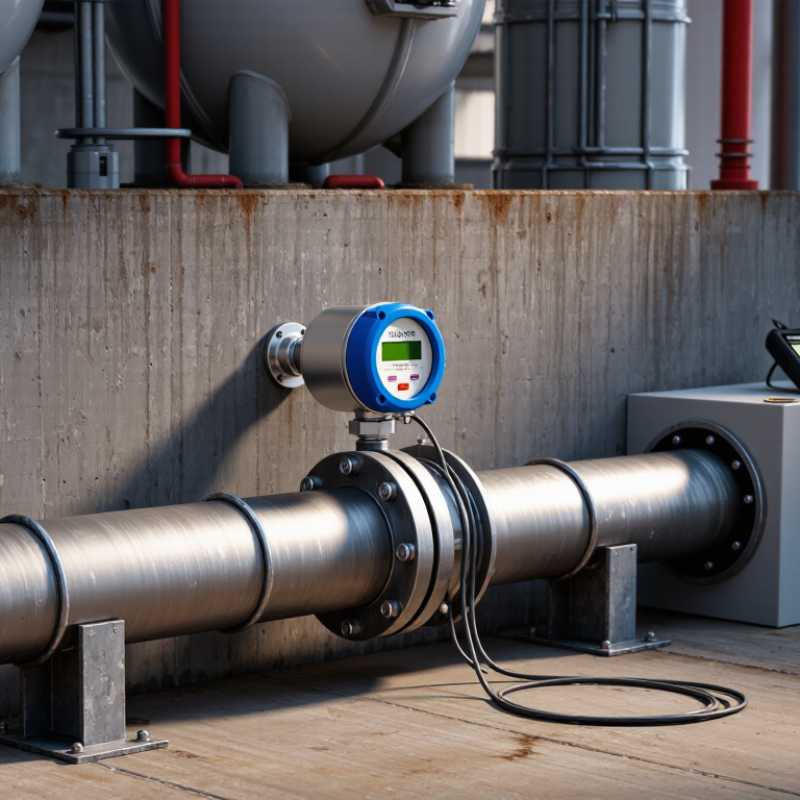
Choosing the best Clamp On Water Meter begins with the pipe, not the product brochure. A meter that works perfectly on clean steel may struggle on an aging, coated pipe. Real sites are rarely ideal. They contain rust, scale, vibration, air pockets, and limited installation space.
Flow-measurement analyst Jesse Yoder has emphasized a practical principle: “Ultrasonic flowmeters measure flow without obstructing the pipe.” That advantage explains their popularity in water networks, cooling systems, irrigation lines, and temporary audits. A Clamp On Water Meter can be installed outside the pipe, avoiding shutdowns, cutting, and additional pressure loss.
Still, “non-invasive” does not mean effortless. Pipe material, diameter, wall thickness, liner condition, and water quality directly affect signal strength. Confirm these details before choosing a model. Check the manufacturer’s sensor range carefully. Measure the pipe with a caliper when records seem unreliable.
Accuracy matters, but so does repeatability. A meter should produce stable readings during morning demand peaks and quiet nighttime flow. Look for clear installation guidance, diagnostic signals, data logging, and calibration support. Battery life also matters in remote chambers.
Small details matter.
I have seen specifications appear impressive while field installation remained awkward. That is where product selection needs honest reflection. The cheapest meter may become expensive after repeated repositioning, weak signals, or uncertain readings. A dependable Clamp On Water Meter should fit the application, the technician, and the maintenance plan—not just the sales sheet.
Choosing the best clamp-on water meter starts with understanding how it works.
The device measures flow from outside the pipe, without cutting the line or draining the system. Two transducers press against the pipe wall. They send ultrasonic signals upstream and downstream. The meter compares their travel times. Flowing water makes one signal arrive slightly faster. That difference becomes a velocity reading. The instrument then combines velocity with the pipe’s internal area to estimate flow rate. No moving parts are inside.
Accuracy depends on more than the display. Pipe diameter, wall thickness, lining, and water quality affect the signal path. A full, clean pipe usually provides stronger readings. Air bubbles, sediment, rust, or partial filling can create unstable results. In field work, careful surface cleaning often matters more than complicated settings.
Measure the pipe instead of guessing. Enter the correct material and dimensions. Install sensors on a straight section, away from pumps, valves, elbows, and reducers. A few millimeters can matter.
When comparing meters, check the flow range, sensor size, data logging, temperature limits, and verification method.
Portable units suit temporary surveys, while fixed systems support continuous monitoring. “Easy to install” can be misleading. Poor coupling gel, uneven mounting, or incorrect spacing may distort results. Verify readings against a trusted reference when possible. Review several flow conditions, not one convenient moment.
Clamp-on measurement is practical, but it is not magic. Its limits deserve attention.
How to Choose the Best Clamp On Water Meter?
Identifying your pipe, flow, and measurement requirements is the practical starting point. Measure the outside diameter with calipers, not by eyesight. Record the pipe material, wall thickness, lining, and insulation. Steel, plastic, and lined pipes can produce different ultrasonic signals. A quick visual estimate is tempting, but it can be wrong.
Check the expected flow range, minimum flow, pressure, temperature, and water quality. A meter designed for high flow may respond poorly during nighttime demand. Confirm whether you need temporary checking, leak detection, process monitoring, or billing-grade accuracy. Clamp-on installation avoids cutting the pipe, but the sensor still needs a clean, stable surface. Straight pipe is helpful. Nearby valves, pumps, elbows, and air pockets may disturb readings. In field work, installation conditions often matter more than the advertised accuracy.
Tips: Clean away rust, paint flakes, and loose insulation before mounting the sensors. Use the manufacturer’s spacing calculation for your exact pipe data. Test the reading against a trusted reference when possible. Keep a record of pipe details and installation position. Small errors in wall thickness can affect the result. When the signal is weak, do not assume the meter is defective; check alignment, coupling, and flow stability first.
| Selection Dimension | What to Identify | Typical Data or Range | Recommended Clamp-On Configuration | Important Check |
|---|---|---|---|---|
| Pipe outside diameter | Measure the external diameter of the pipe, not only the nominal pipe size. | Common water-pipe sizes include:
| Choose transducers whose specified diameter range includes the actual outside diameter. | Nominal diameter varies by pipe standard, material, and wall thickness. Confirm the meter’s supported diameter range before installation. |
| Pipe material | Identify whether the pipe is carbon steel, stainless steel, ductile iron, copper, PVC, HDPE, or another material. |
| Use a sensor frequency and mounting method approved for the pipe material and diameter. | Paint, rust, scale, lining, and air gaps can weaken the ultrasonic signal. Remove loose coating and use suitable acoustic coupling compound. |
| Pipe wall thickness and lining | Determine the wall thickness and whether the pipe has cement mortar, rubber, epoxy, plastic, or other internal lining. | Typical water-pipe wall thickness may range from a few millimetres on small pipes to more than 10 mm on large industrial pipes. | Enter accurate wall-thickness and lining information into the meter, where required. | A thick or poorly bonded lining can change the ultrasonic path. If the thickness is unknown, obtain pipe records or use an ultrasonic thickness gauge. |
| Measured fluid | Confirm that the line contains clean or relatively clean liquid and that the pipe remains full. | Water applications may include:
| Use transit-time ultrasonic measurement for clean water with limited suspended solids or bubbles. | Partially full pipes, heavy aeration, or excessive suspended solids can interrupt the signal and reduce reliability. |
| Flow velocity | Estimate the minimum, normal, and maximum velocity in the pipe. | A practical water-system design range is often about 0.3 to 3 m/s; many ultrasonic meters can cover a wider range, commonly around 0.01 to 10 m/s, depending on the model and installation. | Select a meter whose stated operating range covers both the lowest expected flow and the maximum operating flow. | Very low velocity may approach the meter’s zero-flow sensitivity, while very high velocity can increase turbulence and pressure-related installation errors. |
| Approximate flow rate | Calculate flow from pipe internal diameter and expected velocity. | Q = v × πD² ÷ 4 Example: a 100 mm internal-diameter pipe at 1 m/s carries approximately 7.85 L/s, or 28.3 m³/h. | Compare the calculated minimum and maximum flow with the meter’s published flow range and accuracy specification. | Use internal diameter, not outside diameter, for flow calculations. Wall thickness and lining reduce the flow area. |
| Required accuracy | Decide whether the meter is for indication, system balancing, leak detection, or custody-transfer-style measurement. | Typical portable or fixed clamp-on ultrasonic installations may specify approximately:
| For billing or regulatory measurement, verify the applicable legal metrology approval and calibration requirements. | Actual accuracy depends on pipe data, straight-run conditions, flow profile, signal quality, calibration, and installation quality. |
| Pipe condition | Inspect corrosion, scale, dents, welds, coating, insulation, and surface roughness. | Best results normally come from a sound, round pipe with a clean and firmly bonded surface. | Install sensors on a smooth section and remove loose rust, dirt, or flaking paint before coupling. | Do not mount directly over a heavy weld seam, damaged section, or loose external coating. |
| Installation location | Check for sufficient straight pipe upstream and downstream of valves, pumps, elbows, reducers, and tees. | A common starting guideline is approximately 10 pipe diameters upstream and 5 pipe diameters downstream from major disturbances. | Prefer a full, completely flooded section with stable flow and minimal swirl. | Shorter straight runs may be possible, but they can increase error. Follow the selected meter’s installation instructions. |
| Pipe orientation | Identify whether the pipe is horizontal, vertical, or sloped and determine the likely location of trapped air. | Vertical upward flow is generally preferable to downward flow when a vertical installation is necessary. | On horizontal lines, place sensors on the side of the pipe rather than at the very top or bottom. | Air at the top and sediment at the bottom can reduce signal quality or cause unstable readings. |
| Sensor mounting method | Determine whether the pipe diameter and installation space allow a V, Z, or alternative acoustic path. |
| Choose the mounting path recommended by the meter after entering pipe diameter, material, wall thickness, and fluid data. | Maintain the specified sensor spacing and align both transducers accurately with the pipe axis. |
| Temperature and pressure | Check the minimum and maximum water temperature, ambient temperature, and line pressure. | Typical building-water systems may operate near 5–30°C, while chilled-water systems can be colder and industrial systems may be hotter. | Select transducers, cables, enclosure, and coupling compound rated for the actual operating conditions. | The pipe must remain full at operating pressure. Verify sensor and electronics ratings separately. |
| Power and output requirements | Identify whether the meter will be portable, battery-powered, or permanently installed. | Common outputs include pulse, frequency, 4–20 mA, relay, USB, RS-485, or other digital communication interfaces. | Match the output to the building-management system, data logger, PLC, or field-maintenance process. | Confirm supply voltage, battery duration, cable length, ingress protection, and data-logging capacity. |
| Measurement objective | Define whether the measurement is temporary troubleshooting or continuous monitoring. |
| Choose a portable or permanently mounted arrangement according to measurement frequency and access conditions. | For long-term installations, protect cables and sensors from vibration, weather, impact, and unauthorized adjustment. |
| Verification before purchase | Prepare a complete pipe and operating-condition record. | Required information should include:
| Use the completed data sheet to confirm compatibility before ordering or scheduling installation. | A clamp-on meter is non-invasive, but it is not automatically suitable for every pipe. Signal quality and installation conditions should be checked on site whenever possible. |

Choosing the best clamp-on water meter starts with understanding the water and pipe conditions. A transit-time ultrasonic meter suits relatively clean water and measures flow between two sensors. A Doppler meter works better when suspended particles or air bubbles reflect the signal. For clean water, Doppler technology may produce unstable readings.
I have found that accuracy depends heavily on installation quality. Measure the pipe’s outside diameter carefully, then enter the correct material and wall thickness. Remove rust, paint flakes, and scale from the sensor area. Apply enough coupling gel to eliminate air gaps. Place both sensors straight and firmly against the pipe. Small alignment errors matter. Follow the recommended upstream and downstream distances whenever possible. Nearby elbows, pumps, and valves can disturb the flow profile.
Installation methods also affect long-term reliability. Temporary straps allow quick testing, but they may loosen during vibration or temperature changes. A fixed mounting frame provides better repeatability for permanent monitoring. After installation, compare the meter with a trusted reference, such as a calibrated tank or a verified inline meter. Record pipe conditions, sensor spacing, flow rate, and signal strength. I once accepted a stable display without checking the reference reading. The result looked convincing but was wrong. That mistake reinforced an important lesson: a smooth number is not automatically an accurate number.
A reliable clamp-on water meter begins with compatibility, not purchase price. Check the pipe’s outside diameter, material, wall thickness, and internal lining. Steel, copper, plastic, and lined pipes can produce different ultrasonic responses. Measure carefully. A small error may affect the signal path and reading accuracy. Confirm the meter supports the expected flow range, temperature, and pressure conditions. Straight pipe length also matters because nearby valves, pumps, and elbows can disturb the measurement. Follow the installation guide and record the sensor spacing for future checks.
Inspect the sensor straps, cables, and enclosure during scheduled site visits. Remove dirt, condensation, or loose insulation around the contact area. Reapply coupling gel when the manufacturer requires it.
I once assumed a stable reading meant a perfect installation. That assumption was too simple.
Compare the meter with a trusted reference during commissioning and after major pipework changes. Keep calibration records and note unusual flow patterns.
Choose outputs that match the existing control system, such as pulse, analog, or digital communication. Check sampling rates, storage capacity, alarm functions, and remote access requirements. Clear timestamps help operators compare night flow, peak demand, and leakage indicators. Protect connected devices with access controls and updated software.
Connectivity is not automatically value. A crowded dashboard can hide important changes. Test data transmission before relying on it for maintenance planning or operational decisions.
Choosing a clamp-on water meter starts with the total cost, not the purchase price. A non-invasive meter can reduce shutdowns because technicians avoid cutting pipes or draining lines. However, thick coatings, air pockets, and poor pipe access can weaken ultrasonic signals. I have seen installation estimates change after one pipe inspection. That risk deserves a budget line.
Certification protects long-term reliability. For potable-water service, check compliance with NSF/ANSI/CAN 61 or the applicable national standard. For custody transfer, verify requirements under ISO 4064, OIML R49, or local metrology rules. Calibration should be traceable to an ISO/IEC 17025-accredited laboratory. Certificates alone are not enough. Confirm the exact pipe material, diameter, temperature range, and flow conditions tested.
Data supports careful measurement. The U.S. Environmental Protection Agency reports that household leaks can waste nearly 1 trillion gallons of water annually nationwide. The World Bank has also reported that non-revenue water commonly represents a substantial share of municipal supply, often around 25–30% in developing systems. Better measurement can reveal hidden losses, but savings depend on follow-up repairs. That assumption can fail. Compare five-year costs, including calibration, battery replacement, software, labor, and verification against a reference meter. A lower-priced unit may become expensive when readings drift or support ends. Leave room for uncertainty.


For those larger-sized parts, or smaller quantity runs, we have 2 independent powder coat booths and ovens. The quality, durability and affordability of today’s powder coating finishes make this the process of choice for world-class companies.
Powder coating advantages over other forms of coating are many. Materials used in the Powder coating process can be metals and non-metals that come in a multitude of thicknesses, textures, colors, etc. Another of Powder coating’s biggest advantages over conventional coatings is its ability to create finishes in many different textures. Powder Coating Booths allow us the ability to apply these advantages to large products.
Tri-State Fabricators runs a full-service conveyor line for painting. Wet painting can provide protection or decoration to many different part styles. From start to finish, every project is easier to undergo random and point-based inspection by our skilled painting team.
Advantages to our Wet Paint Line are these lines start with product prep and ends with a thorough inspection of a high quality finished product. Our ability to complete large and small projects with a superior finish and doing so in a timely and economical fashion. This passes along the savings in production to our customers. When powder coating ins not an option, our Wet Paint Line gets the job done right the first time.
When the parts get big and heavy we roll-out our custom paint racks and oversize booth. By utilizing our partnerships with all the major paint brands, we can match virtually any color with wet paint.
The advantages of having access to a Wet Paint Booth are many. Large projects of many different shapes can be loaded into the booth. The Wet Paint Booth offers an environment that is much more controlled than a typical parts painting operation.
Not only are they used because of their controlled environment, but they’re are also advantageous when it comes to applying paint to parts that are needed in industries that require specialty coatings such as medical, aerospace, etc.
Our military forces have some very high standards when it comes to the finish of their vehicles and equipment. From the first pre-treatment step to final coat, it takes a great deal of knowledge and experience to protect the men and women of our armed forces. They deserve only the best, and Tri-State Fabricators provides it.
All of our processes are closely monitored by our staff and management teams. Both of which are highly trained in the processes of metal fabrication and finishing. Tri-State Fabricators’ goal is to always fully satisfy each and every customer, including the military. We will always put a 110% into what we do.
Abrasive media blasting is an excellent way to remove old paint, rust, and increase the paint/powder adhesion. Glass beads produce a much smoother and brighter finish than angular abrasives; leaving the part clean yet without any dimensional change. Chemically inert and environmentally friendly, we can recycle our beads approximately 30 times; making them a more preferred method of metal cleaning or surface finishing.
Advantages to Glass Bead Blasting are many. Glass bead blast media is used when a project is needing rough surfaces need to become smooth for applications of coatings such as paint. It is typically used to clean paint and rust from a product surface without deforming the surface it is being used on. Overall, compared to many other blasting media, Glass Bead Blasting is a very economical choice and those savings are always passed on to our customers.
Tri-State Fabricators utilize a zinc phosphate wash to clean and etch the material to ensure the best paint adhesion possible. The unique design of our 3-stage wash system does the work like a 5-stage. From Cleaning and rinsing to conversion coating and post-treatment, Our Part Washing process is a complete service and works throughout the fabrication service and the finishing service.
Along with the previously mentioned benefits, Curing is a vital chemical reaction that leaves the product finish hard and relatively safe from mild abrasion and aggressive corrosion. This process can be done in more than one way; ambient air-dry or in curing ovens at temps that exceed 240°.
From fixing paint mistakes (someone else’s of course) to simply cleaning our paint line hooks, our burn-off oven is put to good use. After a quick burn-off, a little clean up, and a fresh coat of paint, your parts will look better than new.
Why does our Burn-Off Oven work so well? Because super heating the air around parts turns the materials into ashes. From paint and powder coatings to rubber and machining oils, high temps do the job without degrading the integrity of the part.
Masking is a vital part of producing high quality products. We have die-cut masking patterns to protect machined surfaces as well as a wide range of plugs and caps to protect threaded holes and bolts. We provide permanent and temporary masking.
Masking allows the selected sections of a product to be protected from a fabrication or finishing service. This can be with both chemicals when etching and tapes, paints when only finishing just a section of the product. Masking is great in aiding the customization process of a project.
Screen printing is a photographic process that transfers artwork onto a porous nylon screen which allows colored ink to flow through the screen and be deposited on an aluminum or plastic component. We can generally have just about any design created onto a screen for your parts.
Some of the advantages of Screen Printing are, brand recognition for your business displaying on your products, assembly instructions, product warnings/hazards, etc. Tri-State Fabricators produces Screen Printing of the highest quality so you know it’s durable.
Metal Finishing is the art of treating the exterior portion of product, often metal but can also be made of other materials, so that the surface is clean and free of any debris. Then the process of applying coats or either paint of powder coat takes place. This coating process improves the quality of the product in both appearance and resistance to wear and corrosion.
Tri-State Fabricators, Inc., understands that a project typically isn’t complete until a high-quality finish has been added to your product. This is why our painting and powder coating teams continuously inspect the products throughout the Metal Finishing process.