


How to Choose the Best Acrylic Luminous Sign?

Choosing the right Acrylic luminous sign is not only a design decision. It is a practical investment in visibility, durability, and brand trust.

David Hickey, a longtime sign-industry authority associated with the International Sign Association, offers a useful principle: “Good signage should be clear, durable, and appropriate to its setting.” That idea matters when comparing acrylic thickness, LED quality, light diffusion, mounting methods, and maintenance access. A bright sign may attract attention. Poor light distribution can still create dark patches, glare, or uneven lettering.

Start with the viewing distance. A small storefront needs clean edges and readable typography. A roadside location requires stronger contrast and larger forms. Clear acrylic can create a floating effect, while opal acrylic spreads light more softly. Neither option is automatically better. The surrounding wall, daylight, weather, and viewing angle all influence the result.

Check the acrylic grade and surface finish carefully. Thin panels may flex or crack under stress. Cheap LEDs may lose brightness early. Ask about waterproofing, heat management, power consumption, and replacement access. These details often matter more than a dramatic showroom sample.

There is no universal “best” Acrylic luminous sign. The most attractive option can fail in direct sunlight. A technically strong sign can still feel lifeless. That is where careful testing helps: view a sample at night, inspect it from several angles, and question assumptions before ordering. Good choices are rarely perfect. They are considered, measurable, and suited to the real location.
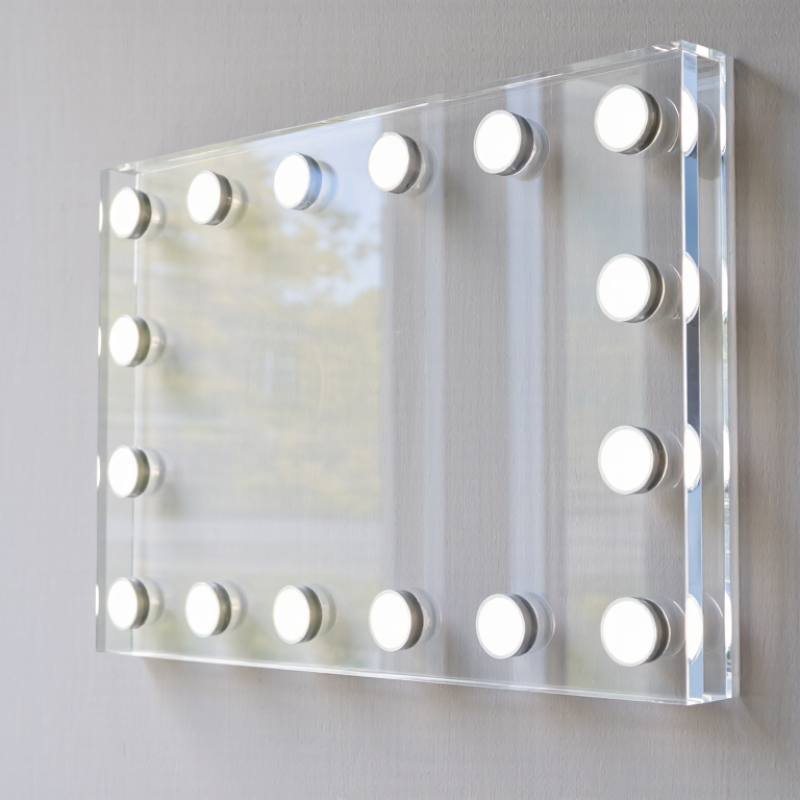
How to Choose the Best Acrylic Luminous Sign?

Define Sign Purpose and Brightness: Target 80–150 cd/m² Outdoors

How to Choose the Best Acrylic Luminous Sign?

An acrylic luminous sign should begin with its purpose, not its appearance. A storefront sign needs clear recognition from passing vehicles and pedestrians. An indoor reception sign usually needs softer illumination. Outdoor signs face sunlight, changing weather, and longer viewing distances. These conditions directly affect the required brightness.

For most outdoor applications, target approximately 80–150 cd/m². This range usually provides readable contrast without creating harsh glare at night. A sign beside a bright road may need a higher setting during the day.

However, excessive brightness can wash out colors and disturb nearby viewers after sunset. Use a dimming system when possible. Measure at eye level. Do not guess.

Acrylic thickness, surface color, LED spacing, and cabinet depth also change the final luminance. Evenly spaced LEDs help prevent bright spots and shadow bands across the panel. A pale acrylic face may appear brighter than expected, while dark graphics can reduce visual clarity.

In practical installations, the first brightness estimate is often imperfect. I have seen signs look excellent at noon but appear uncomfortable after dark. Testing under both conditions is worth the extra effort. Check the sign from the actual sidewalk, driveway, or road. Viewing distance changes everything. A reliable installer should record the measured result, review nighttime performance, and adjust the control settings before final approval.


Compare Acrylic Options: 3–5 mm Cast Sheets for Durable Sign Faces

How to Choose the Best Acrylic Luminous Sign?

For durable sign faces, 3–5 mm cast acrylic sheets offer a practical balance between brightness, strength, and cost. A 3 mm sheet suits compact indoor signs and protected storefronts. It is lighter and easier to cut, but larger panels may flex during installation. A 5 mm sheet feels more solid and resists bending better, especially on wide outdoor faces. However, added thickness increases weight and may require stronger framing.

Cast acrylic usually provides cleaner edges and more consistent light diffusion than many basic alternatives. When illuminated, the face should glow evenly without obvious bright spots near LED modules. Sheet color matters too. White or opal surfaces often soften intense light, while clear sheets can create sharper highlights. Check the viewing distance before choosing. A sign that looks balanced from three meters may appear uneven up close.

Tips: Test a small sample with the actual LEDs, diffuser, and frame. Measure brightness at the corners. Leave room for thermal movement and secure the sheet without excessive pressure. I once selected 3 mm for a broad panel because it was easier to handle; it worked, but slight flexing appeared after installation. That mistake reminded me that support design matters as much as acrylic thickness. A thicker sheet is not automatically better. Poor ventilation can still shorten the life of the lighting system.

How to Choose the Best Acrylic Luminous Sign? - Compare Acrylic Options: 3–5 mm Cast Sheets for Durable Sign Faces

Comparison Factor 3 mm Cast Acrylic 4 mm Cast Acrylic 5 mm Cast Acrylic Selection Guidance
Nominal Thickness 3 mm 4 mm 5 mm Choose thickness according to sign size, support spacing, and wind exposure.
Approximate Weight 3.57 kg/m² 4.76 kg/m² 5.95 kg/m² Based on a typical acrylic density of approximately 1.19 g/cm³.
Relative Bending Stiffness 100 237 463 Relative values are based on thickness cubed; mounting conditions also affect stiffness.
Typical Light Transmission Approximately 92% for clear sheet Approximately 91% for clear sheet Approximately 90% for clear sheet Actual transmission varies with color, surface finish, diffuser treatment, and measurement method.
Resistance to Face Flexing Good for small or well-supported faces Very good for medium-sized faces Excellent for larger faces and wider support spacing
LED Hot-Spot Management May show hot spots when LEDs are closely spaced or too near the face Improved diffusion depth and more uniform illumination Best of the three options when paired with adequate sign depth and diffusion Sheet thickness alone cannot replace correct LED spacing and installation depth.
Fabrication and Drilling Still easy to fabricate with good edge quality Requires more cutting time and higher tool load Use sharp tools, controlled feed rates, and clearance around fasteners.
Resistance to Handling Damage More susceptible to bending during transport and installation Good balance of durability and manageable weight Best resistance to handling-related flexing Protective masking should remain on the sheet until fabrication is complete.
Suitable Sign Face Size Small faces or panels with close back support Medium faces with standard reinforcement Large faces, exposed installations, or wider unsupported areas Final sizing should account for frame design, fastener spacing, and local wind loads.
Relative Material Cost Lowest material requirement Moderate material requirement Highest material requirement Compare total installed cost, including reinforcement, fabrication, and maintenance.
Weathering Considerations Suitable when the sheet is specified for exterior use Suitable when the sheet is specified for exterior use Suitable when the sheet is specified for exterior use Thickness improves rigidity, but exterior durability depends on the sheet formulation and installation.
Best General Application Compact light boxes, small letters, and tightly supported panels Large durable sign faces, exposed locations, and premium rigid panels For general projects, 4 mm is often a practical balance between rigidity, weight, and fabrication effort.

Note: Values are typical engineering reference figures for cast acrylic sheet and should be verified against the selected sheet specification, sign dimensions, illumination system, mounting method, and local environmental requirements.

Assess LED Quality: 80–150 lm/W Efficacy and CRI ≥80

How to Choose the Best Acrylic Luminous Sign?

When selecting an acrylic luminous sign, examine LED quality before judging brightness. A useful target is 80–150 lumens per watt. This range indicates efficient light output for many indoor and outdoor applications. However, ask whether the figure describes the LED chip or the complete sign. Acrylic panels, wiring, lenses, and power supplies can reduce actual performance. Request test data for the assembled sign, not only a laboratory chip rating.

Color accuracy matters as much as brightness. Choose LEDs with a CRI of 80 or higher for clear logos, readable text, and natural product colors. In practice, higher CRI can slightly reduce efficacy. That trade-off is not always a problem. A balanced sign should remain bright without making colors appear dull or distorted. Check several illuminated samples in the intended viewing environment. Store lighting may hide uneven brightness, while a dark entrance can reveal hot spots immediately.

Thermal control also deserves close attention. Excess heat can shorten LED life and cause brightness changes over time. Look for even spacing, reliable heat dissipation, and a properly matched power supply. I have seen signs that looked impressive during a short demonstration but weakened after extended operation. That experience is easy to overlook. Ask for operating temperature data and a realistic warranty. Measurements may vary between suppliers, so independent testing is worth considering.

Check Color and Light Uniformity: Select 4000–6500 K LEDs

How to Choose the Best Acrylic Luminous Sign?

Color temperature strongly affects how an acrylic luminous sign feels at night. A 4000 K LED produces clean, neutral white light. It suits offices, clinics, and modern storefronts. A 5000–6500 K LED appears cooler and sharper. It can improve contrast on white or blue lettering, but excessive blue can feel harsh. The U.S. Department of Energy reports that quality LED lighting can use at least 75% less energy than incandescent lighting and last up to 25 times longer. However, energy savings do not guarantee attractive signage.

Light uniformity deserves equal attention. Look closely at the panel from different angles. Dark corners, bright hotspots, or visible LED dots indicate poor spacing or weak diffusion. DOE CALiPER evaluations have repeatedly shown that optical design influences brightness consistency and visual quality. Ask suppliers for photometric test data, LED spacing details, and color consistency information based on ANSI/IES standards. I have seen signs look perfect in a workshop, then reveal uneven patches outdoors. That mistake is easy to miss.

Tips: Compare 4000 K, 5000 K, and 6500 K samples under real nighttime conditions. Check the sign from three to five meters away. Request LM-80 and TM-21 reports for lumen-maintenance evidence. Do not choose the coolest white automatically. A slightly warmer 4000 K sign may look more professional and remain easier to read.

Verify Compliance: UL 48, IEC 60598-1, and IP65 Protection

Choosing an acrylic luminous sign starts with checking its compliance documents, not just its brightness or polished surface. UL 48 is relevant to electric signs in North American markets. It addresses construction, wiring, insulation, grounding, and fire-related safety. Ask for a valid certification record and inspect the product label. A photocopied certificate is not enough.

IEC 60598-1 provides general safety requirements for luminaires, including protection against electric shock, abnormal heat, and mechanical stress. It may apply when the sign is designed as a lighting product for markets using IEC standards. Confirm whether the test report matches the exact model, power supply, LED module, and enclosure. Small differences matter. I have seen attractive signs fail review because their replacement components were never tested with the original housing.

IP65 protection means the enclosure is dust-tight and resists water jets from any direction. It does not mean the sign can be submerged. Check the sealing around acrylic panels, cable entries, screws, and service openings. A narrow gap can collect moisture behind the face, especially after temperature changes. The rating should be supported by a test report, not a sales claim. Also review installation instructions, drainage design, operating temperature, and maintenance access. Compliance is important, but installation quality still decides real-world reliability. That part is often underestimated.

Powder Coat Booths

For those larger-sized parts, or smaller quantity runs, we have 2 independent powder coat booths and ovens. The quality, durability and affordability of today’s powder coating finishes make this the process of choice for world-class companies.

Powder coating advantages over other forms of coating are many. Materials used in the Powder coating process can be metals and non-metals that come in a multitude of thicknesses, textures, colors, etc. Another of Powder coating’s biggest advantages over conventional coatings is its ability to create finishes in many different textures. Powder Coating Booths allow us the ability to apply these advantages to large products.

Wet Paint Line

Tri-State Fabricators runs a full-service conveyor line for painting. Wet painting can provide protection or decoration to many different part styles. From start to finish, every project is easier to undergo random and point-based inspection by our skilled painting team.

Advantages to our Wet Paint Line are these lines start with product prep and ends with a thorough inspection of a high quality finished product. Our ability to complete large and small projects with a superior finish and doing so in a timely and economical fashion. This passes along the savings in production to our customers. When powder coating ins not an option, our Wet Paint Line gets the job done right the first time.

Wet Paint Booths

When the parts get big and heavy we roll-out our custom paint racks and oversize booth. By utilizing our partnerships with all the major paint brands, we can match virtually any color with wet paint.

The advantages of having access to a Wet Paint Booth are many. Large projects of many different shapes can be loaded into the booth. The Wet Paint Booth offers an environment that is much more controlled than a typical parts painting operation.

Not only are they used because of their controlled environment, but they’re are also advantageous when it comes to applying paint to parts that are needed in industries that require specialty coatings such as medical, aerospace, etc.

Military CARC

Our military forces have some very high standards when it comes to the finish of their vehicles and equipment. From the first pre-treatment step to final coat, it takes a great deal of knowledge and experience to protect the men and women of our armed forces. They deserve only the best, and Tri-State Fabricators provides it.

All of our processes are closely monitored by our staff and management teams. Both of which are highly trained in the processes of metal fabrication and finishing. Tri-State Fabricators’ goal is to always fully satisfy each and every customer, including the military. We will always put a 110% into what we do.

Glass-Bead Blasting

Abrasive media blasting is an excellent way to remove old paint, rust, and increase the paint/powder adhesion. Glass beads produce a much smoother and brighter finish than angular abrasives; leaving the part clean yet without any dimensional change. Chemically inert and environmentally friendly, we can recycle our beads approximately 30 times; making them a more preferred method of metal cleaning or surface finishing.

Advantages to Glass Bead Blasting are many. Glass bead blast media is used when a project is needing rough surfaces need to become smooth for applications of coatings such as paint. It is typically used to clean paint and rust from a product surface without deforming the surface it is being used on. Overall, compared to many other blasting media, Glass Bead Blasting is a very economical choice and those savings are always passed on to our customers.

Part Washing

Tri-State Fabricators utilize a zinc phosphate wash to clean and etch the material to ensure the best paint adhesion possible. The unique design of our 3-stage wash system does the work like a 5-stage. From Cleaning and rinsing to conversion coating and post-treatment, Our Part Washing process is a complete service and works throughout the fabrication service and the finishing service.

Along with the previously mentioned benefits, Curing is a vital chemical reaction that leaves the product finish hard and relatively safe from mild abrasion and aggressive corrosion. This process can be done in more than one way; ambient air-dry or in curing ovens at temps that exceed 240°.

Burn-Off Oven

From fixing paint mistakes (someone else’s of course) to simply cleaning our paint line hooks, our burn-off oven is put to good use. After a quick burn-off, a little clean up, and a fresh coat of paint, your parts will look better than new.

Why does our Burn-Off Oven work so well? Because super heating the air around parts turns the materials into ashes. From paint and powder coatings to rubber and machining oils, high temps do the job without degrading the integrity of the part.

Masking

Masking is a vital part of producing high quality products. We have die-cut masking patterns to protect machined surfaces as well as a wide range of plugs and caps to protect threaded holes and bolts. We provide permanent and temporary masking.

Masking allows the selected sections of a product to be protected from a fabrication or finishing service. This can be with both chemicals when etching and tapes, paints when only finishing just a section of the product. Masking is great in aiding the customization process of a project.

Screen Printing

Screen printing is a photographic process that transfers artwork onto a porous nylon screen which allows colored ink to flow through the screen and be deposited on an aluminum or plastic component. We can generally have just about any design created onto a screen for your parts.

Some of the advantages of Screen Printing are, brand recognition for your business displaying on your products, assembly instructions, product warnings/hazards, etc. Tri-State Fabricators produces Screen Printing of the highest quality so you know it’s durable.

Metal Finishing

Metal Finishing is the art of treating the exterior portion of product, often metal but can also be made of other materials, so that the surface is clean and free of any debris. Then the process of applying coats or either paint of powder coat takes place. This coating process improves the quality of the product in both appearance and resistance to wear and corrosion.

Tri-State Fabricators, Inc., understands that a project typically isn’t complete until a high-quality finish has been added to your product. This is why our painting and powder coating teams continuously inspect the products throughout the Metal Finishing process.
