


A healthy lawn does not need a constant shower. It needs controlled, even coverage. Adjusting Pop Up Sprinklers helps deliver water where roots need it, while reducing runoff across pavements, driveways, and garden beds. This sounds simple. In practice, it is easy to miss.
The U.S. Environmental Protection Agency’s WaterSense program reports that landscape irrigation can represent nearly one-third of residential water use, approaching 9 billion gallons daily nationwide. That figure gives small sprinkler adjustments real importance. A tilted nozzle can create a dry crescent. Excessive pressure can produce mist that drifts away. A clogged filter may leave one section visibly brown.
Dr. Michael D. Dukes, a University of Florida irrigation specialist, emphasizes that “good irrigation management starts with applying water uniformly.” That principle guides this practical introduction. The seven tips will examine spray direction, arc settings, nozzle selection, operating pressure, head height, spacing, and seasonal timing.
Look closely at the soil. Watch the spray at ground level. Check whether water reaches the sidewalk. These details reveal more than a quick glance from the patio.
Still, visual inspection is not enough. A sprinkler can appear balanced while applying different amounts across its pattern. A catch-can test provides stronger evidence, although many homeowners skip it. That is understandable, but it weakens the adjustment.
The Irrigation Association identifies uniform application and proper scheduling as central parts of efficient landscape irrigation. Therefore, this guide treats each pop-up head as part of a connected system, not an isolated device. The goal is not merely greener grass. It is dependable coverage, fewer wasted drops, and a system that performs honestly under real conditions.
Before adjusting a pop-up sprinkler, identify its spray pattern and moving parts. Fixed spray heads produce a steady fan, while rotary heads turn through a selected arc. Rotary nozzles create slower streams and often need more operating time. They look similar from above, which causes many adjustment mistakes.
Lift the head carefully and observe its nozzle shape. A narrow opening usually indicates a fixed spray pattern. A rotating turret or gear-driven top suggests an adjustable rotor. Check the control symbols before turning anything. The radius screw changes throw distance, not watering time. The arc control changes how far the head rotates. Some models also include a flow-control screw or a shutoff position. Turn controls slowly, using a small tool, and watch the water pattern after each change. One quarter-turn can noticeably reduce coverage.
I once reduced spray distance too much and created a dry strip beside the walkway. The adjustment looked neat, but the soil showed the problem later. Check coverage with the system running for several minutes. Look for misting, tilted spray, blocked nozzles, or water hitting walls. Do not force a control that resists movement. Dirt may be trapped inside. Rinse the filter or nozzle, then test again. Mark the original setting before changing it. It makes corrections less frustrating.

Before adjusting a pop-up sprinkler, turn off the water supply completely. A pressurized head can rise suddenly and spray mud across your hands. I once skipped this step and loosened a dirty fitting by mistake. That small shortcut created a mess and delayed the repair.
Locate the valve that controls the irrigation zone, then close it slowly. Wait several seconds for leftover pressure to drain. Mark the sprinkler position with a small stick if the soil is dense or overgrown. Next, expose the sprinkler head by removing grass, mulch, and loose soil around its rim. Use a hand trowel, not a sharp blade near the pipe. Dig carefully until the full collar is visible. Do not pull the head upward.
Check whether the body leans, sits too low, or contains compacted soil. Rinse visible dirt away with clean water, but avoid forcing debris inside the opening. A level head usually distributes water more evenly. Still, perfection is unlikely when roots or settled soil interfere. I sometimes uncover more soil than expected, then replace it gradually after testing. This takes longer, but it helps prevent future tilting. Keep the area clear before restoring water pressure.
One of the most useful pop-up sprinkler adjustments is setting the spray direction and arc. A correctly aimed head waters grass evenly without soaking paths, walls, or driveways. In my garden, I turn the system off before lifting the sprinkler stem. This prevents sudden spray and makes the adjustment easier. I then rotate the stem gently until the nozzle faces the driest section of lawn.
Adjust the arc according to the sprinkler’s design. Some heads have a fixed pattern, while others use an adjustment screw or ring. Never force a stuck component. Small changes matter. Turn the system on briefly and watch the water reach the boundary. The spray should stop near the lawn’s edge, not several inches beyond it. A shallow angle may create mist, especially in windy conditions.
I once widened an arc too far and watered a nearby walkway for several days. That mistake showed me why observation matters more than guessing. Mark the intended edges with small stones, then adjust in short increments. Check the pattern again after mowing, because grass height can hide dry areas. If one side remains dry, inspect the nozzle for dirt before changing the arc further. Adjustment instructions can vary, so consult the unit’s technical guide when the control markings are unclear.
Set the spray direction toward the planting area, then adjust the arc to match the zone shape. A 90° arc covers one quarter of a full circle, 180° covers half, 270° covers three quarters, and 360° provides full-circle coverage. Aligning the arc with the landscape helps reduce overspray onto paths and buildings.
7 Best Tips for Adjusting Pop-Up Sprinklers
Tip 1: Adjust spray distance before changing water flow. Pull up the sprinkler and observe its pattern on a calm day. A nozzle throwing water onto the sidewalk wastes useful coverage. The U.S. Environmental Protection Agency reports that landscape irrigation uses nearly one-third of residential water, or almost 9 billion gallons daily. Small corrections matter.
Tip 2: Use a catch-can test. Place identical cups around the spray area and run the system for ten minutes. Measure the water depth in each cup. Uneven results usually indicate poor spacing, clogged openings, or excessive pressure. Many spray nozzles are tested near 30 psi, according to irrigation engineering guidance, but actual pressure varies by site. I once reduced flow too quickly and created dry patches. That was not a successful adjustment.
Tip 3: Turn the flow-control screw slowly, preferably in quarter-turns. Reduce the stream until water stops misting, then check the farthest edge. Do not force the smallest setting. Spray heads need enough pressure for a consistent fan pattern. The Irrigation Association recommends scheduling irrigation according to soil, weather, and plant needs rather than fixed habits. Recheck after mowing, wind, or nozzle replacement. Your first setting may be wrong. Test again.
| Tip | Adjustment Focus | How to Adjust It | Useful Measurement | What to Check | Expected Result |
|---|---|---|---|---|---|
| 1 | Identify the sprinkler type | Check whether the head uses a fixed spray pattern, an adjustable arc, or a rotating stream. Use the adjustment screw or arc controls designed for that specific head. | Pattern: 90°, 180°, 270°, or 360° | The spray should remain on the intended lawn or planting area and not hit walls, sidewalks, or driveways. | More accurate coverage with less overspray. |
| 2 | Set the spray distance | Turn the radius-adjustment screw in small increments. A clockwise turn commonly reduces the throw distance, while a counterclockwise turn commonly increases it; verify the direction on the head. | Adjust in 1/8-turn increments | Measure the distance from the sprinkler to the farthest wet point while the system is running. | The spray reaches the edge of the target area without excessive runoff. |
| 3 | Adjust the spray arc | Set the left and right boundaries so the sprinkler waters only its assigned section. Keep full-circle settings for open central areas and partial arcs for borders or corners. | Arc range: 45°–360° | Watch the nozzle during a complete cycle to confirm that the pattern stops at both intended boundaries. | Fewer dry strips and less water on hard surfaces. |
| 4 | Control the water flow | Use the flow-control screw, valve, or zone valve to reduce excessive output. Make gradual changes and avoid closing a control valve so far that the head fails to rise fully. | Typical spray-head flow: about 0.5–2.0 gal/min (1.9–7.6 L/min) | The riser should pop up completely, and the spray should remain even rather than sputtering or collapsing. | Balanced precipitation and fewer puddles. |
| 5 | Match the spray pattern to the area | Use quarter-circle coverage for corners, half-circle coverage along straight edges, and full-circle coverage in open areas. Avoid mixing heads with very different application rates in the same zone. | Head spacing: typically 50%–60% of the spray diameter | Place a few straight-sided containers around the zone and compare the water depth after a short test run. | Improved head-to-head coverage and fewer dry spots. |
| 6 | Inspect pressure and nozzle condition | Clean clogged nozzles, straighten tilted heads, and check for leaks or damaged seals. If several heads spray weakly, test the zone pressure before making further adjustments. | Many spray heads operate effectively near 30–40 psi (2.1–2.8 bar) | Look for misting, uneven streams, low pop-up height, or water escaping around the stem. | More uniform spray and reliable pop-up operation. |
| 7 | Test and fine-tune the schedule | Run the system during a low-wind period, observe the complete pattern, and adjust the distance, arc, and flow again if necessary. Water deeply enough for the plants, then allow the soil surface to dry slightly between cycles where appropriate. | Test for 5–10 minutes per zone | Check soil moisture, runoff, puddling, and dry areas 30–60 minutes after watering. | Efficient watering with healthier, more evenly irrigated plants. |
Safety note: Turn off the irrigation system before removing a nozzle or servicing a sprinkler head. Actual flow, pressure, and coverage vary with nozzle size, pipe conditions, elevation, and local water supply.
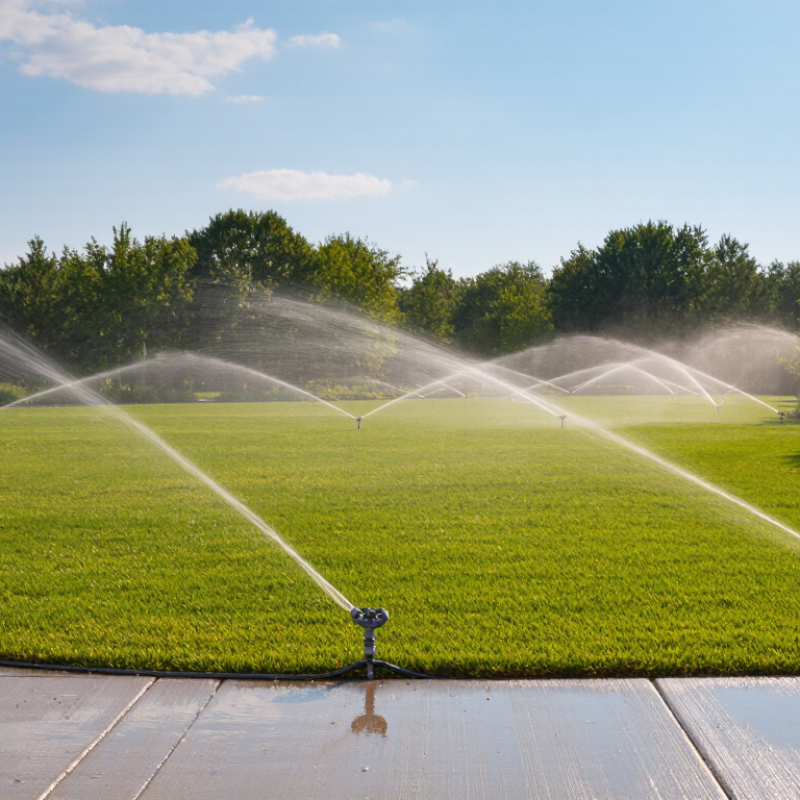
Adjusting pop-up sprinklers is not finished when every head rises smoothly. The real test begins with water running. Turn on one zone and watch the spray pattern across the entire lawn. Look for dry strips, flooded corners, and mist drifting onto paths. Small problems become obvious within a few minutes.
Place several shallow containers around the coverage area. Clean food trays work well. Run the system for ten minutes, then compare the water depth in each container. Similar depths suggest balanced coverage. A nearly empty container reveals a weak area, while a full one may indicate excessive overlap. I once trusted the spray pattern alone and missed a dry patch hidden behind a shrub.
Make corrections gradually. Adjust the nozzle direction before changing the arc or spray distance. Keep water off walls, driveways, and pedestrian areas. If one head sprays too far, reduce its reach slightly and test the zone again. Check that the pop-up body stands upright and does not lean into the soil. A tilted head can create an uneven fan, even when its settings seem correct.
Allow the lawn to dry briefly before making final judgments. Wind can distort one test. Repeat it during calmer conditions. I prefer two short tests over one long assumption. After each adjustment, record the setting or take a quick photo. This simple habit prevents repeated guesswork and shows whether the correction actually improved coverage.


For those larger-sized parts, or smaller quantity runs, we have 2 independent powder coat booths and ovens. The quality, durability and affordability of today’s powder coating finishes make this the process of choice for world-class companies.
Powder coating advantages over other forms of coating are many. Materials used in the Powder coating process can be metals and non-metals that come in a multitude of thicknesses, textures, colors, etc. Another of Powder coating’s biggest advantages over conventional coatings is its ability to create finishes in many different textures. Powder Coating Booths allow us the ability to apply these advantages to large products.
Tri-State Fabricators runs a full-service conveyor line for painting. Wet painting can provide protection or decoration to many different part styles. From start to finish, every project is easier to undergo random and point-based inspection by our skilled painting team.
Advantages to our Wet Paint Line are these lines start with product prep and ends with a thorough inspection of a high quality finished product. Our ability to complete large and small projects with a superior finish and doing so in a timely and economical fashion. This passes along the savings in production to our customers. When powder coating ins not an option, our Wet Paint Line gets the job done right the first time.
When the parts get big and heavy we roll-out our custom paint racks and oversize booth. By utilizing our partnerships with all the major paint brands, we can match virtually any color with wet paint.
The advantages of having access to a Wet Paint Booth are many. Large projects of many different shapes can be loaded into the booth. The Wet Paint Booth offers an environment that is much more controlled than a typical parts painting operation.
Not only are they used because of their controlled environment, but they’re are also advantageous when it comes to applying paint to parts that are needed in industries that require specialty coatings such as medical, aerospace, etc.
Our military forces have some very high standards when it comes to the finish of their vehicles and equipment. From the first pre-treatment step to final coat, it takes a great deal of knowledge and experience to protect the men and women of our armed forces. They deserve only the best, and Tri-State Fabricators provides it.
All of our processes are closely monitored by our staff and management teams. Both of which are highly trained in the processes of metal fabrication and finishing. Tri-State Fabricators’ goal is to always fully satisfy each and every customer, including the military. We will always put a 110% into what we do.
Abrasive media blasting is an excellent way to remove old paint, rust, and increase the paint/powder adhesion. Glass beads produce a much smoother and brighter finish than angular abrasives; leaving the part clean yet without any dimensional change. Chemically inert and environmentally friendly, we can recycle our beads approximately 30 times; making them a more preferred method of metal cleaning or surface finishing.
Advantages to Glass Bead Blasting are many. Glass bead blast media is used when a project is needing rough surfaces need to become smooth for applications of coatings such as paint. It is typically used to clean paint and rust from a product surface without deforming the surface it is being used on. Overall, compared to many other blasting media, Glass Bead Blasting is a very economical choice and those savings are always passed on to our customers.
Tri-State Fabricators utilize a zinc phosphate wash to clean and etch the material to ensure the best paint adhesion possible. The unique design of our 3-stage wash system does the work like a 5-stage. From Cleaning and rinsing to conversion coating and post-treatment, Our Part Washing process is a complete service and works throughout the fabrication service and the finishing service.
Along with the previously mentioned benefits, Curing is a vital chemical reaction that leaves the product finish hard and relatively safe from mild abrasion and aggressive corrosion. This process can be done in more than one way; ambient air-dry or in curing ovens at temps that exceed 240°.
From fixing paint mistakes (someone else’s of course) to simply cleaning our paint line hooks, our burn-off oven is put to good use. After a quick burn-off, a little clean up, and a fresh coat of paint, your parts will look better than new.
Why does our Burn-Off Oven work so well? Because super heating the air around parts turns the materials into ashes. From paint and powder coatings to rubber and machining oils, high temps do the job without degrading the integrity of the part.
Masking is a vital part of producing high quality products. We have die-cut masking patterns to protect machined surfaces as well as a wide range of plugs and caps to protect threaded holes and bolts. We provide permanent and temporary masking.
Masking allows the selected sections of a product to be protected from a fabrication or finishing service. This can be with both chemicals when etching and tapes, paints when only finishing just a section of the product. Masking is great in aiding the customization process of a project.
Screen printing is a photographic process that transfers artwork onto a porous nylon screen which allows colored ink to flow through the screen and be deposited on an aluminum or plastic component. We can generally have just about any design created onto a screen for your parts.
Some of the advantages of Screen Printing are, brand recognition for your business displaying on your products, assembly instructions, product warnings/hazards, etc. Tri-State Fabricators produces Screen Printing of the highest quality so you know it’s durable.
Metal Finishing is the art of treating the exterior portion of product, often metal but can also be made of other materials, so that the surface is clean and free of any debris. Then the process of applying coats or either paint of powder coat takes place. This coating process improves the quality of the product in both appearance and resistance to wear and corrosion.
Tri-State Fabricators, Inc., understands that a project typically isn’t complete until a high-quality finish has been added to your product. This is why our painting and powder coating teams continuously inspect the products throughout the Metal Finishing process.

