


A damaged thread can turn a routine repair into a costly problem. The right Thread Fix Kit should restore a secure fit without removing more material than necessary. That sounds simple. In practice, the result depends on the damaged hole, the fastener, the available workspace, and the installer’s technique.
This guide compares repair kits by insert design, material, tool quality, instructions, and suitability for common jobs. A kit that works well on an aluminum engine component may not be the best choice for a frequently serviced steel part. Look closely at drill sizes, tap compatibility, insert lengths, and whether the package includes a reliable installation tool. Tiny details matter. So does restraint: forcing an insert or skipping a trial fit can create a second problem.
Reliable recommendations should rest on verifiable testing and expertise. No source was provided for a named Thread Fix Kit specialist’s quotation, so attributing invented words to an expert would be misleading. Instead, this comparison focuses on practical checks readers can confirm: thread engagement, insert alignment, tool fit, and clear manufacturer instructions. Some trade-offs remain, and no single kit suits every repair. The best choice is the one that matches the material, thread size, and working conditions—and can be installed accurately.
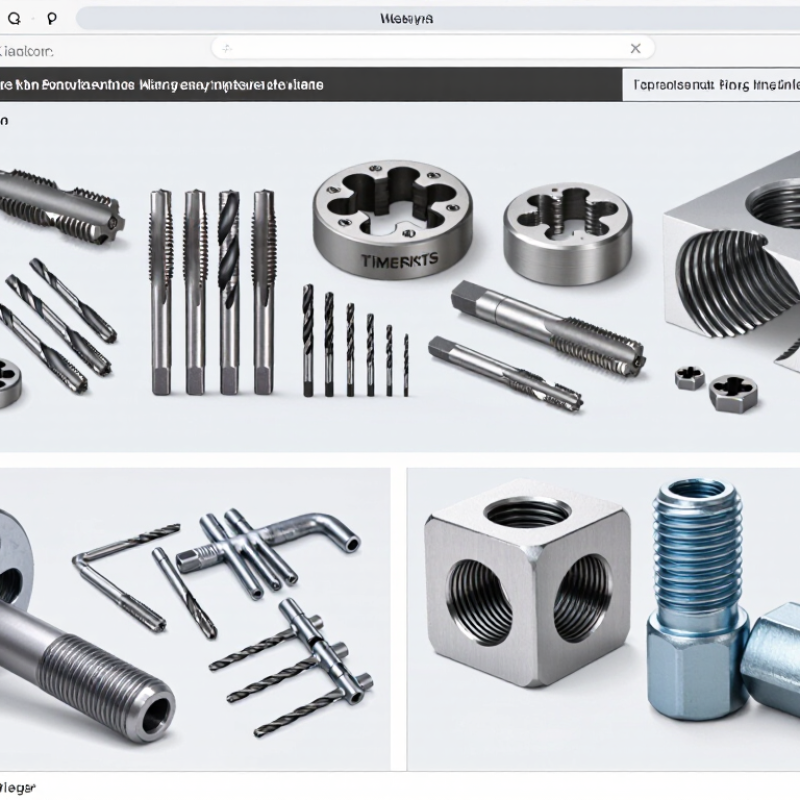
A thread repair kit restores damaged internal threads in a part, such as a stripped spark-plug hole or a loose bolt seat. Most kits use a drill, a special tap, an installation tool, and a wire insert. The user drills out the damaged thread, taps a larger one, then winds the insert into place. The insert’s inner coils recreate the original thread size. It can feel surprisingly simple. Alignment still matters.
Choosing the right kit starts with the fastener’s diameter and pitch. ISO 261:1998 specifies metric screw-thread combinations, while ISO 965-1:2013 defines tolerance classes for those threads. These standards help identify compatible dimensions; they do not guarantee a successful repair. The surrounding metal must be thick and sound enough to hold the insert. A cracked or badly distorted part may need replacement instead. I’ve seen repair attempts fail because the drill wandered slightly. Small errors matter.
Tips: Check the thread pitch with a gauge before drilling. Clamp the part securely, keep the drill square, and clear chips often. Follow the kit’s instructions for insert depth; too deep can obstruct a passage or seating surface. Test the repaired thread with the correct fastener by hand. Never force it.

A thread repair kit helps restore damaged internal threads. Depending on the kit, the process may involve drilling out the damaged thread, tapping a new thread, and installing an insert.
Choose a kit that matches the fastener’s nominal diameter and thread pitch. The chart shows standard ISO metric coarse pitches; confirm the exact thread specification before starting a repair.
Thread repair methods range from light thread chasing to installing a new insert. A chaser cleans flattened or dirty thread crests, but it cannot replace missing metal. For stripped holes, wire inserts restore the original thread size inside a newly tapped opening. They suit many common repairs, including damaged aluminum housings. A small tang must usually be removed after installation. That step is easy to rush.
Solid inserts provide a more substantial sleeve and may be useful where repeated assembly puts stress on the repair. Some have keys that lock them in place; others rely on their outer threads. External thread files can address localized damage on bolts or studs, while a die may clean up longer sections. Neither can reliably fix badly torn threads. Sometimes replacement is the safer option.
Kits differ in the repair method and the tools supplied. A wire-insert kit typically includes a drill, a special tap, inserts, and an installation tool. Solid-insert kits may need a larger bore and careful depth control. Check the fastener size, thread pitch, hole depth, and base material before choosing. Keep the tap square to the opening; even a slight angle can cause trouble. I have found that “one-size-fits-all” claims deserve a second look, especially for blind holes where chips are hard to clear.
When comparing thread repair kits in 2026, start with the threads you actually need to restore. Check the listed thread sizes, pitch coverage, and insert lengths against your fastener and workpiece. A kit with many pieces is not automatically more useful. Clear size markings matter, especially when small taps and inserts look nearly identical.
Look closely at what is included: the correct drill bit, tap, installation tool, and enough replacement inserts for likely repairs. Materials matter, too. Steel inserts can suit many common metal repairs, while softer workpieces may need a different approach. Always check the kit’s stated compatibility rather than assuming it will work on every material. Instructions should explain the drilling depth and tapping steps plainly. Small details matter.
A sturdy case keeps tools organized and helps prevent a tap from getting damaged in a crowded toolbox. Also consider whether the kit provides replacement parts individually; replacing one missing insert is easier than buying a whole new set. For a stripped hole in a small aluminum housing, for example, access space and insert length can matter as much as the kit’s total size. It is easy to overvalue a large piece count. I would still compare the actual specifications carefully, since product listings can leave important details unclear.
Thread repair kits differ by both insert material and repair method. Wire-coil inserts are compact and suit many damaged metal threads, including aluminum housings. Solid inserts provide a thicker sleeve and may be preferable where repeated fastening or higher loads are expected. Neither choice is universal. Check the parent material, thread size, available wall thickness, and service conditions before buying.
Application matters just as much. A kit for a small engine casing may include a drill, tap, installation tool, and several inserts. A kit for plastic parts may use a different repair method; metal inserts can split thin plastic if the hole is too tight. Match the kit to the fastener’s diameter and pitch, not just its general size. Measure carefully. A mismatched pitch can feel close at first.
In a workshop, the repair usually begins with removing damaged thread material and keeping the new hole aligned with the original axis. Chips left inside a housing can cause trouble, especially near moving parts. Use the specified drill and tap, and follow the kit’s depth guidance. I would not assume thread-locking compound is always needed; instructions and operating conditions differ. Some repairs look neat but still fail under vibration, so inspect fit and engagement before returning the part to service.
Choosing the best thread fix kit in 2026 starts with matching it to the damaged thread and the job. Check the original diameter and pitch; a close visual match is not enough. A wrong pitch can bind or strip the repair. Consider the base material, too. Aluminum threads may need a different approach from steel threads, especially in a frequently used or heavily loaded hole. For a blind hole, check whether the kit’s tap and insert can fit without bottoming out. Access matters. So does the repair’s expected heat and vibration.
Tips: Compare the kit’s stated thread sizes with a bolt or gauge you trust. Check that it includes the right drill, tap, and installation tool. Test your technique on scrap material when possible.
Read the instructions before cutting, and confirm the specified hole depth and alignment. Keep the tool square; even a small angle can make the finished bolt sit unevenly. I would not choose by piece count alone. More parts may simply mean sizes you will never use. Product instructions and material compatibility deserve more weight, though they can be easy to skim when a repair feels urgent. If the part is safety-critical, or the damage is extensive, get a qualified repair assessment rather than relying on a kit alone.
| Kit Type | Best For | How the Repair Works | Main Advantages | Limitations | What to Check Before Buying |
|---|---|---|---|---|---|
| Wire thread insert kit | Repairing stripped internal threads, especially in aluminum or other relatively soft materials. | The damaged hole is drilled and tapped with the kit’s specified tools. A wire insert is installed to provide a new internal thread. | Can restore a commonly used thread size while retaining the original fastener size. Kits often include installation tools and multiple inserts. | Requires accurate drilling, tapping, and insert installation. The surrounding material must have enough thickness and strength to support the repair. | Confirm the thread standard and size, the included drill and tap, insert length, material requirements, and whether the kit includes the installation tools you need. |
| Solid thread insert kit | Repairs where a more substantial insert body or a specific insert design is appropriate. | A prepared hole is machined to the insert system’s specified dimensions, then the solid insert is installed according to its instructions. | Provides a solid internal threaded section and may suit certain repeated-use or service repairs. | Installation can require more material removal than a wire insert. Insert design, locking features, and installation steps vary by system. | Check the required hole dimensions, available wall thickness, insert style, fastener size, and the manufacturer’s installation procedure. |
| Thread-restoration tap and die kit | Cleaning or correcting lightly damaged, dirty, or deformed threads that still retain their basic shape. | A matching tap or die follows the existing thread to remove debris and minor irregularities or to clean the thread profile. | Useful for maintenance and thread cleaning; generally does not require installing an insert when the original threads remain serviceable. | Cannot replace missing thread material or reliably repair severely stripped or cracked threads. A cutting tool used incorrectly can remove more material. | Match the thread diameter, pitch or threads per inch, and thread form. Use the correct tool and avoid forcing it through damaged threads. |
| Oversized or self-tapping thread insert kit | Some stripped holes where the repair design allows a larger external insert to be fitted while retaining the required internal thread. | A specified hole is prepared, and the insert’s external features engage the surrounding material as directed by the kit instructions. | Can provide an alternative repair when a standard insert method is unsuitable for the hole or application. | Not suitable for every material, hole condition, or load. The larger repair may require more surrounding material and careful alignment. | Verify the insert’s material compatibility, required hole size, minimum surrounding wall thickness, installation method, and load requirements. |
Choosing the best kit: For intact but dirty or lightly damaged threads, consider a thread-restoration kit. For stripped internal threads, choose an insert system matched to the original thread size, workpiece material, available space, and repair load. Always follow the kit’s specifications; repair strength depends on the material, hole preparation, engagement, and installation quality.


For those larger-sized parts, or smaller quantity runs, we have 2 independent powder coat booths and ovens. The quality, durability and affordability of today’s powder coating finishes make this the process of choice for world-class companies.
Powder coating advantages over other forms of coating are many. Materials used in the Powder coating process can be metals and non-metals that come in a multitude of thicknesses, textures, colors, etc. Another of Powder coating’s biggest advantages over conventional coatings is its ability to create finishes in many different textures. Powder Coating Booths allow us the ability to apply these advantages to large products.
Tri-State Fabricators runs a full-service conveyor line for painting. Wet painting can provide protection or decoration to many different part styles. From start to finish, every project is easier to undergo random and point-based inspection by our skilled painting team.
Advantages to our Wet Paint Line are these lines start with product prep and ends with a thorough inspection of a high quality finished product. Our ability to complete large and small projects with a superior finish and doing so in a timely and economical fashion. This passes along the savings in production to our customers. When powder coating ins not an option, our Wet Paint Line gets the job done right the first time.
When the parts get big and heavy we roll-out our custom paint racks and oversize booth. By utilizing our partnerships with all the major paint brands, we can match virtually any color with wet paint.
The advantages of having access to a Wet Paint Booth are many. Large projects of many different shapes can be loaded into the booth. The Wet Paint Booth offers an environment that is much more controlled than a typical parts painting operation.
Not only are they used because of their controlled environment, but they’re are also advantageous when it comes to applying paint to parts that are needed in industries that require specialty coatings such as medical, aerospace, etc.
Our military forces have some very high standards when it comes to the finish of their vehicles and equipment. From the first pre-treatment step to final coat, it takes a great deal of knowledge and experience to protect the men and women of our armed forces. They deserve only the best, and Tri-State Fabricators provides it.
All of our processes are closely monitored by our staff and management teams. Both of which are highly trained in the processes of metal fabrication and finishing. Tri-State Fabricators’ goal is to always fully satisfy each and every customer, including the military. We will always put a 110% into what we do.
Abrasive media blasting is an excellent way to remove old paint, rust, and increase the paint/powder adhesion. Glass beads produce a much smoother and brighter finish than angular abrasives; leaving the part clean yet without any dimensional change. Chemically inert and environmentally friendly, we can recycle our beads approximately 30 times; making them a more preferred method of metal cleaning or surface finishing.
Advantages to Glass Bead Blasting are many. Glass bead blast media is used when a project is needing rough surfaces need to become smooth for applications of coatings such as paint. It is typically used to clean paint and rust from a product surface without deforming the surface it is being used on. Overall, compared to many other blasting media, Glass Bead Blasting is a very economical choice and those savings are always passed on to our customers.
Tri-State Fabricators utilize a zinc phosphate wash to clean and etch the material to ensure the best paint adhesion possible. The unique design of our 3-stage wash system does the work like a 5-stage. From Cleaning and rinsing to conversion coating and post-treatment, Our Part Washing process is a complete service and works throughout the fabrication service and the finishing service.
Along with the previously mentioned benefits, Curing is a vital chemical reaction that leaves the product finish hard and relatively safe from mild abrasion and aggressive corrosion. This process can be done in more than one way; ambient air-dry or in curing ovens at temps that exceed 240°.
From fixing paint mistakes (someone else’s of course) to simply cleaning our paint line hooks, our burn-off oven is put to good use. After a quick burn-off, a little clean up, and a fresh coat of paint, your parts will look better than new.
Why does our Burn-Off Oven work so well? Because super heating the air around parts turns the materials into ashes. From paint and powder coatings to rubber and machining oils, high temps do the job without degrading the integrity of the part.
Masking is a vital part of producing high quality products. We have die-cut masking patterns to protect machined surfaces as well as a wide range of plugs and caps to protect threaded holes and bolts. We provide permanent and temporary masking.
Masking allows the selected sections of a product to be protected from a fabrication or finishing service. This can be with both chemicals when etching and tapes, paints when only finishing just a section of the product. Masking is great in aiding the customization process of a project.
Screen printing is a photographic process that transfers artwork onto a porous nylon screen which allows colored ink to flow through the screen and be deposited on an aluminum or plastic component. We can generally have just about any design created onto a screen for your parts.
Some of the advantages of Screen Printing are, brand recognition for your business displaying on your products, assembly instructions, product warnings/hazards, etc. Tri-State Fabricators produces Screen Printing of the highest quality so you know it’s durable.
Metal Finishing is the art of treating the exterior portion of product, often metal but can also be made of other materials, so that the surface is clean and free of any debris. Then the process of applying coats or either paint of powder coat takes place. This coating process improves the quality of the product in both appearance and resistance to wear and corrosion.
Tri-State Fabricators, Inc., understands that a project typically isn’t complete until a high-quality finish has been added to your product. This is why our painting and powder coating teams continuously inspect the products throughout the Metal Finishing process.

