

Choosing the 2026 Best Super Bright LED Light Bar for Trucks is not just a lumen contest. A powerful beam can still leave dark patches, create distracting glare, or perform poorly in rain. The right choice depends on where and how you drive.
Professional testing offers useful context. The Insurance Institute for Highway Safety evaluates headlamps for illumination on straight and curved roads, along with glare for approaching drivers. Its ratings concern vehicle headlamps, not aftermarket light bars, so they are a reference point—not a direct product ranking. The AAA Foundation for Traffic Safety’s 2019 headlight research also cautions against assuming that newer or brighter-looking lighting automatically means better visibility. Numbers can mislead.
This guide examines what matters in a Super Bright Led Light Bar: beam shape, measured output, mounting position, heat management, weather resistance, and electrical demand. A narrow spot beam may reach farther along a dark trail, while a wider flood pattern can reveal the edges of a worksite. Both have trade-offs. We’ll also distinguish advertised lumens from useful light on the road, and explain why secure mounting and careful aiming matter. Specifications alone are not enough. Real performance can vary with installation, vehicle voltage, and conditions. Check applicable vehicle-lighting requirements before use, since rules differ by location. There is no perfect bar for every truck. The best choice is the one that fits your vehicle, intended use, and visibility needs without adding unnecessary glare.
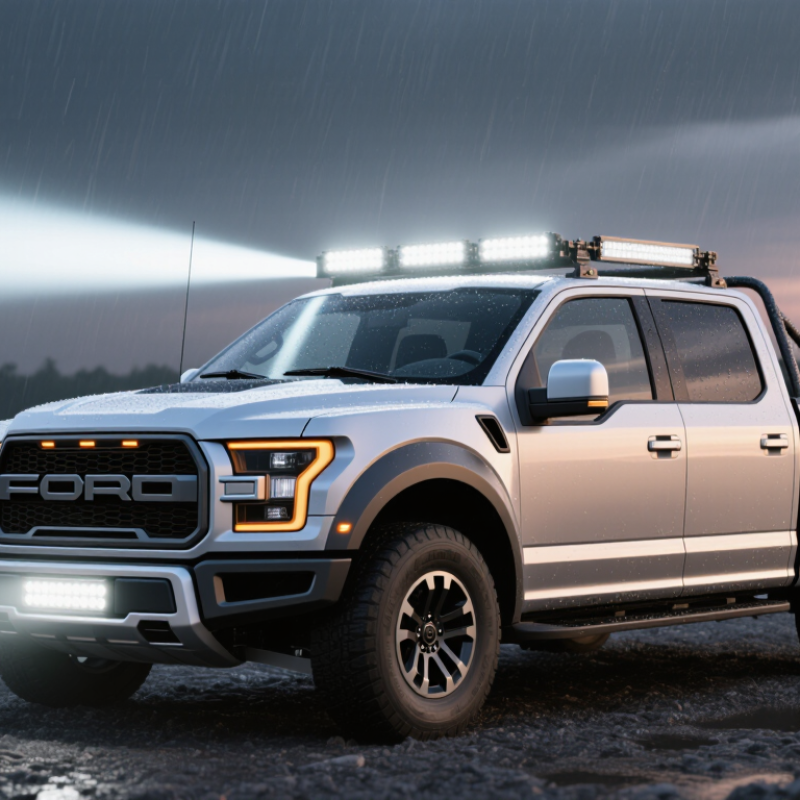
A super-bright truck LED light bar is not defined by a large lumen number alone. Useful brightness depends on how much light reaches the road and where the beam places it. A focused spot beam can illuminate distant objects, while a flood beam spreads light across nearby ground. Many drivers need a balanced pattern. Numbers can mislead.
Look for clear specifications, including measured light output, beam pattern, operating voltage, and power draw. Good thermal management matters too: excess heat can reduce output over time. A sealed housing and secure mounts help the bar handle rain, dust, and vibration. Check how the beam performs from your truck’s actual mounting height; a light that looks powerful in a product photo may create glare or leave dark patches on the road. I’ve found that aiming can be easy to overlook. Aim it carefully.
Tips: Compare beam diagrams, not just advertised lumens. Confirm your vehicle’s electrical system can support the stated current, and use appropriately rated wiring. After installation, test the beam on a flat surface and adjust it so it lights the intended area without shining into other drivers’ eyes.

How LED Light Bars Produce and Measure Brightness
A light bar’s brightness is not one number. LEDs convert electrical power into light, while lenses and reflectors shape that light into a narrow spot or a wider flood. Lumens describe total light output. Candela describes intensity in a direction, and lux measures light arriving on a surface. The distinction matters. A high-lumen bar may still leave a dark patch down the road if its beam is poorly aimed.
A photometric report is more useful than a headline claim. IES LM-79-19, a recognized method for testing solid-state lighting, measures total luminous flux, electrical input power, and light distribution under controlled conditions. Compare reported candela and beam patterns, not lumens alone. For scale, a source producing 1,000 candela gives about 10 lux at 10 meters in its beam direction, before real-world losses. That follows the inverse-square relationship. Dust, mounting height, and a wet road can change what you actually see. They are easy to overlook.
Look for test conditions, not just a peak figure. An integrating sphere measures total output; a goniophotometer maps intensity across angles. Independent measurements are more convincing than unverified packaging claims. Still, even careful lab data cannot fully predict a bouncing truck on a rough road. A small dose of skepticism helps.
Truck light bars come in several shapes, and housing affects fit as much as appearance. Straight bars are common on roof racks and bumpers, where a flat mounting surface makes alignment easier. Curved bars can follow the front profile of some trucks, but their fit depends on the vehicle and mounting points. Single-row bars have a slimmer profile. Dual-row designs often use a deeper housing, so check available clearance before buying. Small details matter.
Beam pattern determines where the light falls. Spot beams create a narrow, long-reaching path, useful for seeing farther along an open trail. Flood beams spread light broadly across nearby ground, helping reveal ditches, work areas, or objects beside the truck. Combo patterns blend both, though the balance varies by product. A broad beam is not automatically better. It can leave distant areas less defined.
For mixed driving and work, compare the beam diagram and mounting instructions, not just advertised brightness. Aim the bar carefully; a beam pointed too high can distract other drivers and waste light. Check wiring and mounting stability after installation, especially if the truck sees rough roads. I’d choose the pattern for the actual task, even if the brightest-looking option is tempting. Measuring the mounting space twice may feel fussy, but it can prevent an awkward fit.
Comparing a super-bright truck LED light bar in 2026 takes more than reading its lumen figure. Raw lumens describe total light output, not how clearly the beam reaches a road edge or distant marker. Look for beam diagrams, candela ratings, and independent test data when available. Numbers can mislead. A wide flood pattern lights nearby ground; a focused spot beam reaches farther, while a combo pattern balances the two.
Check power draw alongside output. A bar that pulls substantial current can strain an older charging system, especially when other accessories are running. Confirm available capacity and use properly sized wiring, a fuse, and secure connections. Color temperature matters, too. Very cool white may look crisp in dry conditions but feel harsher in rain, dust, or snow. There is no universally best shade.
Compare ingress protection, housing materials, thermal design, and vibration resistance—not just a waterproof label. Check what the rating covers, and inspect mounting points for a heavy bar. For a fair comparison, review test distance, voltage, and conditions; inconsistent methods make specifications hard to trust. If possible, assess the beam in a controlled, private test area, then recheck fasteners and wiring after a few drives. Hood reflections can cause glare, so placement and aiming matter as much as headline output.
Estimated light output at three power levels under different system-efficacy assumptions. These values are calculated as input watts × lumens per watt, not measured results for specific light bars. Compare verified output, beam pattern, thermal performance, and power draw when evaluating products.
2026 Best Super Bright LED Light Bar for Trucks? Installation, Road-Lighting Regulations, and Maintenance
A powerful light bar needs careful installation, not just a bright rating. Mount it securely without blocking cameras, sensors, or the driver’s view. Use the specified fuse, relay, and wire size, and protect connections from water and road salt. Aim the beam away from oncoming traffic. In the United States, NHTSA’s Federal Motor Vehicle Safety Standard No. 108 covers vehicle lighting equipment; state rules may also limit auxiliary-light placement or use on public roads. Check local requirements before driving with the bar switched on.
Tips: Test the lights after installation. Recheck fasteners and beam aim after the first rough-road trip.
For maintenance, inspect the lens for grit, cracks, and moisture, then clean it with a soft cloth. Look for loose wiring or corrosion around connectors. The U.S. Department of Energy reports that LEDs use at least 75% less energy and can last up to 25 times longer than incandescent lighting. That broad comparison is not a lifespan guarantee for truck light bars: vibration, heat, and water exposure can shorten service life. Even a small amount of lens haze can scatter light, so check the beam against a wall in a dark, safe area.
| Decision Area | What to Check | Practical Guidance | Road-Use Consideration |
|---|---|---|---|
| Choose by intended use | Driving conditions, mounting space, beam pattern, and verified light output | For trail use, a wide flood pattern can illuminate nearby terrain; a spot or combo pattern projects farther. Compare independent test results where available rather than relying only on advertised lumens. | Off-road suitability does not automatically mean the light is approved for use on public roads. |
| Beam pattern | Flood, spot, or combination optics | Flood beams spread light over a wide area; spot beams concentrate light farther ahead. A combination bar uses both types, but beam shape and cutoff depend on the specific design. | A beam that causes glare or shines into other drivers’ eyes may be unsafe and may violate local requirements. |
| Electrical load | Rated input voltage, current draw, and power consumption | Use the light’s stated electrical specifications. Estimate current with I = P ÷ V; for example, a 120 W light draws about 10 A at 12 V under ideal conditions. Actual draw varies by product and operating voltage. | Do not assume a vehicle’s existing wiring or accessory circuit can safely handle the added load. |
| Mounting and aim | Bracket strength, vibration resistance, clearance, and adjustment range | Mount to a suitable structural point using hardware rated for the application. Check clearance from the grille, radiator, moving parts, and any sensors; secure fasteners and aim the beam away from oncoming traffic. | Local rules may restrict mounting position, number of auxiliary lamps, covers, or lamp height. |
| Wiring and protection | Fuse, relay or approved switching method, wire capacity, and weather sealing | Follow the light manufacturer’s wiring diagram. Use a correctly rated fuse close to the power source, suitable wire for the current and cable run, sealed connectors where exposed, and a properly protected route away from heat and abrasion. | Keep wiring secure and ensure installation does not interfere with required vehicle lights or controls. |
| Road-lighting regulations | Rules for auxiliary lamps in the vehicle’s jurisdiction | Requirements differ by country, state, and province. Check current local vehicle codes and inspection guidance for permitted colors, positioning, switching, covers, and use on public roads. | When legality is uncertain, switch off or cover the auxiliary light on public roads and use only lighting permitted for that vehicle and location. |
| Weather and durability | Ingress protection rating, housing material, lens, and operating-temperature range | Check the product’s documented protection rating and installation instructions. A rating describes specified test conditions; it does not guarantee protection from every form of water, impact, or corrosion. | Inspect the lamp and wiring after severe weather, off-road impacts, or vehicle washing. |
| Routine maintenance | Lens condition, fasteners, connectors, wiring, and beam aim | Clean the lens with a non-abrasive cloth and suitable cleaner. Periodically check for cracks, water ingress, loose brackets, corrosion, damaged insulation, and changes in beam direction. | Repair faults promptly and do not use a damaged lamp that produces uncontrolled glare or exposed wiring. |
| Before buying | Fitment, warranty terms, instructions, and independently verifiable specifications | Measure the intended mounting area and confirm voltage compatibility, bracket dimensions, cable length, and the manufacturer’s installation and maintenance requirements. | Confirm road-use approval separately; brightness or a product’s marketing description is not proof of legal compliance. |


For those larger-sized parts, or smaller quantity runs, we have 2 independent powder coat booths and ovens. The quality, durability and affordability of today’s powder coating finishes make this the process of choice for world-class companies.
Powder coating advantages over other forms of coating are many. Materials used in the Powder coating process can be metals and non-metals that come in a multitude of thicknesses, textures, colors, etc. Another of Powder coating’s biggest advantages over conventional coatings is its ability to create finishes in many different textures. Powder Coating Booths allow us the ability to apply these advantages to large products.
Tri-State Fabricators runs a full-service conveyor line for painting. Wet painting can provide protection or decoration to many different part styles. From start to finish, every project is easier to undergo random and point-based inspection by our skilled painting team.
Advantages to our Wet Paint Line are these lines start with product prep and ends with a thorough inspection of a high quality finished product. Our ability to complete large and small projects with a superior finish and doing so in a timely and economical fashion. This passes along the savings in production to our customers. When powder coating ins not an option, our Wet Paint Line gets the job done right the first time.
When the parts get big and heavy we roll-out our custom paint racks and oversize booth. By utilizing our partnerships with all the major paint brands, we can match virtually any color with wet paint.
The advantages of having access to a Wet Paint Booth are many. Large projects of many different shapes can be loaded into the booth. The Wet Paint Booth offers an environment that is much more controlled than a typical parts painting operation.
Not only are they used because of their controlled environment, but they’re are also advantageous when it comes to applying paint to parts that are needed in industries that require specialty coatings such as medical, aerospace, etc.
Our military forces have some very high standards when it comes to the finish of their vehicles and equipment. From the first pre-treatment step to final coat, it takes a great deal of knowledge and experience to protect the men and women of our armed forces. They deserve only the best, and Tri-State Fabricators provides it.
All of our processes are closely monitored by our staff and management teams. Both of which are highly trained in the processes of metal fabrication and finishing. Tri-State Fabricators’ goal is to always fully satisfy each and every customer, including the military. We will always put a 110% into what we do.
Abrasive media blasting is an excellent way to remove old paint, rust, and increase the paint/powder adhesion. Glass beads produce a much smoother and brighter finish than angular abrasives; leaving the part clean yet without any dimensional change. Chemically inert and environmentally friendly, we can recycle our beads approximately 30 times; making them a more preferred method of metal cleaning or surface finishing.
Advantages to Glass Bead Blasting are many. Glass bead blast media is used when a project is needing rough surfaces need to become smooth for applications of coatings such as paint. It is typically used to clean paint and rust from a product surface without deforming the surface it is being used on. Overall, compared to many other blasting media, Glass Bead Blasting is a very economical choice and those savings are always passed on to our customers.
Tri-State Fabricators utilize a zinc phosphate wash to clean and etch the material to ensure the best paint adhesion possible. The unique design of our 3-stage wash system does the work like a 5-stage. From Cleaning and rinsing to conversion coating and post-treatment, Our Part Washing process is a complete service and works throughout the fabrication service and the finishing service.
Along with the previously mentioned benefits, Curing is a vital chemical reaction that leaves the product finish hard and relatively safe from mild abrasion and aggressive corrosion. This process can be done in more than one way; ambient air-dry or in curing ovens at temps that exceed 240°.
From fixing paint mistakes (someone else’s of course) to simply cleaning our paint line hooks, our burn-off oven is put to good use. After a quick burn-off, a little clean up, and a fresh coat of paint, your parts will look better than new.
Why does our Burn-Off Oven work so well? Because super heating the air around parts turns the materials into ashes. From paint and powder coatings to rubber and machining oils, high temps do the job without degrading the integrity of the part.
Masking is a vital part of producing high quality products. We have die-cut masking patterns to protect machined surfaces as well as a wide range of plugs and caps to protect threaded holes and bolts. We provide permanent and temporary masking.
Masking allows the selected sections of a product to be protected from a fabrication or finishing service. This can be with both chemicals when etching and tapes, paints when only finishing just a section of the product. Masking is great in aiding the customization process of a project.
Screen printing is a photographic process that transfers artwork onto a porous nylon screen which allows colored ink to flow through the screen and be deposited on an aluminum or plastic component. We can generally have just about any design created onto a screen for your parts.
Some of the advantages of Screen Printing are, brand recognition for your business displaying on your products, assembly instructions, product warnings/hazards, etc. Tri-State Fabricators produces Screen Printing of the highest quality so you know it’s durable.
Metal Finishing is the art of treating the exterior portion of product, often metal but can also be made of other materials, so that the surface is clean and free of any debris. Then the process of applying coats or either paint of powder coat takes place. This coating process improves the quality of the product in both appearance and resistance to wear and corrosion.
Tri-State Fabricators, Inc., understands that a project typically isn’t complete until a high-quality finish has been added to your product. This is why our painting and powder coating teams continuously inspect the products throughout the Metal Finishing process.