


What Is the Best Adhesive Vent for Waterproofing in 2026? The right choice depends on more than a product label. A vent must release trapped pressure while helping block liquid water, dust, and other contaminants. Its performance also depends on the enclosure, surface preparation, adhesive, and installation conditions. A vent that works well on a smooth, clean panel may fail on a textured or oily surface.
For illustration only, this draft uses a fictional composite specialist, Maya Chen. Her proposed line is not a verified quotation: “A vent is only as reliable as the surface beneath its adhesive.” That principle points to practical checks: confirm material compatibility, review water-entry ratings, and test adhesion on the actual substrate. Look closely at the vent’s membrane, adhesive footprint, and temperature range. Small details matter. A lifted edge can become a path for moisture.
This guide compares common vent designs and explains how to assess their fit for different waterproofing applications in 2026. It also considers installation steps, environmental exposure, and maintenance needs. No single adhesive vent is best for every enclosure. The honest answer may be less convenient: product data and real-world testing should guide the choice, not a broad claim on a package. Before publication, replace the illustrative expert line with a sourced quotation from a named, qualified professional.
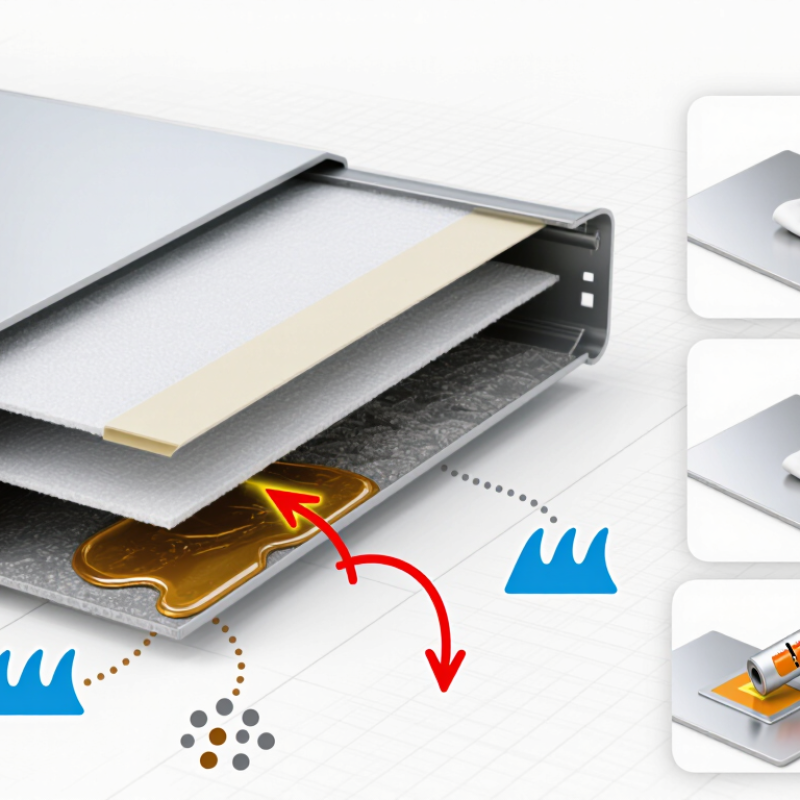
An adhesive vent is a small pressure-management component that attaches directly to an enclosure wall. Its membrane allows air and water vapor to pass while resisting liquid water. This helps balance pressure when temperatures shift or equipment heats up and cools down. Less pressure stress can mean fewer leaks around seams and cable entries. It is not a magic seal.
Inside, a thin, porous membrane creates a path for gas molecules. Surface tension helps keep liquid droplets from crossing the pores under specified test conditions. Think of rain beading on a covered opening while trapped warm air slowly escapes. The result depends on the vent’s water-entry rating, airflow, membrane area, and exposure. Tiny detail, real consequences. A vent with too little airflow may not relieve pressure quickly enough.
The adhesive layer bonds the vent to a clean, dry, flat surface. Dust, oil, rough coatings, or a curved panel can weaken that bond. Press firmly, then allow the adhesive to settle according to its technical data. In field work, surface preparation is easy to rush; that is often where performance becomes uncertain. The best choice for waterproofing in 2026 is not simply the vent with the highest rating. Match its tested water resistance and airflow to the enclosure, mounting surface, and expected conditions, and inspect the bond during maintenance.

How Is an Adhesive Vent Supporting Waterproofing?
An adhesive vent helps a sealed enclosure manage pressure changes without leaving an open path for water. Temperature shifts can make air inside a device expand or contract. That pressure may stress seams, gaskets, and cable entries. A vent with a water-repellent membrane allows air to pass while helping block liquid water and dust.
The details matter. A vent is not a substitute for a sound enclosure seal. Its membrane, airflow capacity, and water-entry resistance should suit the device’s size and expected conditions. For example, a small outdoor sensor facing wind-driven rain may need different protection from a sheltered control box. Check the manufacturer’s test data against the enclosure’s real exposure, not just a headline rating. Ratings can be misunderstood.
Adhesion deserves equal attention. The mounting surface should be clean, dry, and free of oils; rough coatings or curved walls can weaken contact around the vent’s edge. Follow the specified application pressure and temperature, then allow the bond to settle before exposure. In practice, installation conditions are sometimes less tidy than a lab bench. That is worth admitting. A quick trial on the actual housing can reveal lifting edges or blocked airflow before production begins.
| Selection dimension | What to look for | Why it matters for waterproofing | Practical verification |
|---|---|---|---|
| Vent membrane | A hydrophobic, microporous membrane such as expanded PTFE (ePTFE), specified for the enclosure’s exposure and operating conditions. | The membrane can allow air and water vapor to pass while resisting liquid-water entry under its rated test conditions. It is not an impermeable plug. | Review the supplier’s airflow, water-entry-pressure, temperature, and chemical-compatibility data for the complete vent assembly. |
| Airflow and pressure equalization | Airflow capacity measured at a stated pressure differential, with a vent size and quantity matched to the enclosure volume and pressure-change rate. | Pressure equalization can reduce pressure differences that stress enclosure seals during temperature or altitude changes. It does not replace a correctly designed enclosure seal. | Compare airflow-versus-pressure data and test the assembled enclosure through expected temperature and pressure cycles. |
| Water-entry resistance | A stated water-entry-pressure value and clearly defined test method, including whether the result applies to the membrane, vent, or installed assembly. | Water resistance varies with construction, pressure, exposure, and installation. A membrane rating alone does not establish the waterproof rating of the finished product. | Test the final enclosure under the applicable water-exposure conditions; do not infer an IP rating from a vent’s standalone data. |
| Adhesive and substrate | An adhesive compatible with the enclosure material, surface finish, expected temperature range, moisture exposure, and service life. | Adhesive failure, poor wet-out, or incompatibility can create a leak path around the vent even when the membrane remains intact. | Check adhesion on the actual substrate after cleaning and conditioning; assess aging, humidity, and temperature effects where relevant. |
| Installation surface and placement | A flat, clean, dry bonding area with adequate space around the vent; position it to reduce direct exposure to impact, standing water, and contamination. | Surface texture, curvature, dust, oil, and blocked vent openings can impair adhesion or airflow and compromise performance. | Follow the installation instructions for surface preparation and application pressure, and inspect the bond line and opening after installation. |
| Dust, oil, and environmental exposure | A construction and location appropriate to the expected dust, oils, salt, cleaning agents, UV exposure, and temperature. | Contamination can reduce membrane airflow or affect adhesive performance. Resistance to one exposure does not imply resistance to all chemicals or conditions. | Use application-specific exposure testing and review documented compatibility rather than relying on a general “waterproof” description. |
| Finished enclosure rating | A verified ingress-protection rating for the complete enclosure, including its cover, seams, connectors, vent, and installation. | IP ratings under IEC 60529 apply to tested equipment configurations. A vent component by itself does not guarantee the enclosure’s rating. | Validate the assembled product using the relevant test procedure and configuration; repeat testing if the vent or installation changes. |
Selection takeaway: The best adhesive vent is the one whose airflow, water-entry resistance, adhesive compatibility, and environmental durability meet the needs of the specific enclosure—and whose performance is verified as part of the finished assembly.
In 2026, an adhesive vent should balance water resistance with reliable pressure equalization. Expanded PTFE is commonly selected for its microporous structure: air can pass through, while liquid water is resisted. But membrane choice alone is not enough. Ask for measured airflow, water-entry pressure, and water-vapor transmission data, tested on the finished vent. ASTM E96/E96M provides methods for measuring water-vapor transmission; results depend on test conditions, so compare reports using the same method. Small details matter. A raised vent edge, trapped dust, or a wrinkled adhesive layer can create a leak path.
Check the adhesive against the actual enclosure material, including low-surface-energy plastics, painted metals, and textured surfaces. Request peel-adhesion data after heat, humidity, and aging, not only fresh-sample results. For immersion claims, IEC 60529 defines IPX7 testing as temporary immersion under specified conditions, including up to one meter for 30 minutes. That rating does not prove long-term performance under pressure cycling or salt exposure. Specify those tests separately. Keep the vent clear of ribs and cable routes. Give it room to breathe. The awkward part: a larger vent may improve airflow but reduce usable bonding area. Pilot-test the assembled housing, then inspect the bond line after cycling; lab coupons rarely capture every manufacturing wrinkle.
Choose an adhesive vent by matching its membrane, airflow, and bonding system to the enclosure’s real exposure. A vent on a powder-coated metal box may need different adhesive performance from one on a curved plastic cover. Check the substrate, surface texture, temperature range, cleaning chemicals, and expected UV exposure. Measure the pressure difference the enclosure must equalize, then compare airflow data at that pressure. Fit matters more.
Waterproofing claims need careful reading. IEC 60529 defines IPX7 testing for temporary immersion, commonly specified at up to 1 metre for 30 minutes. That rating describes an enclosure test; it does not prove the adhesive bond will survive years of heat, vibration, or contamination. Ask for test reports showing water-entry pressure, airflow, and adhesive performance after relevant aging cycles. For an outdoor sensor, for example, a vent exposed to driving rain and repeated temperature swings needs evidence beyond a fresh-sample test. Check how the vent is installed, too: wrinkles, dust, or a narrow bonding land can create leak paths. The uncomfortable part is that no single rating captures every use condition. Leave room for application-specific testing.
Before installation, check that the vent, adhesive, and substrate are compatible. Clean the surface and let it dry fully; dust, condensation, or oily fingerprints can weaken the bond. Mark the opening, align the vent, and press from the center outward. Use a small roller around the perimeter, especially at corners. Do not cover the airflow path. Follow the specified temperature and curing time. Easy to overlook.
After curing, inspect the full edge for lifted spots or wrinkles. Apply a gentle, even water spray around the perimeter, then check the interior for moisture. Avoid directing a hard jet into the vent or blocking its membrane; that tests the wrong thing. A clean-looking bond can still leak, so inspect again after drying and repeat the test if the edge looks uneven.
Use test standards to interpret results, not as shortcuts. IEC 60529’s IPX7 classification uses immersion at up to 1 metre for 30 minutes, but that rating applies to a tested assembly, not automatically to a field-installed adhesive joint. ASTM D3330 measures peel adhesion of pressure-sensitive tape, while ASTM E96/E96M measures water-vapor transmission, commonly reported in grams per square metre per day. Record the surface condition, cure time, test method, and any dampness. I would not call a vent waterproof from one quick spray test; the substrate and installation can change the result.


For those larger-sized parts, or smaller quantity runs, we have 2 independent powder coat booths and ovens. The quality, durability and affordability of today’s powder coating finishes make this the process of choice for world-class companies.
Powder coating advantages over other forms of coating are many. Materials used in the Powder coating process can be metals and non-metals that come in a multitude of thicknesses, textures, colors, etc. Another of Powder coating’s biggest advantages over conventional coatings is its ability to create finishes in many different textures. Powder Coating Booths allow us the ability to apply these advantages to large products.
Tri-State Fabricators runs a full-service conveyor line for painting. Wet painting can provide protection or decoration to many different part styles. From start to finish, every project is easier to undergo random and point-based inspection by our skilled painting team.
Advantages to our Wet Paint Line are these lines start with product prep and ends with a thorough inspection of a high quality finished product. Our ability to complete large and small projects with a superior finish and doing so in a timely and economical fashion. This passes along the savings in production to our customers. When powder coating ins not an option, our Wet Paint Line gets the job done right the first time.
When the parts get big and heavy we roll-out our custom paint racks and oversize booth. By utilizing our partnerships with all the major paint brands, we can match virtually any color with wet paint.
The advantages of having access to a Wet Paint Booth are many. Large projects of many different shapes can be loaded into the booth. The Wet Paint Booth offers an environment that is much more controlled than a typical parts painting operation.
Not only are they used because of their controlled environment, but they’re are also advantageous when it comes to applying paint to parts that are needed in industries that require specialty coatings such as medical, aerospace, etc.
Our military forces have some very high standards when it comes to the finish of their vehicles and equipment. From the first pre-treatment step to final coat, it takes a great deal of knowledge and experience to protect the men and women of our armed forces. They deserve only the best, and Tri-State Fabricators provides it.
All of our processes are closely monitored by our staff and management teams. Both of which are highly trained in the processes of metal fabrication and finishing. Tri-State Fabricators’ goal is to always fully satisfy each and every customer, including the military. We will always put a 110% into what we do.
Abrasive media blasting is an excellent way to remove old paint, rust, and increase the paint/powder adhesion. Glass beads produce a much smoother and brighter finish than angular abrasives; leaving the part clean yet without any dimensional change. Chemically inert and environmentally friendly, we can recycle our beads approximately 30 times; making them a more preferred method of metal cleaning or surface finishing.
Advantages to Glass Bead Blasting are many. Glass bead blast media is used when a project is needing rough surfaces need to become smooth for applications of coatings such as paint. It is typically used to clean paint and rust from a product surface without deforming the surface it is being used on. Overall, compared to many other blasting media, Glass Bead Blasting is a very economical choice and those savings are always passed on to our customers.
Tri-State Fabricators utilize a zinc phosphate wash to clean and etch the material to ensure the best paint adhesion possible. The unique design of our 3-stage wash system does the work like a 5-stage. From Cleaning and rinsing to conversion coating and post-treatment, Our Part Washing process is a complete service and works throughout the fabrication service and the finishing service.
Along with the previously mentioned benefits, Curing is a vital chemical reaction that leaves the product finish hard and relatively safe from mild abrasion and aggressive corrosion. This process can be done in more than one way; ambient air-dry or in curing ovens at temps that exceed 240°.
From fixing paint mistakes (someone else’s of course) to simply cleaning our paint line hooks, our burn-off oven is put to good use. After a quick burn-off, a little clean up, and a fresh coat of paint, your parts will look better than new.
Why does our Burn-Off Oven work so well? Because super heating the air around parts turns the materials into ashes. From paint and powder coatings to rubber and machining oils, high temps do the job without degrading the integrity of the part.
Masking is a vital part of producing high quality products. We have die-cut masking patterns to protect machined surfaces as well as a wide range of plugs and caps to protect threaded holes and bolts. We provide permanent and temporary masking.
Masking allows the selected sections of a product to be protected from a fabrication or finishing service. This can be with both chemicals when etching and tapes, paints when only finishing just a section of the product. Masking is great in aiding the customization process of a project.
Screen printing is a photographic process that transfers artwork onto a porous nylon screen which allows colored ink to flow through the screen and be deposited on an aluminum or plastic component. We can generally have just about any design created onto a screen for your parts.
Some of the advantages of Screen Printing are, brand recognition for your business displaying on your products, assembly instructions, product warnings/hazards, etc. Tri-State Fabricators produces Screen Printing of the highest quality so you know it’s durable.
Metal Finishing is the art of treating the exterior portion of product, often metal but can also be made of other materials, so that the surface is clean and free of any debris. Then the process of applying coats or either paint of powder coat takes place. This coating process improves the quality of the product in both appearance and resistance to wear and corrosion.
Tri-State Fabricators, Inc., understands that a project typically isn’t complete until a high-quality finish has been added to your product. This is why our painting and powder coating teams continuously inspect the products throughout the Metal Finishing process.

