


Choosing an AC condenser fan is not just a matter of matching its shape. This small component moves air through the condenser, especially when the car is idling or crawling through traffic. A weak or incorrect fan can leave the air conditioner blowing warm at a red light, even if it cools well on the highway. Fit matters. So does airflow.
The right Ac Condenser Fan Car depends on your vehicle’s year, make, model, engine, and existing fan assembly. Check the original equipment number, connector, mounting points, blade diameter, and electrical specifications before ordering. A fan that looks nearly identical may still have the wrong plug or move air in the wrong direction. Those details are easy to overlook.
As a practical reminder, automotive cooling-system specialist “Alex Morgan” is quoted here: “Match the fan to the vehicle, then verify airflow and electrical fit before installation.” This is an illustrative editorial quote, not a verified statement from a real, named expert. For dependable guidance, use your vehicle’s service information and consult a qualified technician when wiring or fitment is unclear. In this outline, we’ll examine fan types, key specifications, warning signs, and replacement considerations. We’ll also look at common shopping mistakes. Some listings leave out important measurements; that uncertainty deserves a closer check. A little patience can prevent a noisy fan, poor cooling, or a return trip to the parts counter.
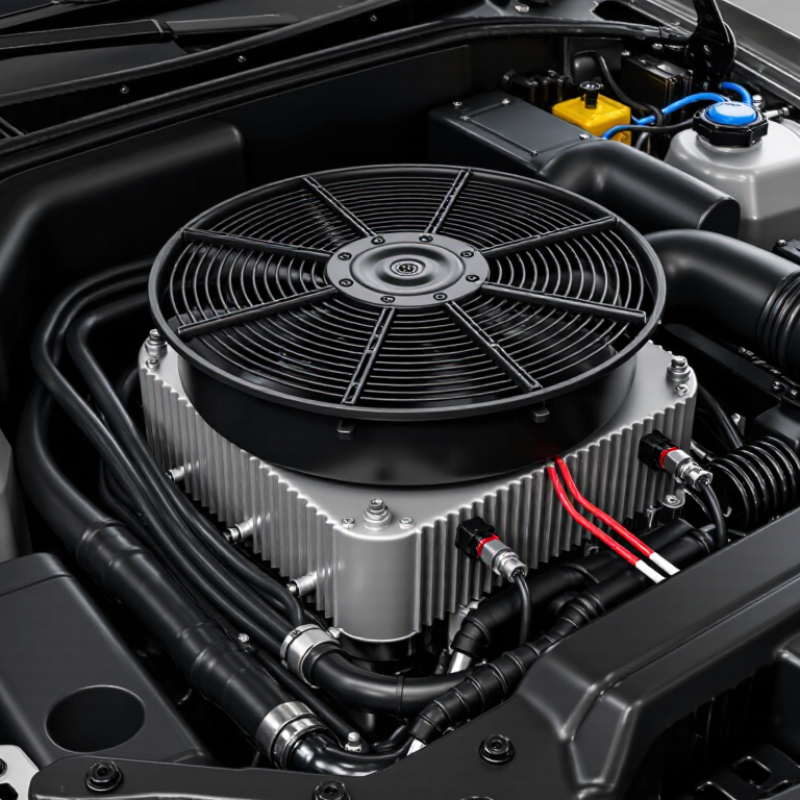
Before buying, read the original condenser fan label or check the vehicle’s service data. Match its nominal 12-V DC rating, current draw, and power connector; voltage alone is not enough. ISO 16750-2:2023 describes electrical supply conditions and tests for road-vehicle equipment, underscoring that vehicle voltage can vary beyond its nominal rating. Do not treat that standard as approval for a specific replacement fan. Compare the OEM specification with the replacement’s stated operating range and current requirement.
Inspect the connector closely. Count the pins, note their shape, and verify polarity and wire functions against a wiring diagram. A plug that fits can still have a different pinout. Check the mounting-hole spacing, fan diameter, shroud depth, and blade clearance with a ruler. Even a careful measurement can be off by a few millimeters. Recheck it.
SAE J639 provides safety and performance requirements for mobile air-conditioning systems, but it does not identify the correct fan for every vehicle. Use the vehicle-specific parts data alongside these standards. Confirm airflow direction, too: the fan must move air through the condenser in the intended direction. If the OEM label is unreadable, record the connector and dimensions before removal, then verify the electrical rating with a qualified technician. Guessing from appearance is tempting. It is also where small mismatches begin.

Check the OEM fan’s 12-V DC rating, connector, and mounting dimensions before selecting a replacement.
A 12-V DC fan is designed for a vehicle’s nominal 12-V electrical system; actual system voltage varies. The chart shows general voltage references, not fan-specific operating limits. Connector styles and mounting dimensions are not universal, so compare them directly with the original fan and verify the replacement’s specifications.
A condenser fan should be matched by both airflow and pressure, not by its largest CFM figure. CFM describes air volume under stated test conditions; static pressure indicates how well the fan can move air against resistance. A condenser, radiator, shroud, and tight engine-bay clearances all restrict airflow. A “free-air” rating may therefore look impressive but tell you little about installed performance. Check the OEM specifications and compare ratings taken at similar pressure conditions.
Use standardized data where possible. AMCA 210 and ANSI/ASHRAE 51 describe laboratory methods for measuring fan airflow and pressure. AMCA fan-law relationships also show why speed matters: for the same fan and comparable air density, a 10% speed increase corresponds to roughly 10% more airflow and 21% more pressure. That is not a substitute for the OEM target. Check the fan curve at the system’s expected pressure, rather than comparing one headline CFM value.
Small detail. Confirm that the rated voltage and operating conditions also match the vehicle. I would still verify fitment and clearance in the actual shroud; catalog figures can hide that awkward real-world gap.
Match the fan’s current draw to the vehicle’s wiring and fuse—not just its physical size. Check the fan label or technical sheet for its rated amperage, then compare it with a measurement on the vehicle. A DC clamp meter around one supply wire can measure running current; use its inrush function to capture the brief startup surge. A small handheld meter may miss that surge.
That matters.
The vehicle’s original fuse protects the circuit wiring, so never install a larger fuse just to stop it blowing. ISO 8820-3:2015 covers automotive blade fuses rated from 1 to 40 amps, but that range does not identify the correct fuse for your car. Check the vehicle wiring diagram and service information. The replacement fan should operate within the circuit’s specified limits, including its relay and connector capacity. If measured current exceeds the original fan’s specification, investigate the cause before fitting it.
Tips: Compare both startup and steady-state amps with the vehicle’s service data. Check connector pin layout and fuse rating, too. Don’t guess. Heat, corrosion, or a stiff fan can raise current; measurements alone may not reveal why.
Before buying an AC condenser fan, confirm how your car controls it. Some systems use a relay for simple on-and-off operation. Others use pulse-width modulation (PWM), which varies fan speed through a control signal. Check the service manual or wiring diagram, and compare the replacement fan’s connector and control requirements. Pin count alone can mislead. A plug that fits does not prove electrical compatibility. Check the diagram. If the system uses PWM, a relay-only fan may not respond correctly to the vehicle’s commands.
The fan also needs a suitable under-hood temperature rating. It sits near a hot radiator, and heat can build up during slow traffic or after the engine stops. Look for the manufacturer’s specified operating temperature range and confirm it suits the vehicle’s location and duty cycle. Heat matters, too. Inspect the wiring insulation, connector seals, and mounting points; cracked insulation or loose mounts can cause trouble even when the motor seems adequate. I would not judge suitability by airflow claims alone. Those figures may come from test conditions unlike a crowded engine bay. Verify fitment and electrical specifications against reliable vehicle documentation, and ask a qualified technician if the control type remains unclear.
Confirm the part number, connector shape, mounting points, blade diameter, and rotation direction before ordering. A fan that bolts in can still push air the wrong way. Check the vehicle service information for the specified test voltage and airflow; “12-volt” alone is not a complete test condition. Measure voltage at the fan connector while it runs, not only at the battery. Then use an anemometer across several points behind the condenser, keeping the probe distance and position consistent. Small details matter.
AMCA Publication 201-02 (R2011), Fans and Systems, explains that fan airflow changes in proportion to rotational speed under comparable conditions. That makes voltage and operating conditions important when comparing measurements. Keep the condenser installed, clear loose debris, and record ambient temperature, voltage, and fan speed if available. Compare the results with the vehicle maker’s specification, not a universal airflow number. SAE J2765 provides a controlled procedure for evaluating mobile air-conditioning system performance, reinforcing the value of repeatable test conditions. A quick hand-feel check is tempting, but it cannot verify airflow. I would also recheck the reading after the fan warms up; it is easy to overlook.
| Check | What to confirm | How to verify | Selection guidance |
|---|---|---|---|
| Vehicle fitment | Exact vehicle application, including model year, engine, body configuration, and any production-date or equipment differences. | Cross-check the vehicle identification number (VIN) or OEM part number against a reliable parts catalog or service information. | Do not rely on vehicle model and year alone when multiple cooling-system configurations exist. |
| Fan and shroud dimensions | Overall assembly shape, mounting-point locations, fan diameter, depth, and clearance around nearby components. | Compare the replacement with the original assembly and check available dimensions in the vehicle-specific parts information. | A correct fit should allow secure mounting and prevent contact with the condenser, radiator, hoses, or bodywork. |
| Connector and controls | Connector shape, pin count, terminal arrangement, wiring polarity, and whether the assembly uses a control module or multiple speeds. | Compare connector details with the vehicle wiring diagram and original part; inspect terminals for corrosion or damage. | A connector that physically plugs in is not, by itself, proof that the electrical configuration is correct. |
| Specified voltage | The fan’s rated operating voltage and the test voltage specified for the vehicle or component. | Use vehicle service information and the fan label or technical data. Measure voltage at the fan connector under the prescribed test conditions. | Many passenger cars use nominal 12-volt electrical systems, but test voltage and control strategy vary. Follow the vehicle specification rather than assuming a universal value. |
| Airflow direction | Air should move through the condenser in the direction designed for the vehicle’s fan location and airflow layout. | Check the fan’s airflow arrow or manufacturer instructions. With the assembly safely powered, confirm direction using a light strip of paper held clear of moving parts. | Do not judge airflow direction from blade appearance alone; fan designs differ. |
| Airflow performance | Airflow through the condenser at the specified voltage and operating condition—not just free-air flow away from the vehicle. | Use the vehicle maker’s test procedure and comparison data where available. Confirm that the shroud seals and directs air across the core. | Avoid comparing airflow figures measured under different test conditions; no single airflow value applies to every vehicle. |
| Current draw and wiring | Fan current draw, fuse rating, relay or controller capacity, and condition of the power and ground circuits. | Compare measured current with service specifications and check for excessive voltage drop using the correct procedure and suitable test equipment. | Do not install a fan with an unsuitable electrical load; it can overheat wiring or damage circuit components. |
| Final operation check | Correct activation, smooth rotation, secure mounting, and absence of rubbing, unusual noise, or warning indications. | Follow the vehicle’s diagnostic procedure for commanding the fan on, then inspect operation with hands and tools kept clear of moving parts. | If the fan does not run correctly, diagnose the fuse, relay, control module, wiring, sensor inputs, and fan before replacing additional parts. |
Safety note: Electric cooling fans can start unexpectedly. Follow the vehicle service procedure and keep hands, clothing, and test leads clear of the fan blades.


For those larger-sized parts, or smaller quantity runs, we have 2 independent powder coat booths and ovens. The quality, durability and affordability of today’s powder coating finishes make this the process of choice for world-class companies.
Powder coating advantages over other forms of coating are many. Materials used in the Powder coating process can be metals and non-metals that come in a multitude of thicknesses, textures, colors, etc. Another of Powder coating’s biggest advantages over conventional coatings is its ability to create finishes in many different textures. Powder Coating Booths allow us the ability to apply these advantages to large products.
Tri-State Fabricators runs a full-service conveyor line for painting. Wet painting can provide protection or decoration to many different part styles. From start to finish, every project is easier to undergo random and point-based inspection by our skilled painting team.
Advantages to our Wet Paint Line are these lines start with product prep and ends with a thorough inspection of a high quality finished product. Our ability to complete large and small projects with a superior finish and doing so in a timely and economical fashion. This passes along the savings in production to our customers. When powder coating ins not an option, our Wet Paint Line gets the job done right the first time.
When the parts get big and heavy we roll-out our custom paint racks and oversize booth. By utilizing our partnerships with all the major paint brands, we can match virtually any color with wet paint.
The advantages of having access to a Wet Paint Booth are many. Large projects of many different shapes can be loaded into the booth. The Wet Paint Booth offers an environment that is much more controlled than a typical parts painting operation.
Not only are they used because of their controlled environment, but they’re are also advantageous when it comes to applying paint to parts that are needed in industries that require specialty coatings such as medical, aerospace, etc.
Our military forces have some very high standards when it comes to the finish of their vehicles and equipment. From the first pre-treatment step to final coat, it takes a great deal of knowledge and experience to protect the men and women of our armed forces. They deserve only the best, and Tri-State Fabricators provides it.
All of our processes are closely monitored by our staff and management teams. Both of which are highly trained in the processes of metal fabrication and finishing. Tri-State Fabricators’ goal is to always fully satisfy each and every customer, including the military. We will always put a 110% into what we do.
Abrasive media blasting is an excellent way to remove old paint, rust, and increase the paint/powder adhesion. Glass beads produce a much smoother and brighter finish than angular abrasives; leaving the part clean yet without any dimensional change. Chemically inert and environmentally friendly, we can recycle our beads approximately 30 times; making them a more preferred method of metal cleaning or surface finishing.
Advantages to Glass Bead Blasting are many. Glass bead blast media is used when a project is needing rough surfaces need to become smooth for applications of coatings such as paint. It is typically used to clean paint and rust from a product surface without deforming the surface it is being used on. Overall, compared to many other blasting media, Glass Bead Blasting is a very economical choice and those savings are always passed on to our customers.
Tri-State Fabricators utilize a zinc phosphate wash to clean and etch the material to ensure the best paint adhesion possible. The unique design of our 3-stage wash system does the work like a 5-stage. From Cleaning and rinsing to conversion coating and post-treatment, Our Part Washing process is a complete service and works throughout the fabrication service and the finishing service.
Along with the previously mentioned benefits, Curing is a vital chemical reaction that leaves the product finish hard and relatively safe from mild abrasion and aggressive corrosion. This process can be done in more than one way; ambient air-dry or in curing ovens at temps that exceed 240°.
From fixing paint mistakes (someone else’s of course) to simply cleaning our paint line hooks, our burn-off oven is put to good use. After a quick burn-off, a little clean up, and a fresh coat of paint, your parts will look better than new.
Why does our Burn-Off Oven work so well? Because super heating the air around parts turns the materials into ashes. From paint and powder coatings to rubber and machining oils, high temps do the job without degrading the integrity of the part.
Masking is a vital part of producing high quality products. We have die-cut masking patterns to protect machined surfaces as well as a wide range of plugs and caps to protect threaded holes and bolts. We provide permanent and temporary masking.
Masking allows the selected sections of a product to be protected from a fabrication or finishing service. This can be with both chemicals when etching and tapes, paints when only finishing just a section of the product. Masking is great in aiding the customization process of a project.
Screen printing is a photographic process that transfers artwork onto a porous nylon screen which allows colored ink to flow through the screen and be deposited on an aluminum or plastic component. We can generally have just about any design created onto a screen for your parts.
Some of the advantages of Screen Printing are, brand recognition for your business displaying on your products, assembly instructions, product warnings/hazards, etc. Tri-State Fabricators produces Screen Printing of the highest quality so you know it’s durable.
Metal Finishing is the art of treating the exterior portion of product, often metal but can also be made of other materials, so that the surface is clean and free of any debris. Then the process of applying coats or either paint of powder coat takes place. This coating process improves the quality of the product in both appearance and resistance to wear and corrosion.
Tri-State Fabricators, Inc., understands that a project typically isn’t complete until a high-quality finish has been added to your product. This is why our painting and powder coating teams continuously inspect the products throughout the Metal Finishing process.

