


Buying a used car can feel exciting, but polished paint can hide expensive problems. A careful 360 Car Inspection helps you examine the vehicle from every practical angle before money changes hands. It combines visual checks, mechanical observations, document review, and a controlled road test. This approach does not replace a qualified mechanic, but it can reveal warning signs early.
Inspect the car in daylight, preferably when the engine is cold. Look for uneven panel gaps, mismatched paint, cracked glass, worn seals, and moisture inside the headlights. Check the tires for uneven wear, exposed cords, and different brands across the same axle. Under the hood, notice fluid leaks, damaged belts, corrosion, and unusual odors. Inside, test the air conditioning, windows, lights, seat belts, warning lamps, and electronic controls. Small details matter.
Then drive carefully on quiet roads and listen for clunks, vibration, steering pull, or delayed braking. A soft brake pedal deserves professional attention. Compare the vehicle identification number with the title and service records. Independent inspection reports and maintenance invoices provide stronger evidence than a seller’s promise. Still, no checklist catches every hidden defect. A clean engine bay may have been recently washed. A quiet test drive may not expose problems under heavier loads. Pause when something feels unclear. Paying for an independent mechanic’s assessment may cost less than repairing an overlooked transmission or cooling-system failure. This guide explains each stage clearly, while recognizing that good judgment sometimes means walking away.
Before buying, photograph the 17-character VIN through the windshield, then compare it with the driver-door label and title. One missing digit matters. Enter the VIN into the NHTSA recall database and VIN decoder. NHTSA’s 2023 recall summary recorded more than 35 million affected vehicles, showing why a clean exterior proves little. Check the recall description, remedy status, and manufacturing details. An open recall may involve brakes, steering, airbags, or fire risks. Save the result as a PDF.
NHTSA records do not certify ownership or guarantee a clear title. Request a title-history report through NMVTIS or your motor-vehicle agency, and look for salvage, flood, rebuilt, theft, or odometer flags. The American Association of Motor Vehicle Administrators describes NMVTIS as a tool for detecting title fraud and preventing unsafe vehicles from moving between states. The National Insurance Crime Bureau reported 1,020,729 vehicle thefts in 2023, so VIN verification deserves more than a quick glance. Check twice. Compare the seller’s name, VIN, mileage, and title state. Reporting delays can occur, and I would not treat a clean database result as mechanical approval. Have an independent technician inspect the car before money changes hands.

How to Do a 360 Car Inspection Before Buying a Car?
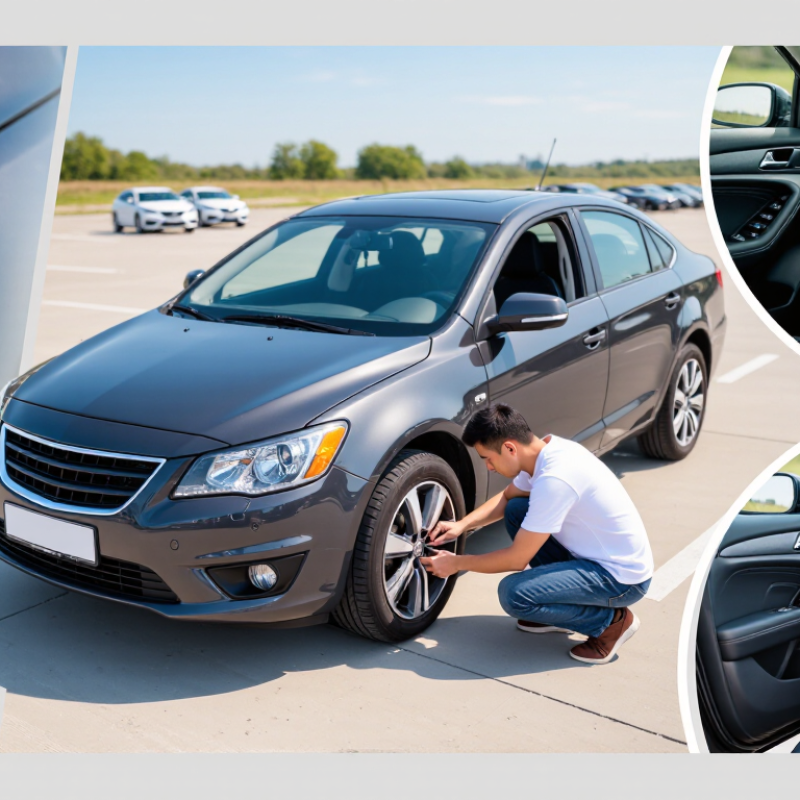
During a 360-degree inspection, examine every tire before checking the engine bay. Use a tread-depth gauge, measured in 32nds of an inch. The common replacement benchmark is 2/32 inch, or about 1.6 millimeters. Tread at this level offers limited wet-road grip and deserves immediate attention. Do not measure one convenient spot. Check the inner, center, and outer grooves on each tire. Uneven readings may reveal poor alignment, worn suspension parts, or incorrect inflation.
Tips: Look for built-in wear bars between the tread blocks. If the tread sits level with those bars, replacement is due. Check several points around each tire, not just one section. A single deep reading can create false confidence. Inspect sidewalls for bubbles, cuts, cracking, or exposed cords. These defects can matter even when tread depth looks acceptable. Also compare the four tires for different patterns or brands, which may suggest earlier replacement history.
It is easy to miss the inner shoulder because it faces underneath the vehicle. Use a flashlight and turn the steering wheel when inspecting the front tires. Record each measurement on paper. I would recheck any reading near 3/32 inch, because a worn area may reach 2/32 soon. Consider the tire’s age and condition, not tread depth alone. New-looking tread does not guarantee a healthy tire.
| Inspection Area | What to Check | Measured or Expected Value | Safety Reference | Interpretation | Recommended Action |
|---|---|---|---|---|---|
| Front Left Tire | Measure tread in the inner, center, and outer grooves; inspect for cracks, bulges, nails, and uneven wear. | 6/32 in, 6/32 in, 5/32 in | Replace at or below 2/32 in | Usable tread remains, but the slightly lower outer reading may indicate alignment or cornering wear. | Check alignment and tire pressure; continue monitoring tread uniformity. |
| Front Right Tire | Compare all three groove readings with the opposite front tire. | 6/32 in, 6/32 in, 6/32 in | Replace at or below 2/32 in | Even wear and adequate tread depth for continued service. | Verify pressure when cold and include the tire in routine inspections. |
| Rear Left Tire | Inspect tread depth, shoulder wear, sidewall damage, and embedded objects. | 4/32 in, 4/32 in, 3/32 in | Replace at or below 2/32 in | Above the legal replacement threshold, but wet-weather traction reserve is reduced compared with a new tire. | Budget for replacement soon, especially before frequent rain or long-distance driving. |
| Rear Right Tire | Check tread depth and compare wear across the axle. | 4/32 in, 4/32 in, 4/32 in | Replace at or below 2/32 in | Even wear, with less remaining tread than the front axle. | Compare tire age and condition; plan axle-pair replacement when necessary. |
| Tread-Wear Indicators | Locate the molded bars inside the main grooves and compare them with the surrounding tread blocks. | Indicator height: 2/32 in | Tread level with bars = replacement required | Indicators provide a quick warning but do not replace a calibrated tread-depth measurement. | Use a tread-depth gauge at several points on every tire. |
| Sidewalls | Look for bulges, cuts, exposed cords, deep abrasions, and cracking between or around tread blocks. | No structural damage visible | Any serious damage requires immediate attention | Sidewall damage can cause sudden air loss even when tread depth is acceptable. | Do not purchase without professional assessment if cords, bulges, or severe cuts are present. |
| Tire Pressure | Measure pressure with a gauge before driving or after the vehicle has been parked for several hours. | Within the vehicle placard specification | Use the door-jamb placard, not the maximum sidewall pressure | Incorrect pressure can cause premature wear, reduced handling, and lower fuel efficiency. | Correct pressure before the road test and recheck for slow leaks. |
| Wheel Alignment | Check for feathering, cupping, one-sided wear, steering pull, or an off-center steering wheel. | No abnormal wear or pulling | No fixed universal value; verify with an alignment check | Uneven wear may reflect alignment, suspension, or wheel-balance problems. | Request a professional inspection and include likely repair costs in negotiations. |
| Braking System | Inspect visible rotor surfaces, calipers, brake hoses, and warning lights; listen during the road test. | No leaks, grinding, vibration, or warning lights | Brake component limits vary by vehicle | Noise, pulsation, pulling, or a soft pedal requires further diagnosis. | Obtain a brake inspection before purchase if any symptom appears. |
| Suspension and Steering | Look for leaking dampers, damaged springs, loose components, excessive bounce, or unusual play. | No leaks, looseness, or excessive movement | Confirm with a lift inspection | Suspension faults can accelerate tire wear and affect braking stability. | Have an independent mechanic inspect the underside before completing the purchase. |
Measurement note: A tread depth of 2/32 inch is the commonly used replacement threshold in the United States. Tires may provide reduced wet-weather traction before reaching this point, so measurements of 4/32 inch or less should be treated as a reason to plan replacement.
A 360-degree inspection should begin before the engine starts. Walk around the vehicle in daylight, then inspect the cabin carefully. Airbag warning lights should illuminate briefly during startup and turn off afterward. A light that stays on may indicate a serious restraint-system fault. Check the steering-wheel cover, dashboard seams, and side panels for uneven gaps or fresh material. These signs can suggest previous airbag deployment or repair.
Test every seat belt, including rear positions. Each belt should latch firmly, retract smoothly, and lock during a sharp, controlled pull. Look for frayed webbing, twisted straps, damaged buckles, or missing pretensioner covers. Federal standards address belt performance, but a used vehicle may still have neglected damage. Do not judge safety by appearance alone. A diagnostic scan by a qualified technician can reveal stored restraint faults.
Switch on low beams, high beams, turn signals, brake lights, hazard lights, and reverse lights. Ask someone to confirm the rear lamps work. Check lenses for moisture or cracks. Inspect the windshield and other glass for chips, long cracks, cloudy areas, or poor replacement fitting. Safety glazing markings should be present where required, and the driver’s view must remain clear. Federal standards provide manufacturing benchmarks, not a complete promise about a used car’s current condition. I once focused on paint defects and nearly missed a seat belt that would not retract. That mistake changed my inspection routine.
How to Do a 360 Car Inspection Before Buying a Car?
A 360-degree inspection starts with the controls, not the paint. On a quiet, legal road, press the brake pedal firmly. It should feel solid, not soft or slowly sinking. During gentle braking, the car should stop straight. Pulsing may suggest rotor problems, while grinding demands immediate attention. Check the brake fluid level and look for wetness near each wheel. Never crawl underneath a vehicle supported only by a jack.
Steering should respond without excessive free play, clunks, or delayed return. Turn slowly through a parking area and listen carefully. Inspect the tires for uneven wear, which can reveal alignment or suspension faults. Push down on each corner and release it. One controlled rebound is normal; repeated bouncing is not. Look for leaking shock absorbers, cracked rubber bushings, or broken springs. I once ignored a faint front-end knock. That mistake made the inspection more expensive.
The OBD-II system has been used on vehicles since 1996. Locate the diagnostic connector and scan it with the ignition on, then with the engine running. Record stored, pending, and permanent codes. Check the readiness monitors too. If many are incomplete, the codes may have been cleared recently. Do not accept a clean screen as proof of perfect health. Compare scan results with dashboard warnings, engine behavior, and service records. A professional inspection may still uncover faults that a basic scanner misses.
Check the exterior, tires, brakes, steering, suspension, fluid leaks, and warning lights. For vehicles sold in the United States from model year 1996 onward, an OBD-II scan can also reveal emissions-related faults and monitor readiness.
The chart shows the standard OBD-II monitor structure: three monitors operate continuously during driving, while up to eight additional monitor categories run under specific conditions. Before purchase, confirm that no warning light is active, scan for stored or pending trouble codes, and verify that readiness monitors are complete according to local inspection rules. Tire tread and brake measurements must always be compared with the vehicle manufacturer’s specifications and local regulations.
A 360-degree inspection should include an independent mechanic, not only the seller’s checklist. Ask for a written inspection before signing any final agreement. The mechanic should examine the engine, transmission, brakes, suspension, tires, fluid leaks, underbody, electronics, and diagnostic codes. Request a cold start, a road test, and a lift inspection. A warm engine can hide problems.
Compare every repair estimate with local market costs. The U.S. Bureau of Labor Statistics reported a 7.1% year-over-year increase in motor vehicle maintenance and repair prices in 2023. Older vehicles may also require several repairs at once. Ask the mechanic to separate urgent safety work from delayed maintenance. Then collect two or three local quotes. Compare labor hours, hourly rates, parts quality, taxes, and disposal fees. A low estimate may exclude essential work.
Tips:
Photograph damaged parts and record the vehicle mileage. Use an independent repair database or local labor guide for a second reference. Ask, What would fail within 12 months?
That question often reveals overlooked risks. A brake estimate of 800 dollars may seem high, but regional labor rates can explain part of the difference. Still, estimates are not perfect. I have seen buyers focus on a small discount while ignoring worn tires and leaking suspension components. Reflect on the total ownership cost, not just the purchase price. When the seller refuses an independent inspection, treat that refusal as meaningful evidence.


For those larger-sized parts, or smaller quantity runs, we have 2 independent powder coat booths and ovens. The quality, durability and affordability of today’s powder coating finishes make this the process of choice for world-class companies.
Powder coating advantages over other forms of coating are many. Materials used in the Powder coating process can be metals and non-metals that come in a multitude of thicknesses, textures, colors, etc. Another of Powder coating’s biggest advantages over conventional coatings is its ability to create finishes in many different textures. Powder Coating Booths allow us the ability to apply these advantages to large products.
Tri-State Fabricators runs a full-service conveyor line for painting. Wet painting can provide protection or decoration to many different part styles. From start to finish, every project is easier to undergo random and point-based inspection by our skilled painting team.
Advantages to our Wet Paint Line are these lines start with product prep and ends with a thorough inspection of a high quality finished product. Our ability to complete large and small projects with a superior finish and doing so in a timely and economical fashion. This passes along the savings in production to our customers. When powder coating ins not an option, our Wet Paint Line gets the job done right the first time.
When the parts get big and heavy we roll-out our custom paint racks and oversize booth. By utilizing our partnerships with all the major paint brands, we can match virtually any color with wet paint.
The advantages of having access to a Wet Paint Booth are many. Large projects of many different shapes can be loaded into the booth. The Wet Paint Booth offers an environment that is much more controlled than a typical parts painting operation.
Not only are they used because of their controlled environment, but they’re are also advantageous when it comes to applying paint to parts that are needed in industries that require specialty coatings such as medical, aerospace, etc.
Our military forces have some very high standards when it comes to the finish of their vehicles and equipment. From the first pre-treatment step to final coat, it takes a great deal of knowledge and experience to protect the men and women of our armed forces. They deserve only the best, and Tri-State Fabricators provides it.
All of our processes are closely monitored by our staff and management teams. Both of which are highly trained in the processes of metal fabrication and finishing. Tri-State Fabricators’ goal is to always fully satisfy each and every customer, including the military. We will always put a 110% into what we do.
Abrasive media blasting is an excellent way to remove old paint, rust, and increase the paint/powder adhesion. Glass beads produce a much smoother and brighter finish than angular abrasives; leaving the part clean yet without any dimensional change. Chemically inert and environmentally friendly, we can recycle our beads approximately 30 times; making them a more preferred method of metal cleaning or surface finishing.
Advantages to Glass Bead Blasting are many. Glass bead blast media is used when a project is needing rough surfaces need to become smooth for applications of coatings such as paint. It is typically used to clean paint and rust from a product surface without deforming the surface it is being used on. Overall, compared to many other blasting media, Glass Bead Blasting is a very economical choice and those savings are always passed on to our customers.
Tri-State Fabricators utilize a zinc phosphate wash to clean and etch the material to ensure the best paint adhesion possible. The unique design of our 3-stage wash system does the work like a 5-stage. From Cleaning and rinsing to conversion coating and post-treatment, Our Part Washing process is a complete service and works throughout the fabrication service and the finishing service.
Along with the previously mentioned benefits, Curing is a vital chemical reaction that leaves the product finish hard and relatively safe from mild abrasion and aggressive corrosion. This process can be done in more than one way; ambient air-dry or in curing ovens at temps that exceed 240°.
From fixing paint mistakes (someone else’s of course) to simply cleaning our paint line hooks, our burn-off oven is put to good use. After a quick burn-off, a little clean up, and a fresh coat of paint, your parts will look better than new.
Why does our Burn-Off Oven work so well? Because super heating the air around parts turns the materials into ashes. From paint and powder coatings to rubber and machining oils, high temps do the job without degrading the integrity of the part.
Masking is a vital part of producing high quality products. We have die-cut masking patterns to protect machined surfaces as well as a wide range of plugs and caps to protect threaded holes and bolts. We provide permanent and temporary masking.
Masking allows the selected sections of a product to be protected from a fabrication or finishing service. This can be with both chemicals when etching and tapes, paints when only finishing just a section of the product. Masking is great in aiding the customization process of a project.
Screen printing is a photographic process that transfers artwork onto a porous nylon screen which allows colored ink to flow through the screen and be deposited on an aluminum or plastic component. We can generally have just about any design created onto a screen for your parts.
Some of the advantages of Screen Printing are, brand recognition for your business displaying on your products, assembly instructions, product warnings/hazards, etc. Tri-State Fabricators produces Screen Printing of the highest quality so you know it’s durable.
Metal Finishing is the art of treating the exterior portion of product, often metal but can also be made of other materials, so that the surface is clean and free of any debris. Then the process of applying coats or either paint of powder coat takes place. This coating process improves the quality of the product in both appearance and resistance to wear and corrosion.
Tri-State Fabricators, Inc., understands that a project typically isn’t complete until a high-quality finish has been added to your product. This is why our painting and powder coating teams continuously inspect the products throughout the Metal Finishing process.

